


The Oculus Go is down to just $159 at eBay

Using the coupon code PICKDADSGIFT at eBay you can pick up the all-new Oculus Go for just $159.20. This beats previous deals by $10. The standalone headset normally sells for $200, but this limited time eBay sale offers you a way to pick one up for a little less. This 32GB gadget is designed to sit between a Gear VR headset and the Oculus Rift, giving you an awesome experience without the need to dock your phone or strap to a computer.
This listing is via Newegg’s official eBay storefront, so you don’t have to worry about it being a sketchy retailer that you are buying from. Getting the Oculus Go set up can be a bit tricky, but we have a great guide to get you started.
YouTube Music vs. Google Play Music: Which should you use?

You pay for one, you get both, but which one should you actually use right now?
When we compare music services, we’re usually trying to help you figure out which one you should give your money to. After all, it’s somewhat rare for a company to offer two completely different music services with completely different feature sets and catalogs, but Google has always been somewhat rare when it comes to music.
If you pay for Google Play Music, you get a Premium subscription to YouTube Music with YouTube Red. If you pay for YouTube Red, you get a premium subscription to Google Play Music. Because you get both of these services when you subscribe to one, this comparison is going to be a little bit different.
Google also keeps slipping out details of plans for YouTube Music eventually replacing Google Play Music, and while that is a long, long ways off, it is definitely something to keep in mind as you consider both platforms and which one it worth your time right now.
Old-school versus bleeding edge

It’s old, but it’s familiar and predictable.
Google Play Music has been around since 2011, and its last big overhaul was five years ago, at Google I/O 2013, when it announced All Access, the name of their streaming subscription, and a complete app overhaul. As you can imagine, an app that hasn’t seen any real UI changes in five years feels long in the tooth, but at the very least, everyone knows where everything is and we’re all very familiar with Google Play Music’s bugs and quirks.
YouTube Music has technically been around since 2015, but the app received a major overhaul with the announcement of YouTube Premium, YouTube Music Premium, and “a new music streaming service” YouTube Music. The app’s UI was almost completely redone, especially in how albums and songs from labels were presented. While stations reigned supreme in the old YouTube Music, Playlists have taken over the Home tab and many of its recommendations.

YouTube Music is “brand new” and currently in “Early Access”, which is a very nice of way of saying it’s still a beta. It’s really buggy and there are a lot of basic things like library management and audio quality settings that are currently sub-par or outright missing in YouTube Music.
Read more: YouTube Music review: a mixtape full of promise
Google Play Music is the beat-up, old pickup that needed body work three years ago and YouTube Music is a kit car that is going to be really cool and unique once Google finishes building. It’s got four wheels, a chassis, and a motor, but the gear-shift is sticking out of a hole in the floor and it needs lights and doors before it’s ready to drive on more than a driveway.
Pasty, white, and bloated versus Tall, dark, and basic
YouTube Music has much of the UI I’ve wished Google Play Music would bring us after five years of orange/white Material Design 1.0 and hamburger menus. YouTube Music’s app is wonderfully dark — the same dark theme I’ve begged YouTube and Google Play Music to get for years — and it uses the same bottom tab format that YouTube, Spotify, and many, many apps have switched to in the age of the extra-tall smartphone display.

Google Play Music has felt bloated for years, with a hamburger drawer stuffed full of menus and features, but at least it has features. YouTube Music is rather lacking in that department right now. YouTube’s algorithm-based Your Mixtape beats the pants off Google Play Music’s I’m Feeling Lucky — wow, that name is a throwback — but otherwise, Play Music has everything YouTube Music needs:
- Robust library management (especially on desktop)
- Proper queue management and queue saving
- Larger official, label-based catalog
- Music locker for filling gaps in the available catalog
- Gapless playback
- Genre browsing
- Station/radio browsing
- Top charts by album, song, and genre
- New releases by album, genre
- Android Auto support
- Wear OS support
YouTube Music has three tabs on its app: Home, Hotlist, and Library, and Hotlist is for the most part useless, since it shows trending and popular music videos and only music videos. A “New releases” carousel can appear for users in the Home tab, but it shows less than a dozen albums and the albums shown are based on what YouTube thinks you like.

Also, say what you will about casting personal music or lengthy tracks from Google Play Music — and I can say plenty — but at least when you cast from Google Play Music it doesn’t rearrange your play order or disable shuffle and repeat. Chromecast audio is also reserved for YouTube Music Premium users only, which is just weird for a music service, even if it is built around video.
The biggest collection of music videos on the planet versus the golden key
We asked YouTube Music about the size of its music catalog and some of the gaps users have been finding in the official album/songs it offers compared to their predecessor, such as all Beatles albums and most Disney Records albums from the last two years. Their response sums the selection differences up quite nicely:
YouTube Music has a different, and significantly larger catalog, than Google Play Music, including a vast catalog of remixes, live performances, covers and music videos that you can’t find anywhere else. That being said, we don’t share specific track counts. Regarding the catalog gaps you mention, we have a team that is constantly seeking out catalog additions and omissions.
They’re right about having content you won’t find anywhere else. YouTube is the most-used video platform in the world, and as such is a treasure trove of remixes, mashups, and covers. YouTube is also one of the easiest places to find illegal music, so if you can’t find an album you like in the Albums search results, start digging in the video results and you’ll usually find it.
 If I can’t fly to Japan and buy the CD, at least I can listen to it on YouTube.
YouTube Music has a larger total selection of music, and Google Play Music has a larger selection of official albums and singles, but in the rare instance that you can’t find a piece of music on either platform, that’s when Google Play Music’s premiere feature comes in: its music locker.
Google Play Music offers a free, 50,000-song personal music locker, letting you upload songs from your private collection to listen to anywhere you stream Play Music. The songs can be as long as you want — I have two-hour concerts uploaded as a single song — so long as each one is under 300MB in size, though you have to upload them from a computer rather than directly from your Android phone.

Google Play Music’s music locker was their original feature, and remains one of their best assets. Now that Amazon Music has pulled their music locker function, Play Music is the only service left that will lets you mix uploaded and subscription music on all devices and platforms. For someone who has a collection of music that can’t be found on any legal platform — except maybe YouTube — Google Play Music was the only music streaming choice for me.
This is why the news that Google Play Music’s locker feature migrating to YouTube Music fills me with such hope. YouTube is already the biggest collection of music content in the world — legal and not-so-much — and with a personal locker, there will literally be nothing that you can’t listen to there. If you can’t find it, you can add it yourself.
Good artists copy; great artists steal
Google Play Music’s long-term future is unclear, but its short-term future is assured by YouTube Music’s current, half-finished state and very limited availability. YouTube Music might replace Google Play Music one day, but only after it has achieved feature parity, stability, and wide availability. YouTube Music is currently an “Early Access” beta that’s available in five countries — Australia, South Korea, New Zealand, Mexico, and the United States — and has more bugs than a Texas garden.

Google Play Music may be old, and it may be a little bit boring, but you can depend on it for a while longer, and when it comes time for it to finally fade into the sunset, your library will migrate to YouTube Music, which will have to have taken on most if not all of Google Play Music features. So I’m playing with YouTube Music because it’s new, shiny, and comes with my Google Play Music subscription, but Google Play Music is the music I come back to every morning when I wake up and every night when I wind down. Google Play Music still has my music locker and it has my back; I can trust it to behave the same way it has for the last six years that I’ve used it.
Everything you need to know about Google Play Music
Sign up for Google Play Music ($9.99/month individual, $14.99/month family)
Sonos Beam is a smart TV soundbar launching July 17 for $399
Pre-orders are available now!
During an event in San Francisco on June 6, Sonos announced a new product called the Sonos Beam. Sonos Beam doubles as both a smart speaker and soundbar for your TV, and it’s packing a lot of features for its $399 asking price.

First off, the Beam takes up much less space than Sonos’ last soundbar, measuring in at 60% smaller and 28% shorter than the Playbase.
Sonos Beam connects to your TV using an HDMI cable, and thanks to a technology called “Audio Return Channel” that was added to the HDMI standard in 2009, the Beam instantly picks up all the audio coming from your TV and outputs without any special setup required on your end. Beam doesn’t even come with its own remote because the one you use for your TV will automatically control the Beam’s volume levels and not your TV’s built-in ones.
Another benefit you get with the Beam using HDMI is that it can harness HDMI-CEC so you can turn your television on and off with your voice. Simply say “Alexa, turn the TV off (or on)” and it’ll just work.


Speaking of assistants, Sonos Beam has Alexa built-in by default and will get AirPlay 2/Siri this summer and Google Assistant “when the time is right.”
As for the sound quality, the Beam has four subwoofers, two tweeters in the front, one in the middle, and a total of three passive radiators. In other words, all of your music, movies, and TV shows should sound excellent. Also, since this is a Sonos speaker after all, you can pair the Beam with Sonos’ other speakers to create a true surround-sound setup.
Sonos Beam is available for pre-order now and costs $399. That’s not cheap, but it’s a heck of a lot more affordable than the $699 Playbase. Shipments are expected to go out July 17.
See at Sonos
This is the absolute best deal we’ve seen on the Google Wifi 3-pack
Better speeds everywhere.

If you want to blanket your house with Wi-Fi, the Google Wifi 3-pack is the way to go. Right now, you can grab one for yourself for only $207.19 when you enter coupon code PICKDADSGIFT during checkout. This set normally sells for between $260 and $300 and has only dropped this low before during other eBay deals similar to today’s 20% off sale. Setting it up is a breeze, and the added controls over individual devices on your network brings you a peace of mind that other systems just can’t match.
You can add onto that system with a single Google Wifi for $91.19 using the same code above (if you buy both at the same time).
A nice way to integrate Google Wifi into your home is by mounting them, as they look as nondescript as a smoke alarm. You can get a three-pack of mounts from Amazon for only $24 right now.
Not interested in a Google Wifi 3-pack? eBay is offering 20% off any single item over $50 when you use the coupon PICKDADSGIFT today only.
See at eBay
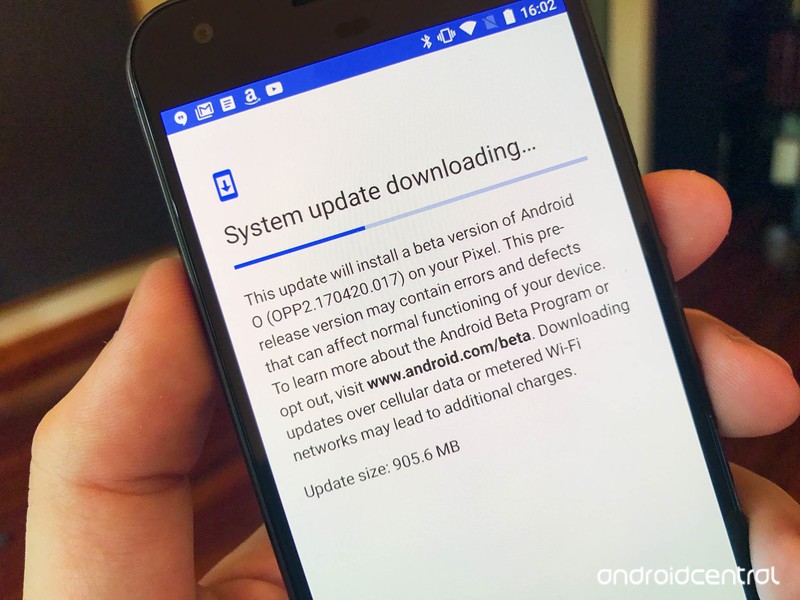
Google releases Android P Developer Preview 3
Factory images and OTA files are available now.
It’s been a little less than a month since Google launched Android P’s Developer Preview 2, and right on schedule, the company’s now pushing out Developer Preview 3.

Both the factory images and OTA files for DP3 were recently added to the Android Developer website, and one of the highlights for this update includes the ability for developers to publish apps to Google Play’s alpha and beta channels as they continue to test their software with Android P.
As for user-facing changes, don’t expect as big of a difference compared to what saw from Developer Preview 1 to Developer Preview 2. There will likely be some performance enhancements and general bug fixes, but most of the features introduced with the last version should stay the same.
You can manually load Developer Preview 3 onto your device right now, and if you’re enrolled in the Android Beta Program, an over-the-air update should be made available soon.
Android P Beta hands-on: The best and worst features
Android P
- Android P: Everything you need to know
- Android P Beta hands-on: The best and worst features
- All the big Android announcements from Google I/O 2018
- Will my phone get Android P?
- How to manually update your Pixel to Android P
- Join the Discussion
How to install Android P on your Pixel right now (or roll back to Oreo)
Get the Android P Developer Preview on your phone right away.

The Android P beta is here, and its first proper update brings it up to Developer Preview 3.
The main way to load the Android P preview is to enrol in the Android Beta Program, which makes it super easy to opt in and out of the program. If you’re more hardcore, or want to manually flash the Android P developer preview, we have those instructions, too.
- The easy way
- The harder way
The easy way — Android Beta Program
If you don’t want to mess with unlocking your bootloader or the command line, you will get an update to the Android P if you’re part of the Android Beta program. That means that if you have one of the eligible devices, you can simply visit the Android Beta portal and opt-in to the beta, which will then prompt Google to send your phone or tablet an over-the-air update.
Head to Android Beta program portal on your Pixel phone.
Sign into the Google account associated with that phone.
Scroll down to Your eligible devices.
Find the device you want to enrol in the Beta program and tap Opt in.
Follow the prompts to accept the over-the-air download.
Note: To leave the beta program, simply tap the Opt out button on the Android Beta program page to unenroll. Your phone will receive an over-the-air update to return to the latest stable version of Android, but your phone will be wiped clean upon rebooting, so back up your stuff.
Which devices are eligible for the Android beta program?
The preview is supported on the following phones and tablets:
- Pixel 2
- Pixel 2 XL
- Pixel
- Pixel XL
The following phones will also soon be eligible to download the Android P beta:
- Nokia 7 Plus
- OnePlus 6
- Xiaomi Mi Mix 2S
- Essential PH‑1
- Sony Xperia XZ2
- OPPO R15 Pro
- Vivo X21
The harder way — Flashing through bootloader

Before we go through the steps of sideloading Android updates, it is strongly recommended that you have previous knowledge of working with the Android SDK (software development kit) and the Terminal (OS X or Linux) or Command Prompt (Windows), as it is possible to harm your device if something were to go wrong in the following process.
If you need to download the Android SDK you can grab it from the Android Development website and follow their instructions on how to install it correctly. For the following process, all you will need is the adb and fastboot files which are located in the Platform Tools folder, so make sure to read the description at the dev site and grab the right download.
Additionally, all the following commands are written as they would be in Terminal on a Linux or OS X platform. If you are following this guide and using a Windows machine, you will not need to use the “./” seen in the guide. Just type the rest of the command line by line in the order they are listed and you’ll be good.
Enable developer settings and USB debugging
Go to your Settings and scroll down to About Phone/Tablet.
Tap on the Build number seven times until the dialog box says you are now a developer.
Go back to the Settings menu and you should find a new option called Developer options. Tap into the Developer options.
Make sure that the developer options are turned on and that USB debugging is checked on.
Plug your device into your computer and tap “OK” on the dialog box asking you to Allow USB debugging while connected to the computer. You can also select to always allow access on that computer.
If done correctly, this will be everything you will need to do on your phone or tablet for the moment.
Unlocking your bootloader
Pixel phones bought from Google directly have a bootloader you can unlock. If you want to manually flash software, you’ll need to do this.
To do this you must first boot into your bootloader. You can either manually turn off your phone or tablet and hold down the power button and the volume down button to enter your device’s Bootloader Menu or you can enter the following commands into your terminal or command prompt.
Run the following command to make sure your device is properly connected to your computer. If it returns a string of characters it means that you are all set to start updating your device.
./adb devices
Now to enter into the Bootloader menu just run the following command.
./adb reboot bootloader
At the bottom of the screen, there will be several things listed including the lock state of the device. This should say locked unless you have unlocked your bootloader in the past and never went back and locked it again.
To unlock your bootloader, which is required only when flashing a stock firmware image (not sideloading an update), you must enter the following commands. Remember that when unlocking your phone’s bootloader it will factory reset your device, so you will lose everything stored on it. If you have not yet backed up anything important on your device you can hit the power button while Start is highlighted in the Bootloader menu and this will boot you back into your device like normal. Now back to unlocking your bootloader.
Now type:
./fastboot flashing unlock
A dialog will appear on the device asking if you are sure about unlocking. Again this will factory reset your device, so if you want to back out of the process you just need to select no with the power button. If you are ready to unlock your bootloader you press the volume up button and then the power button to confirm that you wish to unlock your bootloader.
./fastboot reboot-bootloader
It is recommended to reboot the bootloader just to give itself a check to make sure everything is working correctly before moving on to the next step.
Flashing the stock firmware image
Now that your bootloader is unlocked, it’s time to flash the new firmware. To find the images for the developer preview, head on over to the Developer Preview download page, find your device, and download the latest factory image available. It is easiest to then uncompress the file in the Platform Tools folder you downloaded (where the adb and fastboot files are) so that you don’t have to type the path to the different files when flashing the firmware. (Or if you know that you can drag a file into a terminal window to copy the path, just do that.)
To begin, make sure you are still in the bootloader menu on your device and double check that your bootloader is in fact unlocked.
First, make sure that your computer is communicating correctly with your phone or tablet. As long as your device’s serial number comes back as a connected device you are ready to begin updating your device.
./fastboot devices
Now it is time to flash the updated bootloader with the following command.
./fastboot flash bootloader [bootloader file].img
You will not see anything on the screen of your device but there should be a dialog in your terminal or command prompt. When it is done flashing the bootloader you should reboot back into the bootloader to make sure everything is still working correctly.
./fastboot reboot-bootloader
Next, you flash the updated radios. This step is only necessary if you are updating the firmware of a phone or tablet that has cellular radios built into it.
./fastboot flash radio [radio file].img
./fastboot reboot-bootloader
Finally, it’s time to flash the actual system image to your phone or tablet.
Warning: The following line of code will wipe your device. Normally, you can remove the “-w” from the command but when moving to a beta version of Android it’s not guaranteed to work.
./fastboot -w update [image file].zip
When this is done, your phone will restart itself and boot up normally. As this process clears all data from your device, it will take slightly longer for your device to boot up for the first time. Once you have been greeted with the device setup walkthrough process, you know you have successfully flashed a new version of the firmware.
If you do not want to enter the commands manually there are scripts included in the compressed folder containing the system image that will do most but not all of the heavy lifting for you. The flash-all script files will automate the flashing of the bootloader, radios (if needed), and the system image. The problem with this process is that you must first make sure that your phone is in the bootloader menu and its bootloader must be unlocked before starting the script. Of course, if these are not already done the script will fail to run and nothing will happen.
Going back to Oreo
When you’ve had your fun using the Android P Beta, and you’ve figured out that it’s not stable enough to use as a daily driver, it’s time to go back to Oreo. Thankfully the process is simple, and you just learned how to do it! Simply go back through the same steps above, except for two changes: you don’t need to unlock your bootloader again, and you’ll want to download the Oreo factory image from Google instead. Get back to stock, and maybe you’ll check out a future Developer Preview build.
This sounds worse than it is, so don’t worry. But we also understand it can seem like an impossibly difficult thing the first time you’re trying it. That’s OK, we all felt the same way when we first tried it, too. Just take the time to read through everything before you start clicking and tapping things and you’ll do just fine.
If you have any trouble along the way, be sure to hop into the forums and ask for help!
Updated June 6, 2018: Updated this guide to reflect Developer Preview 3 being available.
Android P
- Android P: Everything you need to know
- Android P Beta hands-on: The best and worst features
- All the big Android announcements from Google I/O 2018
- Will my phone get Android P?
- How to manually update your Pixel to Android P
- Join the Discussion
Apple Releases Safari Technology Preview 58 With New Version for macOS Mojave
Apple today released a new update for Safari Technology Preview, the experimental browser Apple first introduced over two years ago in March of 2016. Apple designed the Safari Technology Preview to test features that may be introduced into future release versions of Safari.
Safari Technology Preview release 58 includes the same WebKit revisions that were present in Safari Technology Preview 57, but with Safari and WebKit features that will be coming to Safari 12 when it is released later this year.
Icons in tabs, improved Intelligent Tracking Prevention, and Automatic Strong Password functionality for automatically generating unique, strong passwords when signing up for accounts or changing passwords on websites.
Today’s Safari Technology Preview update is available for both macOS High Sierra and macOS Mojave, the newest version of the Mac operating system that’s currently being beta tested by developers.
The Safari Technology Preview update is available through the Software Update mechanism in the Mac App Store to anyone who has downloaded the browser. Full release notes for the update are available on the Safari Technology Preview website.
Apple’s aim with Safari Technology Preview is to gather feedback from developers and users on its browser development process. Safari Technology Preview can run side-by-side with the existing Safari browser and while designed for developers, it does not require a developer account to download.
Discuss this article in our forums
‘Panic! At The Disco’ to Headline Apple’s Annual WWDC Bash
Apple’s annual WWDC Bash will be headlined this year by rock band Panic! At The Disco. The almost-end-of-WWDC party will take place Thursday evening from 7-10PM at Discovery Meadow, just around the corner from the McEnery Convention Center where the rest of WWDC takes place. The invitation also notes that a “special DJ” will be hosting.
Apple notes that attendees 21 or older may drink alcohol after picking up a wristband on Thursday either on the plaza outside McEnery or at the tent inside Discovery Meadow by showing valid government-issued photo ID. Bag check is not available at the event, Apple notes, “so please leave your bags at the hotel.”
The Bash is an annual end-of-WWDC tradition for Apple, though it takes place on Thursday night ahead of the final day, as many attendees fly out on Friday.

Discuss this article in our forums
