


Apple Seeds Third Beta of iOS 12 to Developers
Apple today seeded the third beta of the upcoming iOS 12 update to developers for testing purposes, two weeks after seeding the second beta and a month after introducing the new software at the Worldwide Developers Conference.
Registered developers can download the new iOS 12 beta from Apple’s Developer Center or over-the-air after installing the proper certificate.
The iOS 12 update introduces significant changes to the iOS operating system, with Apple working from top to bottom to make iPhones and iPads, especially older models, faster and more responsive. In beta 3 specifically, Apple is adding an entirely revamped and rebuilt Maps app for the San Francisco Bay Area with a slight design change that will display foliage, pools, buildings, pedestrian pathways, and other map elements more accurately, along with improvements to traffic, real-time road conditions, construction, and more.
 Image via TechCrunch
Though limited to the San Francisco area during beta testing, the new Maps features will roll out to all of California when iOS 12 launches, followed by additional locations across the United States.
On the iPhone X, there are new Animoji characters along with “Memoji” customizable, personalized Animoji that can be used both in Messages and in FaceTime. Messages and FaceTime have also gained fun new camera effects, and Group FaceTime support allows for calls with up to 32 people.
Siri is smarter in iOS 12 with a new Shortcuts feature that lets you create custom automations using first and third-party apps that can be activated with Siri, with Apple planning to introduce a dedicated Shortcuts app in the future.
Apple also built a comprehensive set of time management and monitoring tools into iOS 12 with Screen Time, allowing you to keep track of just how much time you’re spending on your iPhone and iPad.

Updated Do Not Disturb options make turning off notifications and distractions easier than ever, with a new Do Not Disturb at Bedtime feature cutting down on nighttime interruptions.

Group Notifications make incoming notifications easier to view and manage, while a new Instant Tuning feature lets you tweak your notification settings on a notification-by-notification basis.

Apple News has a new Browse feature, the Stocks app has been redesigned, iBooks has been overhauled with a new look and a new name – Apple Books – and Voice Memos has been revamped with iCloud support and an iPad app. There’s also a new ARKit-based Measure app.
ARKit 2.0 introduces new capabilities like shared experiences that let two people see the same AR environment on separate devices, and persistence, which allows AR experiences to be saved across multiple sessions.
Tons of other small tweaks and features have been added to iOS 12, so make sure to check out our dedicated roundup for additional detail on what’s new in iOS 12.
Early betas of new operating system updates always introduce tweaked features and new functionality, and we’ll be outlining what’s new in the third beta below. We also rounded up all of the changes that were introduced in the previous beta, beta 2.
Related Roundup: iOS 12
Discuss this article in our forums
Exposure compensation: What it is and how to master it
Daven Mathies/Digital Trends
It’s never been easier to take a great picture, as even the cameras inside today’s smartphones are incredibly capable and easy to use. But that doesn’t mean we always get perfect results. You’ve probably been in a situation where you tried to take a picture of your friend, dog, or pet rock in front of something like a window or other bright background, only to have your subject appear as a silhouette. This is a simple problem of the camera not knowing which area of the frame to expose for — the bright window, or the shadowed pet rock on the sill?
Fortunately, the issue of images coming out too dark or too bright is quite easy to prevent thanks to a tool called exposure compensation. Exposure compensation may sound complicated, but it’s actually the easiest way to adjust a camera’s exposure and is a setting you will find on virtually any camera, from professional DSLRs and mirrorless cameras to, you guessed it, your phone.
What is Exposure Compensation?
Simply put, exposure compensation is an easy way to adjust the exposure value (EV) of your camera’s metering system. When you increase the EV value, you are making an image brighter; decreasing it will make an image darker. Exposure compensation doesn’t tell you how it chooses to make the image brighter or darker, but that’s the whole point: You don’t have to worry about shutter speeds and f-stops, or ISO settings.
For cameras that offer manual controls, note that exposure compensation doesn’t actually affect your images if you are already shooting in manual mode — but it will work in both shutter and aperture priority.
Photography 101
Shoot better photos at the golden hour
How to use a histogram to expose photos
Exposure, aperture, shutter speed, and ISO
The rule of thirds and how to use it
How to take great actions shots
It’s important to understand that exposure compensation isn’t the same as setting exposure manually or using exposure lock — your exposure is still automatic and the camera may make adjustments from shot to shot as the light changes. But if you are in a situation where you know your camera is prone to underexpose — like the aforementioned backlit scene — setting an exposure compensation of, say, +1 EV will tell the camera to allow in one additional stop of light compared to what it thinks it needs, and you should get consistently accurate exposures from then on.
Where Is the Exposure compensation Setting?
Can’t track down the exposure comp menu or settings? On a phone, the location depends on the specific app you are using, but you can generally find exposure compensation in the default camera app simply by holding your finger down on the screen. This will lock focus and exposure on that area of the frame and allow you turn the brightness up or down simply by dragging your finger. You may have done this already, even without realizing it was called exposure compensation.
An example of an exposure valuation scale.
On dedicated cameras, exposure compensation is always represented by a sliding scale with a 0 in the middle. Some cameras may have dedicated dials for exposure compensation, while others will have a button or menu option. Both in a camera’s menu and on a button, exposure compensation is identified by a universal “plus/minus” symbol (phone apps with advanced controls may use this symbol, too).
Depending on the camera, you can adjust your exposure in 1/2 or 1/3 stops. Going to +1 or +2 means you’re making your exposure one or two full stops brighter. Negative numbers indicate that you’re making the exposure darker. Note: One stop represents a doubling or halving of exposure; an image shot at +1 EV will have twice the light as one shot at the base exposure value, while setting exposure compensation to -1 EV will result in half that amount of light.
When Can I Use Exposure Compensation?
Modern cameras have the ability to meter perfectly fine exposures most of the time. There are instances where you want to have the exposure control in your own hands, however. For beginners, exposure compensation is a very easy way to make your photos darker or lighter in challenging lighting situations without worrying about what’s actually going on under the hood.
Like the initial example of photographing a subject in front of a bright background, the opposite is also true. A subject in front of a dark background could trick your camera’s meter, which will see all that darkness and try to brighten it up, only to result in overexposing your subject. In this situation, move your exposure compensation meter to the minus side to make the photo darker. The end result is that the main subject of your photo will be properly exposed. You may have to experiment with varying levels of compensation to find the perfect exposure.
On live-view cameras like smartphones, point-and-shoots, and mirrorless cameras, you can see the effect of exposure compensation on the screen as you make adjustments. When using the optical viewfinder on a DSLR, you obviously won’t be able to see the effect until you play back the picture. Particularly in this case, it is important to remember to turn exposure compensation off before you move to a new setting. Otherwise, you may accidentally shoot your kid’s entire soccer game at +3 EV and end up with a set of hopelessly overexposed photos.
Exposure compensation also can’t fix every type of exposure problem. If you’re trying to expose properly for a dark subject and a bright background, it can’t help you — but other techniques, like high dynamic range compositing or fill flash, come into play. Especially for beginners or phone photographers, however, exposure compensation is the easiest way to take exposure into your own hands. Your pictures will thank you for it.
Editors’ Recommendations
- How to use the histogram when working with digital photography
- How to photograph kids
- The best photography tips for beginners
- How to take better pictures when you know nothing about photography
- Photography 101: exposure, aperture, shutter speed, and ISO
High-speed sync: What it is and how to master it
Flash photography can be a mystery, but when done correctly, it can also add character and depth to an image that otherwise wouldn’t be possible. One of the more mysterious flash technologies is called high-speed sync (HSS), which may as well be magic — but this is one trick you can master.
HSS enables the use of flash at very high shutter speeds (up to whatever a camera’s fastest setting is). This comes in handy for outdoor portraits, when a shallow depth of field is desired, thus necessitating a fast shutter speed.
The effect is nicely demonstrated in the above video by Chicago-based photographer Manuel Ortiz (via PetaPixel). This demonstration works well because Ortiz focuses not on the usual difference of flash versus no flash, but specifically on HSS flash versus non-HSS flash. Without HSS, his shutter speed is limited to 1/250 of a second, so he compensates by stopping down the aperture which has the effect of increasing depth of field (his ISO is already at the lowest setting). With HSS, however, there is no such shutter speed limitation, and thus Ortiz is able to shoot at 1/4,000 of a second to enable the maximum aperture of f/1.4.
The indirect effect of HSS, therefore, is a shallow depth of field, which pulls the subject out from the background. But you may be wondering: Why is shooting above 1/250 of a second intrinsically different than shooting at a slower speed when it comes to flash? To understand that, one first has to understand how a focal plane shutter works (that’s the type of shutter used in DSLRs and mirrorless cameras).
A focal plane shutter has two parts: a front (or first) curtain and a rear (or second) curtain. The front curtain drops to begin the exposure, and the rear curtain follows it to end the exposure. Every camera has what’s called a “maximum sync speed” (usually either 1/200 or 1/250 of a second) that is the fastest shutter speed available to use with a non-HSS flash. Above this speed, the rear curtain begins closing before the front curtain has exposed the entire sensor, so the shutter becomes more like a scanner, passing a bar of light over the sensor. (If it helps to have a visual, this process is illustrated very well on Fstoppers.)
That’s a problem for a standard flash, which shines a burst of light that often lasts 1/1,000 of a second or less. At a high shutter speed, that won’t be enough to light the entire frame, as at any given moment, the shutter curtains are blocking part of the sensor. HSS gets around this problem by pulsing the flash extremely quickly over the entire duration of the shutter movement. In essence, a flash in HSS mode behaves more like a constant light.
The downside of HSS is that extending the duration of a flash reduces its maximum output power, which can be a problem if you’re trying to overpower the sun or use a large light modifier. HSS is a standard feature of most first-party external flashes, like those from Sony, Canon, and Nikon, but is also included in some high-end studio lights. The Flashpoint Xplor 600 TTL that Ortiz uses in the video offers significantly more power than a Sony flash, and thus is more flexible when it comes to high-speed sync.
Editors’ Recommendations
- Hasselblad X1D review
- The Leica SF 60 is both a flash and a video light with off-camera possibilities
- Sony Cyber-shot RX10 IV review
- Photography 101: exposure, aperture, shutter speed, and ISO
- Your phone’s flash has nothing on the powerful, pocketable Lume Cube
This is the OnePlus 6 Red
After the launch of the OnePlus 6 Marvel Avengers Limited Edition a few months ago, OnePlus has introduced a new variant of the OnePlus 6 — OnePlus 6 Red — which will be available across all OnePlus global markets.
Editor’s Pick
OnePlus 6 review: the spiritual successor to the Nexus
Buy OnePlus 6
Move over OnePlus 5T, the OnePlus 6 has arrived. The latest iteration of the OnePlus family brings us an all-new design on the outside, and more of what we already love on the …
Aside from the cosmetic changes in the design, the OnePlus 6 Red edition is of course a OnePlus 6 at heart with the same internals, and that isn’t a bad thing. The OnePlus 6 is a solid smartphone and has a well-rounded appeal for a broad audience.
This is not the first time OnePlus has offered a red color variant. Last year, OnePlus had offered a OnePlus 5T Lava Red Edition, a limited-edition variant built to celebrate OnePlus’ four-year anniversary and was inspired by the color of cooling lava. The color on the OnePlus 6 Red though is quite different from the Lava Red.

The OnePlus 6 Red sports a stunning reflective finish achieved by layering sheets of glass for a beautiful amber-like effect that supposedly took several months to refine and perfect. In order to achieve the amber-like depth and clarity, it used a new film coating process that’s never been attempted before in the smartphone industry. There’s also silver metal highlights around the camera lens and rear fingerprint scanner for a touch of sophistication.

OnePlus 6 Red is available in the 8GB RAM and 128GB storage configuration and is priced at the same level as other OnePlus 6 variants — ₹39,999 ($583) in India, that is. Essentially, there’s no premium on the red color variant — except the limited availability of course.
The OnePlus 6 Red will go on sale in India on July 16 (12 noon IST), in China on July 9, and other regions in North America and Europe on July 10.

I wasn’t a big fan of the Lava Red edition, but OnePlus 6 Red is totally rad, and looks stunning. What are your thoughts on the new color variant of the OnePlus 6, and are you looking to pick one up? Let us know in the comments!
Huawei’s got a free way of turning your phone into a monster gaming machine
Andy Boxall/Digital Trends
Huawei has seen gaming-centric phones from Razer and Asus, and has its own ideas about what will make the new generation of mobile gamers flock to its smartphones, and for a change, it doesn’t involve buying a new model. Games rely on the Graphics Processing Unit (GPU) to perform well, and Huawei has a software update coming that will boost the efficiency of the GPU by 60 percent and cut down battery consumption by 30 percent. The cost to you, Huawei phone owner? Zero. Excellent news.
It’s called GPU Turbo, and boosting the GPU’s ability means even mid-range phones will be able to run complex mobile games at a higher frame rate, and with all those flashy HDR+ visual effects switched on. Huawei even believes some of the Honor phones with simple GPUs will be able to outperform phones with stronger GPUs. What’s more, the GPU Turbo will also support augmented and virtual reality applications in the future, presumably if they’re specifically coded for compatible devices.
How does this magic work? Huawei’s not giving away many of its trade secrets, but it uses hardware-software acceleration in the GPU, in a similar way to how Google fine-tuned the software ahead of activating the Visual Core chip in the Pixel 2. Huawei has long spoken about how much it spends on research and development, plus how tweaks inside its EMUI user interface keep Android running faster for longer. That it has found a way to make the gaming experience better on many phones through software alone shouldn’t be a surprise.
Software updates
The GPU Turbo update is free and makes your phone better at playing games, so is there a downside? No, because Huawei’s committed to delivering the software update to a wide range of current phones from both it and sub-brand Honor. In August, the Huawei P20, P20 Pro, Mate 10, Mate 10 Pro, and Mate RS are scheduled to receive the GPU Turbo update. In September, the P20 Lite will join them, along with the Mate 9, Mate 9 Pro, the P10, and the P10 Plus.
The Honor 10 should also see the update arrive in August. In China, a special edition of the Honor 10 called the Honor 10 GT has been released with the software already in place. In September the Honor 9, Honor 7X, and the Honor View 10 should benefit from the GPU Turbo software. Other phones for September include the Honor 8 Pro, the Honor 9 Lite, the Huawei Y9, Huawei P Smart, and the Mate 10 Lite.
Software update schedules are notorious for last-minute changes, so take all these dates as very approximate. Just because it says August, don’t expect it to be August 1, as it may be more like August 31. We also expect some future Huawei and Honor phones to have the GPU Turbo software installed on release. We’ll keep you updated with news of the update’s progress here.
Editors’ Recommendations
- Here’s everything you need to know about the Huawei P20
- Honor 10: Everything you need to know
- Huawei P20 Pro review
- When is your phone getting Android P? We asked every major manufacturer
- When is your phone getting Android 8.0 Oreo? We asked every major manufacturer
How are you liking the LG G7 ThinQ?
Turns out the G7 is a pretty darn good phone.
The LG G7 has been out in the wild for a hot minute at this point, but unless you’ve been actively following the phone, chances are you might not have known that.

LG put together a really solid gadget with the G7, but even so, it continues to be overshadowed by competitors like the Galaxy S9, Pixel 2, and OnePlus 6.
For the folks that waded through that sea of competition and decided to give the G7 a shot, the feedback has been mostly positive among the Android Central forum community. When asked how they’ve liked the phone so far, this is what they had to say:
Nubwy
06-28-2018 05:16 PM“
It’s been about two weeks with my G7 ThinQ. I love it so far. The only gripe I have is battery life but it’s still easily getting me through a whole day. I had a G6 I regretted trading for a Pixel that ended up burning me in the long run. Glad I made the choice to stick with LG. Solid phones and a great UI. Love it! How’s everyone else’s holding up?
Reply
biswasd
06-28-2018 08:21 PM“
Ditto for me…..selling my iphone X……love this g7….used to have a G6 as well, but night day in terms of performance / speed and the g-damn screen is incredible, sharp, and bright A-F.
🙂
P.S. works great with the $70 Verizon Wear 24 LTE watch that I bought from dailysteals….
Reply
pastafarian
06-29-2018 08:21 AM“
Compared to the 2 Samsung s7e’s our g7’s replaced, this phone has been a revelation. Far less frustrating with no black screen of death issues. It works perfectly with android auto, something that couldn’t say about the S7. My wife no longer having the all too common pink vertical stripe on her screen is also nice (damn you Samsung!). On the negative side, a few too meany app crash…
Reply
phillymade
06-29-2018 07:58 AM“
I am super happy with my G7. Infact, we bought an LG Thinq TV and it promted me to get the G7. I have had LG devices before and loved them, so thought this would be a good time to come back. Battery life is good and gets better every week but am also not a slave to it, I just use my device and don’t think too much about it. I am happy that I have this device and am sick of hearing all the…
Reply
Now, we want to pass the mic over to you — How’s your experience with the LG G7 been?
Join the conversation in the forums!
LG G7
- LG G7 hands-on preview: All about that bass
- LG G7 Specifications: Everything you need to know
- Join the LG G7 forums
Android P features you’ll love: A better camera experience

Android P provides built-in support for multiple cameras and ways to help developers take high-quality photos in a jiffy.
Android P is going to make it easier to support almost any camera configuration with things like the new Multi-Camera API.
Android comes in all shapes and sizes. It’s one of the few consumer operating systems that allows a company to tailor the experience to their hardware platform and that’s a big reason it’s become so popular — a company that can do something different or better than the competition is free just to do it. You’ll see that being taken advantage of in numerous ways once you start looking at the vast assortment of Android-powered phones, but few if these details are as evident as it is with the camera.
Your phone probably has two or three actual physical cameras with lenses and all. But it could have four, or even just one, because like we mentioned Android lets a company that makes phones do things its own way when it comes to hardware features. But that doesn’t mean it was easy — engineers and developers have had to work hard to support their own configuration for cameras. While there will still be a lot of work involved to support different camera configurations, Google has addressed some of the tough details with Android P.
Multi-camera API
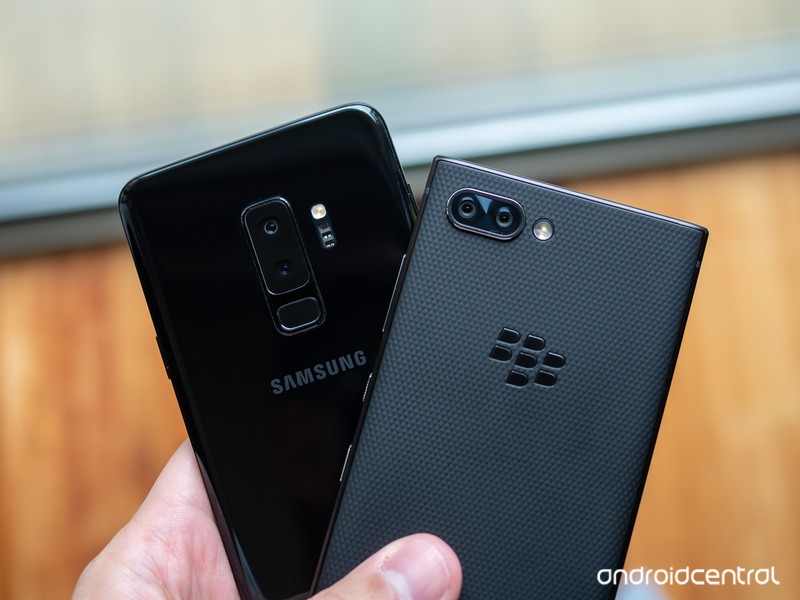
You might have noticed that some phones, like the Samsung Galaxy S9, use two cameras on the rear of the phone while others only have one. This isn’t just for looks or because three cameras are one better than two cameras and the second lens is there to collect information the other isn’t collecting while you take a photo.
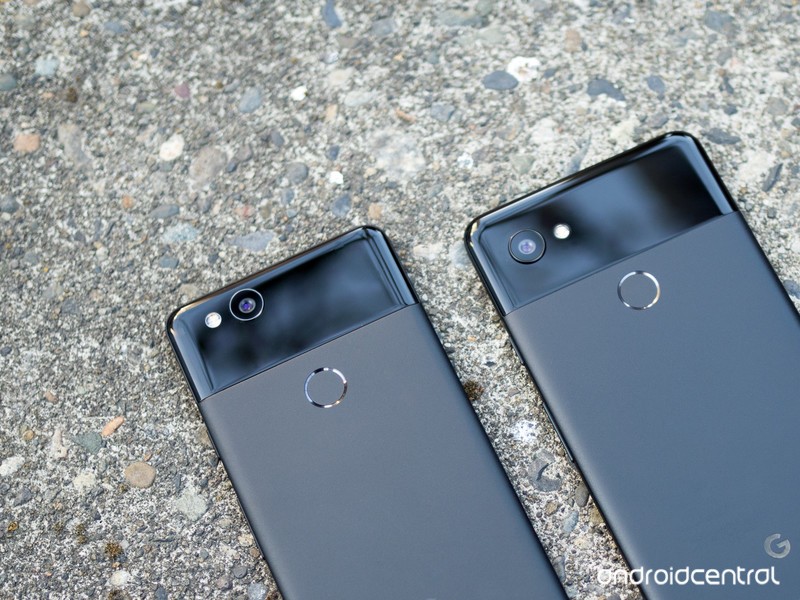
Wide-angle photos aside (there is no way a computer algorithm can recreate them), you can do everything as good or better with one lens than you can with two but it’s not easy. Google uses a single rear camera and a laser diode in the Pixel 2 to capture excellent photos with a single lens, but it is also using incredibly powerful ML (machine learning) algorithms that “know” what the objects you see in a photo are supposed to look like. The software can then adjust the photo, so the things look the way the algorithms, and hopefully, our eyes, think they should.
Not every company making smartphones has the resources to build out proper real-time support for multiple cameras. Now Google is doing it for them.
Samsung doesn’t have access to ML algorithms like this, at least not ones it is satisfied with using. What Samsung does have is a team of crack hardware engineers who can solve almost any problem and the software team who can make the hardware work as it should. The Galaxy Note 8 (and other high-end models) uses two cameras on the rear of the phone to do things like measure distance and adjust focus and there is no denying that it does an equally excellent job. This is because Samsung has the resources to tackle the issue of supporting something like Portrait Mode photos in their own way.
Not every company making Android phones has the resources to use two or more cameras at the same time to gather data and pack it all into one photo, so Google is making it easier with Android P’s new Multi-camera API.
In Android P developers will be able to gather image data from two or more cameras simultaneously. That means a phone with two rear or two front cameras could combine image data from each in real time and create photos that use seamless zooming, bokeh, stereo vision or almost anything else a developer can dream of doing with two different streams of image data. Developers can also grab data from a “logical” camera that switches between one or more cameras while in use.
These ideas aren’t new but native Android support is and that’s a big deal.
This means a third “virtual” camera could be created that grabs image data using one or both rear cameras. An application can grab “normal” data through one camera, distance data for a seamless zoom through a second, and switch the original camera back and forth to form a virtual stream in order to process something like a photo filter on the background. This switching would be done so quickly the original image data should be unchanged.
You could have a zoomed in photo through a telephoto lens that is also able to use hardware to create a black and white background complete with digital bokeh. You probably shouldn’t ever do such a thing, but if a developer wanted to offer it he or she could.
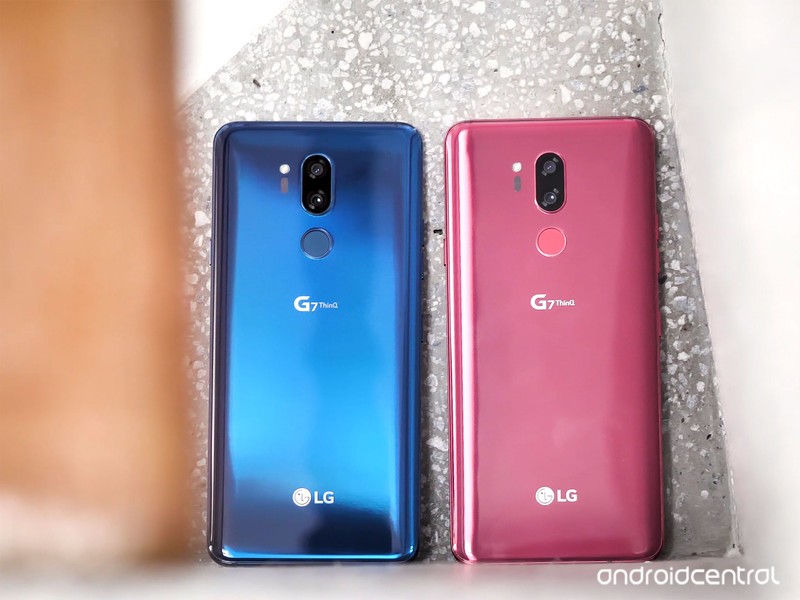
These changes are not “new” ideas. They are very similar to what companies like Samsung and LG have done with phones that use more than one camera to capture a photo. The difference is that Samsung and LG had to do it because it was something not ever done before. Google adding this support directly into Android means better photos from manufacturers that don’t have the same resources Samsung or LG has.
The Multi-camera API will also support monochrome (think black and white) cameras. If the cameras are capable they will be supported fully just like the main high-resolution camera on a phone.
Even more goodies
The Multi-camera API in Android P will get all the attention and will make for the bigger impact, but there are a few other important changes coming to the camera with Android P.
Session parameters are a way developers can have their app grab a picture without it taking forever to process, even if they are leveraging the new Multi-camera API. Functions like “Session_Regular” and “Session_High-Speed” let a developer decide how much of a phone’s limited resource pool can be used to grab a photo quickly when it needs to be done and not so quick when it doesn’t.
Surface sharing will let applications “handle various use-cases without the need to stop and start camera streaming.” This means an app doesn’t have to stop working on getting image data it sees through the lens(es) while you decide what to do with the previous photo. That’s important when you think of things like the short clips we think of as live photos.
Smaller changes can have an impact, too. Android P has several important ones.
Other even smaller changes are an API to allow the screen to act as a flash by blinking white times as a regular camera flash instead of a developer needing to code that themselves, as well as access to OIS (optical image stabilization) timestamps for application-level special effects — any app can stabilize a photo as well as the built-in camera app can with this change.
Last but not least, proper support for external USB cameras is coming so things like inspection cameras, microscopes or even telescopes can be used through your phone’s USB port without a lot of developer work writing a driver but with more features than a basic “USB webcam” interface that works in some cases today.
None of these changes will make us a better photographer, but it will make our cameras good enough that we can take better photos. In the end, that’s all that counts, right?
Android P
- Android P: Everything you need to know
- Android P Beta hands-on: The best and worst features
- All the big Android announcements from Google I/O 2018
- Will my phone get Android P?
- How to manually update your Pixel to Android P
- Join the Discussion
Which color OnePlus 6 should you buy?
Make sure you make the right OnePlus 6 decision.

“Most people put their phones in a case, so why does it matter what color you buy?” I hear a variation of that sentence very time I talk about phone colors and materials.
But if that were the case, companies would release phones in one color — “Model T” black — and call it a day. Instead, we’ve seen color trends come and go, and increasingly a variety of hues, materials, and shimmer to suit anyone’s tastes. And while many people do cover their phones with gaudy cases, there are an increasing number that choose to go naked, or use a clear case, to see the phone as it was intended.
The OnePlus 6 comes in four colors, and each feels as distinct as it looks. Choosing which one to buy won’t be easy, but hopefully, we can help.
Mirror Black
Mirror Black is the obvious choice for the OnePlus 6 because it’s the default choice — if you want the cheapest variant of the phone, you have to choose Mirror Black.
Given that the OnePlus 6 is covered in glass, the Mirror Black variant looks the most traditionally reflective, with OnePlus “coating it with a mirror sheen, giving it the look and feel of ceramic.” While the coating means it picks up fingerprints quite easily, it’s also surprisingly grippy, allowing you to safely use the phone without a case. You’ll be wiping it down every few minutes, but when fresh and clean the phone looks incredible, and picks up on the strongest light source in the room.
Who should buy the Mirror Black OnePlus 6?
If you’re looking to get a OnePlus 6 that looks as far from a previous OnePlus device as possible, Mirror Black is where it’s at. Or, conversely, if you loved the short-lived OnePlus X (OnePlux), this is your only real option.
At the same time, given that the Mirror Black model is the only one offered at the $529 starting price, for 6GB of RAM and 64GB of storage, it should be considered the frugal pick.
Midnight Black
Midnight Black is the more traditional-looking variant of the OnePlus 6, harkening back to the halcyon days of the OnePlus 3T, where the “matte black everything” was all the rage. While this particular variant is covered in glass, it looks very much like metal, and offers a cleaner, more sophisticated look to the OnePlus 6.
It’s also available in both 128GB and 256GB variants, both of which have 8GB of RAM.
Who should buy the Midnight Black OnePlus 6?
If you long for the days when the OnePlus line was made of metal, the Midnight Black OnePlus 6 is the closest thing you’ll get. At the same time, it actually looks better than the metal versions because despite the matte underlay, the glass catches the light and looks really nice in almost any lighting condition.
That said, it’s not as striking as the Mirror Black model, so it’s easily covered in a case without regret.
Silk White
Only available in one storage combination — 8GB of RAM and 128GB of storage — the limited-edition Silk White OnePlus 6 features a glass back, but underneath is a crushed pearl design that looks slightly pocked in the light. With rose gold accents, the Silk White OnePlus 6 is striking and unique, and will definitely be more coveted given its limited-edition nature.
Who should buy the Silk White OnePlus 6?
If you’re looking for the only OnePlus 6 color that actually has any color, Silk White is the obvious choice. If you enjoy rose gold, or just want a phone that looks a bit different, it’s the way to go.
At the same time, it’s possible, given the Silk White’s limited manufacturing run, that it may become something of a collector’s item, so you better get on it fast if you want one.
See at OnePlus
Red
Without a doubt, the OnePlus 6 Red is the most eye-catching color we’ve seen for the phone so far. Announced on July 1, the six-layer glass design includes an extra anti-reflective layer, a translucent orange one, and red base layer that all come together to create the stunning end result.
In addition to the red covering the back and frame of the OnePlus 6, you’ll also find subtle gold accents around the camera housing, fingerprint sensor, OnePlus logo, and “Designed by OnePlus” branding.
The OnePlus 6 Red officially goes on sale July 10 and will be available in the 8GB RAM + 128GB configuration for the standard $579.
Who should buy the OnePlus 6 Red?
If you want a phone that truly stands out from the crowd and catches the attention of everyone around you, the OnePlus 6 Red is the way to go.
The only downside is that it’d be a shame to cover its beauty with a case or skin, so if you do pick it up and decide to go naked, you’ll need to be extra careful to ensure its glass design stays in tip-top shape.
OnePlus 6 Red hands-on: This is the one to get
What’s your color?
Have you chosen a OnePlus 6 color? Are you lusting after the Silk White or Red version? Let us know in the comments below!
Updated July 3, 2018: This article was updated to include the OnePlus 6 Red.
OnePlus 6
- OnePlus 6 review
- OnePlus 6 vs. OnePlus 5T: How much changes in six months?
- OnePlus 6 vs. OnePlus 5: Should you upgrade?
- These are the official OnePlus 6 cases
- The OnePlus 6 doesn’t work on Verizon or Sprint
- Join the discussion in the forums
How to Take a Screenshot on the Samsung Galaxy S9
You need to know how to do this.
It’s one of the simplest features of a smartphone: capturing a screenshot. The basic function can be found on any phone out there, but each company does things slightly different and adds extras to make the screenshot process more powerful and useful. Samsung goes above and beyond on the Galaxy S9 and S9+ to give you multiple ways to capture a screenshot, plus extra tools to capture scrolling lists and make quick edits after capture.
Here are all the ways you can capture, edit and share screenshots on the Galaxy S9.
- Button combo screenshot
- Palm swipe screenshot
- Scrolling capture
- Bixby Voice
Button combo screenshot
This is the simplest way to capture a screenshot, and one that the most people will be familiar with.
Open the content on the screen you want to capture.
Press and hold the volume down button and power button for about 2 seconds.
- You’ll see the screen shrink in, and editing options will appear briefly on the screen.
If you want to edit the screenshot right after it’s captured, you can tap the bottom options to draw, crop or share it immediately.
If you miss those buttons, the screenshot will also be saved in the notification shade, where you can expand and tap the options to edit, share or delete it.
If you dismiss notifications, the screenshot can also still be found in Gallery or any other app you may use to manage photos, like Google Photos.

Palm swipe screenshot
Samsung also offers a secondary method for getting to the same exact screen shot options, using the edge of your hand to swipe across and activate the process.
Go to Settings, Advanced features and make sure that “Palm swipe to capture” is turned on.
Open the content on the screen you want to capture.
Place the side of the palm of your hand on the edge of the screen, and in one motion swipe it across the face of the phone.
The screenshot will be captured in the same way as above, with the same editing and sharing options at the bottom of the screen.
Scrolling capture

Whether you initiate a screenshot with the button combination or palm swipe, you’ll sometimes notice an extra option in that bottom edit bar: “scroll capture.” This option lets you automatically scroll (in apps that vertically scroll) and stitch together several screenshots into one super-tall screenshot.
Open the content on the screen you want to capture.
- Whatever app you have open must be able to vertically scroll — remember to start this process at the top of what you want to screenshot, since the scroll only goes downward.
Use the button combo or palm swipe to initiate screenshot.
Tap scroll capture at the bottom of the screenshot edit menu.
Continue to tap scroll capture until you’ve covered everything in the app that you wish to capture.
The extra-tall scrolling screenshot will save in the exact same way as any other — you can now edit, crop and share it.
Bixby Voice
Bixby Voice can actually be useful for taking a screenshot if you’re unable to grab the phone to do the button combination or swipe gesture.
Open the content on the screen you want to capture.
Press and hold the Bixby Button, or if you’ve configured it, say “Hey Bixby.”
With the interface activated, say “take a screenshot.”
The screenshot will automatically be saved to the Gallery, where you can then view, edit and share it.
- Note that with the Bixby method, you miss out on the instant edit capabilities of the other methods. You can, however, string together commands to for example “take a screenshot and share it to Twitter” if you want to get elaborate.
Samsung Galaxy S9 and S9+
- Galaxy S9 and S9+: Everything you need to know!
- Galaxy S9 review: A great phone for the masses
- Complete Galaxy S9 and S9+ specs
- Galaxy S9 vs. Galaxy S8: Should you upgrade?
- Join our Galaxy S9 forums
Verizon
AT&T
T-Mobile
Sprint
Update July 2018: There are a few ways to take screenshots, and we have them simply broken down here.
Skull & Bones for PlayStation 4: Everything you need to know
Set sails, matey. Booty’s awaiting.

Ubisoft reintroduced the world to Skull & Bones at E3 2018. Assassin’s Creed fans will be familiar with what the game aims to be: a sea-dwelling pirate simulator. That’s the high-level definition, but what, exactly, are we getting with this game? That’s what we’re here to find out. Everything you need to know about Skull & Bones is straight ahead.
What is Skull & Bones?
We weren’t sure what to think of Skull & Bones before Ubisoft’s E3 2018 press conference, because to that point we only knew that it was a pirate ship game. Thanks to new info and our first look at gameplay, however, we now have a bit better of an idea.
Skull & Bones is accurately described as all the ship battling parts of Assassin’s Creed 4: Black Flag, but without literally everything else. A more modern and appropriate example would be Sea of Thieves. Either way, you get the picture. You’re on a ship, and you’re chasing down other ships for loot and gold. You’re a pirate, baby.
Is there a story?

No, not really. Well, not yet, anyway. Skull & Bones seems to be all about head-to-head naval warfare ala World of Warships. It’s a style of game Ubisoft is becoming increasingly known for. Just as Rainbow Six: Siege and For Honor have little to no story elements in order to focus on a deep multiplayer experience, Skull & Bones is all about mastering all the arts of pirateering.
There will be a living world around you called the Hunting Grounds, with rival factions and pirates constantly stirring up trouble in the water, but there doesn’t seem to be any strong narrative to follow. We do know that it takes place in the Indian Ocean, though. As for specific locales, Ubisoft has confirmed that we’ll see the East African coast near Mozambique, known as the Quirimbas Archipelago.
Some of the factions confirmed early on include La Buse’s Gang, the British EIC, and the Portuguese Empire. There are also historical pirates and leaders set to appear in the game, Including Olivier Levasseur, La Buse, and many of their associates.
So what do you do in the game?

You sail, and you fight. That’s a really simple way to put it, but it’s a much deeper game than that makes it sound. The sailing part is probably the hardest, with Ubisoft emphasizing a more realistic sailing engine compared to what we’ve seen in other games.
You’ll have to manage your sails quite readily, as you truly will be at the mercy of the winds. Thus, half of the game is battling the sea, and that includes everything in an around it. There will be storms, and there are sharks in the water (but be clear, there is no hunting in the game). Waves will come and go, and they’ll be hard to navigate. The wind will blow in the opposite direction you want to go and you’re just going to have to find a way to deal with it.
Once you do manage to find your way to your activity or target, you have a whole new set of responsibilities to execute. You have to engage your opponents with your best weapons, be that the starboard cannons or the mortars at the helm of the ship. You can also ram your opponent’s ship and board it to engage in hand-to-hand combat.

And while all of this is going on, you’ll still need to tend to your ship. You’ll still need to fight the wind and the waves for proper positioning. It’ll take damage, and your crew will need to keep it patched up so as to not sink where it floats. You can repair it with materials scavenged during your travels.
The force guiding all of these encounters will be your need for treasure and loot. Between a standard stream of leads on hidden treasure and in-game hunts for the booty, players will find themselves doing all they can to stock up on the goods. You can do this by brute force, or by manipulating and controlling trade routes. Your spoils will include commodities like cotton, coffee, and pearls, all of which will add even more silver to your treasury.
All of that money gets fueled right back into your ship. There’s a wide variety of ships in the game, each with their own pros and cons. One might be able to take a big hit to the hulls, while another might be more agile but hit harder with cannons. It’ll be up to you to decide which ship fits you best according to your playstyle.

There are also upgrades for individual elements of your ship to be collected, ranging from common to legendary. You’ll be tasked with selecting a crew with abilities that fit your needs, too. It’ll cost you a whole lot of money, and that money can only be obtained by living the pirate’s life.
You do all of this at the hideout, your very own pirate’s cove where you can unwind, upgrade your ship, manage your crew, and more. While there, you are shielded from the dangers of the Hunting Grounds, so it’s a nice safe haven when you need to take a break.
Unfortunately, it doesn’t sound like you’ll be shoring up very often in this game. In fact, Ubisoft has already confirmed that your hideout is the only land you’ll be on. The game is purely about sailing and pirating, and little more.
The game will always change

Ubisoft is planning to employ their Seasons concept here. In Skull & Bones, each season will be made to feel unique through what they’re calling Fortunes. These are in-game events that change the traditions of the world.
One such Fortune is known as Favorable Winds, an event that will bring more merchants than usual onto the seas, all of whom are traveling on fast-moving winds. This makes them a lucrative target for plundering, so long as you’re willing to compete with other players to claim the riches.
The other is called Hostile Takeover. In this Fortune, trade routes will be limited as warring factions will have their biggest warships out on the waters. The commodities will dry up a bit, but if you manage to take down some heavy foes during this time you’ll be rewarded far more greatly than usual.
There will be a regular flow of new seasons and expansions, and with each one will come a new Fortune. It’s sounding like the very sort of thing that’ll help keep players engaged and coming back, making your purchase relevant for months and, hopefully, years to come.
Are there microtransactions?
Ubisoft has mentioned that there will be microtransactions. A lot of them are likely to be cosmetic, with the ability to customize your captain as well as elements of your ships such as your sails, figureheads, ship wheel, and paint colors. Some of them may tie into gameplay, but Ubisoft isn’t offering specifics just yet.. We don’t know how, exactly, they’ll approach it.
The company’s policy on microtransactions is typically fair. Launch content is usually easily and fully attainable through normal gameplay. And in the cases of Rainbow Six: Siege and For Honor, you can play with new characters without paying a dime, though the grind to get them is quite gruesome.
Sign up for the beta
If you’re excited to play Skull & Bones then you’ll want to sign up for the beta. There’s no timing for the beta’s release, nor are there any guarantees you’ll be selected, but you’ll never have a chance if you don’t sign up.
Sign up for the Skull & Bones beta
When can I play it?
Ubisoft has no hard release date for Skull & Bones just yet. All we know is that it’ll be arriving at some point in 2019 for PlayStation 4, Xbox One, and PC. We’ll surely be updating you as more information makes its way out.
Skull & Bones hands-on impressions from E3 2018
PlayStation 4

- PS4 vs. PS4 Slim vs. PS4 Pro: Which should you buy?
- PlayStation VR Review
- Playing PS4 games through your phone is awesome
Amazon

