


PG&E applies to build Tesla’s largest-yet battery farm for Silicon Valley
Tesla’s largest-ever Powerpack installation may be coming to north-central California. Pacific Gas and Electric Company (PG&E) applied to the California Public Utilities Commission (CPUC) for approval for a utility-owned 182.5 MW energy storage farm using Tesla Powerpacks at the company’s South Bay – Moss Landing Energy Storage site.
PG&E also sought approval for three third-party owned energy storage projects. One of the third-party projects will have a larger initial capacity than the Tesla project. The Tesla project, however, would have an expansion capacity of 1.1 GW.
The storage projects’ purpose is to help keep electrical power levels even for PG&E customers. The storage facilities would feed power to the grid when consumption exceeds normal levels and during blackouts or other service interruptions.
The three additional projects and their respective storage capacities are Dynegy Marketing and Trade, LLC, 300 MWh; Hummingbird Energy Storage LLC, 75 MW; and Micronoc Inc., 10 MW. All four projects would use lithium-ion battery storage technology and be located in the utility’s South Bay – Moss Landing area, which services from the South Bay area south to California’s central coast. The coverage area encompasses Silicon Valley.
Additional mega-energy farm utility projects
Recurrent Energy’s 350 MW solar power and battery farm
Chernobyl nuclear exclusion zone solar farm
Tesla giant Australia battery reduced service costs by 90 percent
Get in on the action with community solar marketplaces
The projects will have enough storage capacity to provide power to the region’s electrical grid for four hours. If the Tesla project expands to the max, its discharge duration will increase to six hours and provide six times as much energy as the initial installation.
Tesla’s 100 MW battery farm in South Australia, switched on December 1, 2018, has already proved its value. In the first four months of service, the costs for ancillary services to fill in for power interruptions in the region decreased by a full 90 percent, according to McKinsey and Co.
PG&E is looking for improved service and reduced costs from the proposed projects.
“Energy storage plays an increasingly important role in California’s clean energy future, and while it has been a part of PG&E’s power mix for decades – starting with the Helms Pumped Storage Plant in the 1980’s – recent decreases in battery prices are enabling energy storage to become a competitive alternative to traditional solutions. As a result, we believe that battery energy storage will be even more significant in enhancing overall grid reliability, integrating renewables, and helping customers save energy and money,” said Roy Kuga, vice president, Grid Integration and Innovation, PG&E.
Editors’ Recommendations
- Tesla’s giant Australian battery reduced service costs by 90 percent
- World’s largest battery on a desert solar farm would triple Tesla’s record
- California prepares to lead the nation in solar-equipped housing
- Powered by a laser, this insect-sized RoboFly can take off and land wirelessly
- The best solar chargers for your smartphone or tablet
How to fix the most common Windows 10 installation problems
Like any complex piece of software, Windows 10 and its installation process is vulnerable to mistakes, glitches, and hardware errors. That being the case, here are some of the most commonly-encountered problems that arise when installing or upgrading to the new version of Windows. If you’ve got Windows 10 installation problems, you’ve come to the right place.
Side note: If the latest version of Windows 10 is experiencing widespread problems, you may also want to wait. The April 2018 update alone had the potential to wipe all the data from your desktop or break Chrome. Not an ideal outcome! It’s a good idea to research the latest update first to see if there are any notable issues, a sign that you should perhaps hold off on the update anyway and check back later to see if a trouble-free version is available.
Run the Windows Update troubleshooter
Windows 10 includes a troubleshooter that can automatically detect and try to fix problems with updates and patches. If the problem isn’t clear and you aren’t sure what to do next, try running this troubleshooter. It doesn’t always find a solution, but it’s a good place to start.
Step 1: Head to your search box and type in “Troubleshoot.” Select the “Troubleshoot” option that awaits in System Settings.
Step 2: A new troubleshooting window will open. In the first section, called “Get up and running,” you should see an option for “Windows Update.” Select it.
Step 3: A new button should now appear that says “Run the troubleshooter.” Select it to automatically start the troubleshooter and see how it can help.
Step 4: A new troubleshooter window will now open as Windows 10 scans for any problems. If it finds any issues — and it will look for everything from missing updates to corrupted files — then it will notify you and ask if you want to “Apply this fix” or “Skip this fix.” Since you are trying to fix your update, it’s a good idea to always choose the “Apply” option here.
When finished, the troubleshooter with give you a list of any problems found and fixed, at which point you can select “Close” to end the process. If the troubleshooter did find and fix notable issues, you should now try your update process again.
Low disk space
Windows 10 requires quite a bit of free disk space on your hard or solid state drive in order to install. The 32-bit version of the OS — used mostly on tablets and less expensive laptops at this point — needs 16GB of free space, the 64-bit version needs 20GB. If you’re installing from a file stored on your computer itself with the Microsoft upgrade tool, you’ll need an additional two to 4GB just for the installation files.
If you have a full storage drive, or a small one to begin with, you’ll need to make some room. The quickest way to do this is to uninstall space-hogging programs. Robust 3D games and complex packages like Adobe Creative Suite take up gigabytes of space. Uninstall them and be sure to back up any save files or settings. Don’t worry, you can re-install them from the installation discs or with a download once Windows 10 is properly set up.
Should you still need more space, it’s recommended you remove files in the following order: video files, audio files, images of all kinds, then documents, and other files. An external USB hard drive is the quickest and easiest way to accomplish this — simply save any files you can’t delete to the external media, and they’ll be easy to restore once you’ve installed Windows 10. Afterward, empty the Recycle Bin to clear the deleted files, or run a program like CCleaner to clear out your browser caches, logs, and other things that take up storage space.
To check your progress, click the Start button, type “This PC,” and click the result. The drive labeled “Windows” is what Windows 10 will install to — make sure you’ve got at least 20GB free just to be safe.
ISO image issues
If you’ve used the Microsoft Media Creation tool to burn a disc or create a bootable USB drive to install Windows 10, it’s possible that the media itself is damaged or corrupt. This will result in a failed or damaged installation. Sadly, it’s extremely difficult or impossible to modify the files once they’re written to the disc or drive. You’ll need to run the tool again to install Windows 10, which may necessitate access to another laptop or installing your older version of Windows again.
If you continue to experience problems after creating multiple installation media and trying to install Windows 10 more than once, you may have a persistent hardware problem. The CD/DVD burner or the USB drive you’re using may be faulty. If possible, try using a different USB drive or an external disc burner.
Thankfully, you might be able to just install Windows 10 from an ISO image, which you can grab here, for free. Fire it up, follow the prompts, and it’ll tell you if you’ll be able to install your new operating system without the use of external media like flash drives and discs.
Error codes
Sometimes during the Windows installation process, the program will stop and display an error code. There are hundreds of possible error codes and at least as many potential problems. The best thing to do in this situation is to write down the code — you may not be able to copy it from the display screen — and search the internet for the core problem, and hopefully, a solution.
Here are some of the steps you can take if there’s no reliable information for your specific code:
- Unplug any unnecessary devices from your computer, like flash drives and dongles. Laptops should have nothing plugged in at all (except a power cord), and desktops should only have a monitor, mouse, and keyboard attached.
- For desktops, remove or disconnect any unnecessary internal hardware. If your PC includes an integrated graphics card or sound card on the motherboard, remove any standalone cards. Unplug any secondary storage drives (but not the primary OS drive), disc drives, card readers, and extra hardware such as a fan controller or USB extension connected to a PCI port.
- If you’re upgrading your PC and you’ve selected a standard upgrade that preserves your programs, remove unnecessary programs before beginning the installation process. Anti-virus programs and drivers for devices like game controllers seem to have the most trouble during the upgrade process.
- If your Windows install or upgrade doesn’t complete, or if you have issues with startup, you might want to disable hibernation, which you can do by typing “powercfg /h off” into a Command Prompt window.
- Alternately, simply install the operating system “cleanly,” preserving your personal files but not the programs. To do so, select “Custom: Install Windows” instead of “Upgrade” during the setup process. You can re-install your programs later.
Microsoft also offers a list of potential Windows 10 installation error codes, and what they mean.
Incompatible hardware
Windows 10 runs on a variety of hardware, including Atom-based tablets and other low-power systems, but it does have minimum requirements. If your computer has a processor with a speed of less than 1GHz — or RAM totaling less than 1GB for the 32-bit version or 2GB for the 64-bit version — the setup wizard will not allow you to complete the installation. Desktop users can often upgrade their RAM or processor, but laptop users who don’t meet the minimum requirements are probably out of luck.
For a look at how much RAM you really need, check out our guide to all things memory.
Editors’ Recommendations
- How to convert FLAC to MP3
- Windows update not working? Here’s how to fix it
- How to reset your iPhone
- Following battery backlash, Apple offers a $50 refund to some customers
- The most common Nintendo Switch problems, and how to fix them
Rugged portable SSDs, Black+Decker lawn tools, robot vacuums and more are all discounted today
Whether you’re looking for new tech gear or household items, we’ve got you covered.
We found plenty of great deals today that include big discounts on SanDisk’s rugged portable solid-state drives, Black+Decker lawn tools, robovacs, and more!! Time’s running out to take advantage of these prices, so hurry!
View the rest of the deals
If you want to know about the deals as soon as they are happening, you’ll want to follow Thrifter on Twitter, and sign up for the newsletter, because missing out on a great deal stinks!
Best Outdoor Speakers in 2018

Make your garden sing with some outdoor speakers.
Portable speakers are great additions to your Android stable. But maybe you want something you can leave outside, and not have to lug back and forth every time you want to remind the neighbors just how much you love Journey. Or maybe you want both. So wouldn’t it be nice to have more options for audio fixtures in your yard?
We’ve rounded up the best outdoor speakers for your backyard listening pleasure.
Bluetooth speakers:
- Acoustic Research Hatteras Northern Lights
- Acoustic Research Pasadena
Wired speakers:
- Bose Free Space 51
- Klipsch AWR-650-SM All Weather 2-way
- TIC GS-3
- Dayton Audio IO655
- Polk Audio Atrium 4
What to consider when buying outdoor speakers
The best outdoor speakers (or speakers of any kind, really) are wired. Wired audio gives you better sound and a tried and true connection – no worrying about how the layout of your home or backyard might affect the wireless signal. If you’re unsure about a wired setup, consider adding a Sonos Connect:Amp ($499). This handy little device acts as a receiver for your wired speakers, so you can wirelessly stream music from your phone or tablet without even needing a receiver.
If you do have a receiver, then consider the Sonos Connect ($349), which just plugs into your existing setup, allowing you to wirelessly stream music to your receiver.
If you do want to go wireless (as most of us do nowadays), then consider Bluetooth speakers, since they’ll offer you great sound and you can have your device near them to help eliminate interference and a choppy signal.
A third option is to get wireless speakers that operate using a wireless transmitter. The transmitter plugs into your receiver (usually in the house) and transmits your music outside. Though this type of speaker has gotten better over the years, it’s still pretty hit and miss when it comes to audio quality and signal consistency. If your receiver is turned up too loudly, your outdoor speakers will distort — even at low volumes. If you’re in a crowded part of town, you’ll get all kinds of interference.
This is why we’ve included some wired and some Bluetooth options in this roundup, so that you’re getting the best audio quality possible, especially if you’re planning on spending a ton on speakers.
Bluetooth outdoor speakers
Acoustic Research Hatteras Northern Lights

If you’re looking for some solid wireless outdoor speakers, then the Acoustic Research Hatteras speakers might have what you’re looking for.
Unlike many wireless outdoor speakers, the AR Hatteras speakers operate via Bluetooth. You can set them up on your deck or elsewhere in the backyard and enjoy music from your smartphone or tablet. The best part is you get to keep your device near without having to go inside to change anything with your stereo setup. You can also control playback right on the speaker itself.
The Hatteras is attractively designed as a high-tech lantern, which should nicely complement most backyard aesthetics. The cool factor is its “northern lights” 360-degree light, which changes colors and operates in six modes, which include various pulsating and flashing patterns, as well as solid colors.
The bass thumps, thanks to 40 watts of peak power, two tweeters, and two mid-ranges. You won’t get the true stereo sound that you would from a pair, but it’s still more than acceptable, especially for a speaker of this size.
If you want a great-looking outdoor Bluetooth speaker, then look no further. This is as good as it gets, if not a bit pricey, at around $200.
See at Acoustic Research
Acoustic Research Pasadena

Acoustic Research makes the list again with their more affordable, battery-powered Pasadena. These speakers start at around $65 each and sound great on their own — and even better when paired with a second one.
They offer Bluetooth connectivity and up to 8 hours of battery life — ideal for outdoor listening — plus it’s easy to store and charge them in the garage or house when not in use. There’s also an auxiliary jack on the back, just in case you’d prefer a wired connection or are dealing with a device that doesn’t have Bluetooth.
The best part is that you get three-way sound in a 9.5-inch-tall package. There’s a front-facing 2.5-inch tweeter, a front-facing 3.5-inch mid-range, and a rear-facing 3.5-inch woofer, offering well-balanced sound, though the bass is a bit muted.
AR is all about that lantern look, so the Pasadena resembles a more traditional lantern than the Hatteras does — perfect for the patio, though it emits no light.
If you’re looking for a solid little Bluetooth speaker that’s battery-powered, offers decent sound, won’t break the bank (around $80), and can even be hung from a sturdier wire, then check out the AR Pasadena.
See at Amazon
Wired outdoor speakers
Bose Free Space 51

If we’re talking about the best speakers of any sort, then it’d be a sin not to mention Bose in some capacity. In this case, they truly are some of the best outdoor speakers money can buy.
In true Bose fashion, these are not wireless, but once you do wire them in outside, you can set them and forget them; these speakers are designed to withstand temperatures from -40 to 150 degrees Fahrenheit. One of their neatest features is that they can be in or on-ground speakers, so you can bury them up to a certain point and still receive top-of-the-line sound quality.
Bose is all about room-filling sound and when there’s no room to fill, these still provide immersive, 360 degree sound, thanks to their radial design. They are quite pricy, starting around $450 for a pair, but with outdoor speakers, you certainly get what you pay for.
If you want high-quality sound with rich bass tones, a present mid-range, and crisp-but-not-shrill highs, then Bose is the way to go — so long as you don’t mind doing some outdoor wiring.
See at Amazon
Klipsch AWR-650-SM All Weather 2-way

Klipsch is another company that makes fantastic-sounding speakers, and their outdoor AWR-650-SMs, which resemble rocks, are no slouch. They are, however, another wired option, which some folks may shy away from.
That being said, if you want HD sound outdoors, you’ll have to put up with the wires, along with the steep starting price of around $225 for each of these speakers. They feature a 6.5-inch woofer and two 0.75-inch tweeters, which deliver low, rich bass and pleasing,crisp highs, respectively. Having two tweeters also means that you can listen in stereo without having to break the bank and buy two.
Aside from awesome sound, these speakers are all about aesthetic. They come in either a granite or sandstone finish and should blend in seamlessly with your yard.
If you’re looking for a speaker that won’t distract from your existing backyard decor, sounds great, and don’t mind wiring, then check out the Klipsch AWR-650-SM All Weather 2-way speakers.
See at Amazon
TIC GS-3 omnidirectional

These in-ground speakers from TIC have a neat army green finish and feature a 360-degree speaker, making them perfect for backyards.
They’re made from ABS, which is a strong and durable plastic that has a much higher melting point than most other plastics, which makes them resilient in just about any climate. With 200W of peak power, you should have no trouble cranking the tunes outside.
At around $77, these are your best option for in-ground speakers if you’re on a budget.
See at Amazon
Dayton Audio IO655

These wall-mounted speakers come in at around $108 per pair and sport a 6.5-inch woofer each, as well as a 1-inch tweeter, so you have your lows, mids, and highs all well-covered in a compact package.
The outer plastic is made from weather-resistant ABS plastic, and the grills are made of aluminum, so they can hang out in your yard for years. Though these are inexpensive, they actually sounded as good or better than more expensive competition in the the Wirecutter’s tests. If you’re looking for outdoor wall-mounted options, these are dynamite.
See at Amazon
Polk Audio Atrium 4

I love Polk products. Its soundbars are excellent, its indoor speakers are superb for the money, and as the company gets a little older, it’s beginning to refine the designs of many of its speakers (which haven’t always been the most aesthetically pleasing). The black Atrium 4s are sexy, sleek, and designed to stay outside and last. The tweeter domes are made from anodized aluminum with rubber surrounds, and they actually exceed baseline and military specs for environmental endurance. That basically means that you can mount them and then not worry about them for years to come.
At just under $100 for a pair, you absolutely can’t go wrong with these.
See at Amazon
Looking to set up an outdoor home movie theater? We can help!
How to create an outdoor movie theater in your backyard
What’s in your yard?
Do you have an outdoor speaker that you find aesthetically pleasing with awesome sound? Let us know in the comments below.
Updated July 2018: Updated pricing, added the Dayton Audio IO655 and the Polk Audio Atrium 4.
How to get custom text tones back on your Samsung Galaxy phone

We can get dozens of text messages a day, so why not spice them up with custom tones for your loved ones?
Custom text message tones might seem like a small feature, but they can be immensely useful. A custom text message tone can tell us to respond to one notification among a sea of default notification tones. A friend of mine has a custom text tone, a revolver shot, that echoes through the station when his wife texts him.
He was quite sad when his phone updated and Samsung took that away, and he’s not the only one.
- Why you need another text messaging app now
- How to set custom text tones in Android Messages
- How to set custom text tones in Pulse
- How to set custom text tones in Textra
- How to set custom text tones in Mood
Why you need another text messaging app now
Before Samsung updated its Galaxy S8 and Note 8 phones to Oreo, there was a place in Samsung Contacts to set a personal ringtone and notification tone for friends’ incoming messages. After the Oreo update, Samsung contacts only have the option to set a personal ringtone. I don’t know why this was removed during the update, though it may have something to do with changes to notification in Android Oreo.
Samsung has heard the uproar over the change and has announced that it will bring it back, but that update is taking its sweet time rolling out to individual users. If you still want a custom text tone for individual contacts right now, you can still have them, but you’ll have to switch to another text messaging app.
This is also exactly why you should want to use a third-party text messaging app. Samsung yanked out a fairly standard, fairly popular text messaging feature and we have no concrete timetable for it roll back out to millions of phones across dozens of carrier variants. Third-party text messaging apps are updated more regularly, have more robust features since they have to compete in an app category that is very busy and very popular, and they tend to look and work the same across all devices, so you won’t have to get used to a new text messaging app every time you switch phones.
There are dozens of great text messaging apps out there, but all of our favorites support custom text tones on a per-conversation basis.
Find your new favorite text messaging app here.
After you’ve picked one, here is how to set a custom text tone in each of them.
How to set custom text tones in Android Messages
Tap the Conversation you wish to set a custom notification for.
Tap the three-dot menu icon in the top right corner of the screen.
Tap People & options.


Tap Notifications.
Tap Sound.
Tap your desired tone.
Tap Save.


How to set custom text tones in Pulse
Tap the Conversation you wish to set a custom notification for.
Tap the three-dot menu icon in the top right corner of the screen.
Tap Conversation options.


Scroll to the bottom of the menu and tap Notification Channel Settings.
Tap Sound.
Tap your desired tone.
Tap Save.


How to set custom text tones in Textra
Tap the Conversation you wish to set a custom notification for.
Tap the arrow down icon in the top right corner of the screen.
Tap Customize this conversation.


Tap Notifications.
Tap Notification Sound.
Tap your desired tone.
Tap Save.


How to set custom text tones in Mood Messenger
Tap the Conversation you wish to set a custom notification for.
Tap the three-dot menu icon in the top right corner of the screen.
Tap Options.


Scroll to the bottom of the menu and tap Current tone under Notifications & Sounds.
Tap the bell icon to go to the system sounds list.
Tap your desired tone.
Tap Save.


Your turn
Going away from the standard Samsung Messages can be a big change for some users, but it’s a small price to pay to get that distinct tone when a parent or an ex-boyfriend is texting you. In fact, may I suggest a notification tone for just such a contact?
Updates June 2018: This post has been updated to include that Samsung is bringing custom text tones back, though the timetable for it rolling out to everyone is anyone’s guess.
Samsung Galaxy S8 and S8+
- Galaxy S8 and S8+ review!
- Galaxy S8 and S8+ specs
- Everything you need to know about the Galaxy S8’s cameras
- Get to know Samsung Bixby
- Join our Galaxy S8 forums
Verizon
AT&T
T-Mobile
Sprint
Unlocked
Samsung Galaxy S9 vs. Galaxy S9+: Which should you buy?
An easy-to-manage decision.
Samsung’s seen serious success with launching its yearly flagship in two sizes. In the last couple of years, the larger version has become the more desirable model while the smaller turned into the solid, default choice at a lower price.
Unlike the Galaxy S8 release, the Galaxy S9 and S9+ have more differences than just size: you get a few feature and spec improvements as well, offering a bit more to justify the higher price.
So when you go to get a new Samsung flagship, you have a choice: should you buy the Galaxy S9 or Galaxy S9+? Here’s what you need to know to make the best decision.
What’s the same
When it comes to design, Samsung doesn’t discriminate between its two flagship sizes. Whether you get the compact Galaxy S9 or larger Galaxy S9+, the materials and proportions are identical. Neither size has an exclusive color or hardware feature. When it comes to the core experience of using the phones, you won’t notice a difference beyond the size.
The screens are of course different dimensions, but the resolution and quality of the panel are the same. Yes, that means that the Galaxy S9 has a slightly higher pixel density, but in real-world use you’d never notice the difference — particularly if you leave the phones set at the 1080p resolution they are out of the box.
What’s different
The Galaxy S9+’s differences come down to a larger size, two spec changes and a camera addition. The most important ones to consider are about size: moving up to a 6.2-inch display gives you more room to work and play, but also makes the phone larger and relatively tough to manage in one hand. The Galaxy S9+ is about 10 mm taller, 5 mm wider and 15% heavier than the standard Galaxy S9 — that’s nothing to sneeze at.
But to go along with that increased size is, of course, a larger battery, which at 3500mAh can help you get through a full day without worrying about charging. The capacity is over 15% higher than the Galaxy S9’s 3000mAh, but the larger display certainly doesn’t use that much extra power — so you’ll be able to do all of the same things for longer on a charge. Battery life hasn’t really improved from the last generation, so the Galaxy S9 once again is likely to leave heavy users in need of charging before the day is done.
The Galaxy S9+ gets a secondary camera, but it may not be a deciding factor in your buying decision.
The primary camera on the Galaxy S9+ is identical to the Galaxy S9, and that’s a great thing for everyone because this camera is great. But the larger chassis in the GS9+ afforded Samsung the room to add in a secondary camera that mimics the Galaxy Note 8’s. That means it has a longer “telephoto” focal length, roughly twice the length of the main camera. The secondary camera lets you seamlessly zoom in without losing resolution at 2X, and enables Samsung’s “Live Focus” portrait mode that artificially blurs the background behind your subject for a dramatic effect.
The secondary sensor isn’t the same type of “Super Speed” Dual Pixel that the main camera is, so the quality isn’t the same. And as we saw with the Note 8, those extra features of zooming and Live Focus aren’t something that completely changes the camera experience. The main camera’s improvements in this generation are far more important for daily photography — you just have to decide how much you want the zooming and Live Focus, because you just don’t get them on the Galaxy S9.
Samsung Galaxy S9 and S9+ specs
The least consequential addition in the Galaxy S9+ is more RAM, which Samsung bumped up to 6GB to match the Galaxy Note 8. Considering it left the standard Galaxy S9 with 4GB, and the two phones run identical software, it’s hard to think that Samsung’s done much optimization to take advantage of that extra RAM itself. But the extra memory will, of course, help you hold just a few more applications in the background, and give you more runway into handling future software updates and more powerful apps. This is absolutely a “nice-to-have” and not a necessary feature.
Bottom line: Which should you buy?

As I said from the start, the Galaxy S9 is the default choice for so many people when they walk in the store simply because it’s less expensive. If you’re unsure about whether you want a “big” phone, start by using the standard Galaxy S9 — you won’t regret the size, and it can do almost everything the larger Galaxy S9+ can.
You’re going to want to start with the standard S9 and decide whether it’s worth spending the extra money on a second camera and larger battery.
But by moving up to the Galaxy S9+, you get a better overall phone. To choose it, you have to know you want a bigger device — maybe you want the extra screen space for everything you do, or need the extra battery life. But you also have to know you can manage the extra size and give up some one-handed usability. If you want to take that trade-off, you then also get the bonuses of more RAM and a secondary camera for extra photography choices — I very clearly put those two additions below the decision regarding screen size and battery capacity, which have clear benefits in everyday use.
Finally, remember the cost involved. To get that bigger screen, larger battery and couple extra features, you have to pay about $120 more for the Galaxy S9+. Over the course of a two-year payment plan, it’s about $5 more a month, which is easy for a lot of people to handle — but everyone has their own threshold for how much they’ll pay for a new phone, especially when it’s just incrementally better. If you can afford it, and your hand can manage the size, the Galaxy S9+ is the better overall phone — and if you can’t, the Galaxy S9 gets you most of the way there for less.
Samsung Galaxy S9 and S9+
- Galaxy S9 and S9+: Everything you need to know!
- Galaxy S9 review: A great phone for the masses
- Complete Galaxy S9 and S9+ specs
- Galaxy S9 vs. Galaxy S8: Should you upgrade?
- Join our Galaxy S9 forums
Verizon
AT&T
T-Mobile
Sprint
Update July 2018: Changes made to reflect our further use of the phones and our opinions of their strengths.
Apple’s First MacBook Pro With Retina Display is Now ‘Vintage’
On June 11, 2012, at its annual Worldwide Developers Conference, Apple introduced its first MacBook Pro with a Retina display. Impressed by its thinness, the crowd at Moscone West erupted with a huge round of applause.
The notebook was also praised in many reviews, which awarded it top marks for its mix of functionality and portability. Marco Arment, a well-known developer, even called it “the best laptop ever made,” with a “crowd-pleasing design.”
“Introduced in 2012, less than a year after Steve Jobs died, I see it as the peak of Jobs’ vision for the Mac,” said Arment, in a blog post last year.
In addition to being the first MacBook Pro with a Retina display, the 2012 model had a much slimmer design compared to previous models, after Apple removed the built-in Ethernet port and optical disc drive for CDs/DVDs. The external design of the notebook remained largely unchanged through 2015.
Despite being thinner, the 2012 to 2015 era MacBook Pro had an array of connectivity options, including a pair of Thunderbolt and USB-A ports, an HDMI port, a SD card slot, and a MagSafe power adapter that breaks away safely if tugged.
 I/O on 2012 MacBook Pro with Retina display
By comparison, the 2016 and later MacBook Pro has two or four Thunderbolt 3 ports, depending on the model, that can deliver power, USB, DisplayPort, HDMI, and VGA over a single cable. Apple in turn removed dedicated USB-A and HDMI ports, an SD card reader, and MagSafe from the notebook.
 I/O on 2016-and-later MacBook Pro
While the latest MacBook Pro lineup hasn’t led to any significant declines in Mac sales, which Apple reports on a quarterly basis, a subset of customers continue to favor the older models. In fact, Apple continues to sell one configuration of the 2015 MacBook Pro, priced from $1,999 in the United States.
For those clinging to a 2012 model, however, there’s a bit of bad, but inevitable, news.
Just over six years after Apple released the Mid 2012 model 15-inch MacBook Pro with Retina display, which is more than a fair amount of time, Apple has officially classified it as “vintage” or “obsolete” depending on the region.
What this means is that at least five years have passed since the model was last manufactured, meaning that Apple and Apple Authorized Service Providers are no longer obligated to provide hardware service or replacement parts, except in the state of California and Turkey, where required by law.
Of course, if you own a 2012 MacBook Pro, there is nothing stopping you from following one of iFixit’s many do-it-yourself repair guides.
Apple routinely updates its vintage and obsolete products list with additional devices as they age, so this was to be expected eventually, but it’s still somewhat of a sad reminder that the first MacBook Pro with Retina display has nearly reached the end of its life. Anyone still using one is now on their own in terms of hardware.
Apple’s support team should still be able to answer questions about macOS and be able to perform software troubleshooting if needed.
Apple’s website does not list the Late 2012 model 13-inch MacBook Pro with Retina display, released in October 2012, as “vintage” yet. Only the 15-inch model, released in June 2012, carries this distinction.
Related Roundup: MacBook ProTag: vintage and obsoleteBuyer’s Guide: MacBook Pro (Don’t Buy)
Discuss this article in our forums
Get patriotic this Fourth of July with our quickest home screen theme yet

This theme is quite fitting for our country: it looks complicated, awesome and time-consuming, but it’s really quite easy.
The Fourth of July is a day to celebrate our union, to acknowledge its past and look ahead to its future. It’s also an excuse for everyone to take a day off work in the middle of the summer, go swimming by the river, grilling in the backyard, drink some star-spangled beer and blow up some fireworks. Whatever your plans for this Independence Day, make sure that your phone is decked out in some red, white, and blue brilliance with our quickest theme yet, built upon American adaptability and KLWP.
- About KLWP and our July 4th theme
- Applying the July 4th Preset in KLWP
- Adjusting the July 4th Preset in KLWP
- Applying Whicons Icon Pack
About KLWP and our July 4th theme
KLWP — short for Kustom Live Wallpaper — is the bigger, bolder brother of KWGT, the what-you-see-is-what-you-get widget builder that we’ve used in many of our theme the last few years, including our recent Heart Canada and Deadpool themes. KLWP is a what-you-see-is-what-you-get live wallpaper builder, allowing you to build widgets, shortcuts, and designs right into your live wallpaper.

See the 5 white app icons on the screen? Everything besides those is part of our live wallpaper, and that means that since we’ve already built the theme, all you lucky users need to do is apply the live wallpaper, apply your icon pack, and get on with grilling and chilling.
This theme was originally based around a widget I found and liked in Element for KWGT, which is a wonderful preset pack I recommend checking out for KWGT. I hunted down the fonts and fonticon pack to help re-create the dock in KLWP and then made several edits and additions, including:
- Converted the three app shortcuts into music controls
- Added song information to the bottom of the dock, just above the nav bar
- Organized the Time/Weather elements to help them remain better aligned
- Tied all the theme elements to Globals for easy color adjustments
- Created and adjusted a custom tricolor music progress bar to sit sit along the edge of the dock
- Added a conditional layer to hide the interactive elements while on the lock screen

This is a theme I’ve tinkered and toyed with for over a month, and a KLWP Preset that I’ve adjusted and fine-tuned through weeks of personal use. Since you’ll be importing the KLWP Preset I’ve made, you’ll need KLWP Pro, which is $4.50. Considering how powerful KLWP is and how responsive its development team and community are, I think it’s more than worth that price.
The only elements you’ll need besides KLWP and KLWP’s Pro Key are our July 4th Preset, the free Whicons Icon Pack, and a home screen launcher that supports custom icon packs. I’m using Nova Launcher so that I can take advantage of subgrid positioning and lay out my apps in an angle that matches the theme.
Applying the July 4th Preset in KLWP
Once you download the July 4th Preset, use a file manager app to copy it to Internal Memory/Kustom/wallpapers. If you haven’t opened Kustom before, you might have to make the Kustom folder or wallpapers subfolder. Once the preset file is saved in Kustom/wallpapers, let’s get it imported.
Open KLWP.
Tap the next arrow three times.
Tap Allow to let Kustom access your device’s storage.


Tap the next arrow.
Tap Allow to let Kustom access your device’s location.
Tap Done.


A welcome message will appear.After reading it, tap Done.
Tap Load Preset.
In the Presets menu, tap the Exported tab.


Tap July 4th Preset.
The preset will load, but Kustom is still missing some important permissions for our theme. Tap Fix now.
Tap Fix.


Tap Kustom LWP or Kustom Notifications.
Tap Allow.
Tap the back button.


Tap the floppy disc icon in the top right bar of the screen to Save the wallpaper.
We still need to set KLWP as our wallpaper. Tap Fix.
Tap Set Wallpaper.


Tap Home screen and lock screen.
Tap the floppy disc icon in the top right bar of the screen to Save the wallpaper.
Tap the home button to see the applied theme in action.


The theme should adapt well to most home screen sizes since most the element groups are anchored and organized from the bottom of the screen.
Adjusting the July 4th Preset in KLWP
Ideally, the only thing left you’ll need to do is set the icon pack, but if you need to adjust the theme, here are some ways you can do that.
- Is the dock not fitting the width of your screen properly? Tap Layer and adjust the Scale up to down to your liking. Be advised that not all elements adjust at the same rate, so you may need to readjust individual elements after doing this.
- Want to re-position the sections of the dock to better fit your screen? Tap the Item group or element you wish to move (for instance the Progress Bar), and then tap Position. Adjust the X and Y offsets or directional padding to re-position the element as desired.
-
You can change what tapping an individual element or group triggers. For the base Preset, tapping the Hour opens the Kustom editor so you can adjust the wallpaper to your liking, but you could change it to open your clock or calendar app.


- Weather providers offer different descriptions of current weather conditions and some providers are more accurate in different regions than others. To change the weather provider KLWP uses, tap the three-line menu icon in the top left corner of the screen and tap Settings. Under Weather, you can tap Weather Provider and select from half a dozen sources.
-
KLWP by default will pull in the details and controls for any media notification that it sees. If you only want KLWP to pull in data from one app, you can enter KLWP Settings and set Preferred Music Player to your chosen music app.


There are plenty of ways to edit and alter this theme. For instance, here in Texas, the weather is horribly hot and sunny all the time, so I’ve switched the weather fonticon out for a Google Keep icon and shortcut.
Because, really, knowing how hot it is outside during the Fourth of July barbeque doesn’t help us endure it any better; it only makes us more aware of our misery.
Applying Whicons Icon Pack
This is a simple red, white and blue theme, and it works best with a simple white icon pack, and for a simple white icon pack, we turn once again to one of my favorite icon packs on Google Play. Whicons is one of the three free icon packs from Randle that mesh with so many themes that it’s just unnatural.
Open Whicons.
Tap the three-line menu icon in the top left corner.
Tap Apply.


Tap your desired launcher.
Tap OK.


I arrange my apps on the home screen using Nova Launcher’s subgrid positioning, but you can place your icons anywhere above our patriotic dock.
Your turn

So, do put fifty icons on your home screen for the 50 stars — assuming your home screen is big enough for that many — or do you take a more reserved approach to our Fourth of July theme? Want to kick it up a little more? Try this Captain America variant I made using The First Avenger’s colors and signature shield for some Star-Spangled Awesome.
Are there any themes you’d like us to tackle? Let us know in the comments!
Best Screen Protectors for BlackBerry KEY2
Keep your KEY2’s display looking as good as can be with these screen protectors!
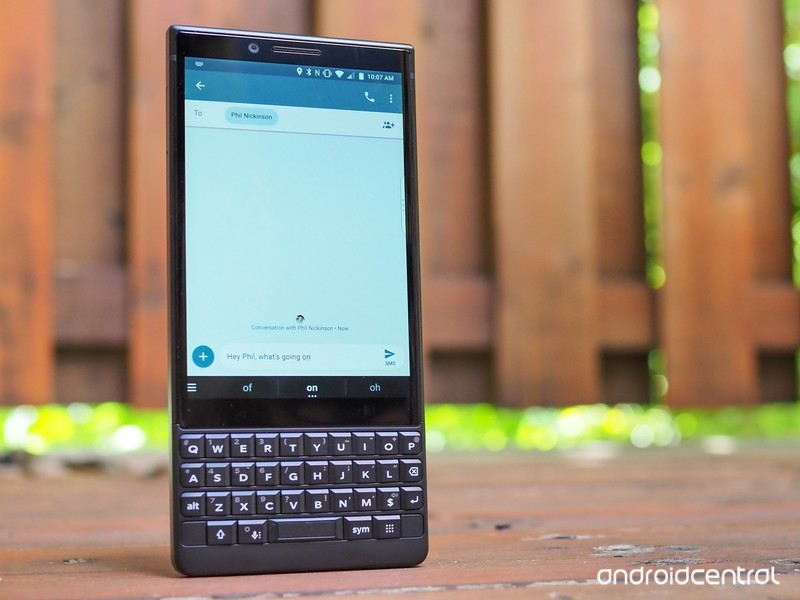
Whether you’re a productivity machine or still hate the feeling of typing on an on-screen keyboard, the BlackBerry KEY2 and its excellent physical keyboard are here to save the day.
There’s no doubt that the KEY2’s keyboard is the star of the show, but don’t forget about its 4.5-inch touchscreen display. It’s sharp, crisp, and works well in most situations, but a few nasty scratches will leave you wishing you’d put on a screen protector.
If you want to cover up your KEY2’s display so that it stays safe and sound, these are the screen protectors we recommend picking up!
- PULEN Tempered Glass Screen Protector
- AVIDET Tempered Glass Screen Protector
- Skinomi Film Screen Protector + Full Body Skin
- DeltaShield Military-Grade Film Screen Protector
- TopACE Tempered Glass Screen Protector
PULEN Tempered Glass Screen Protector
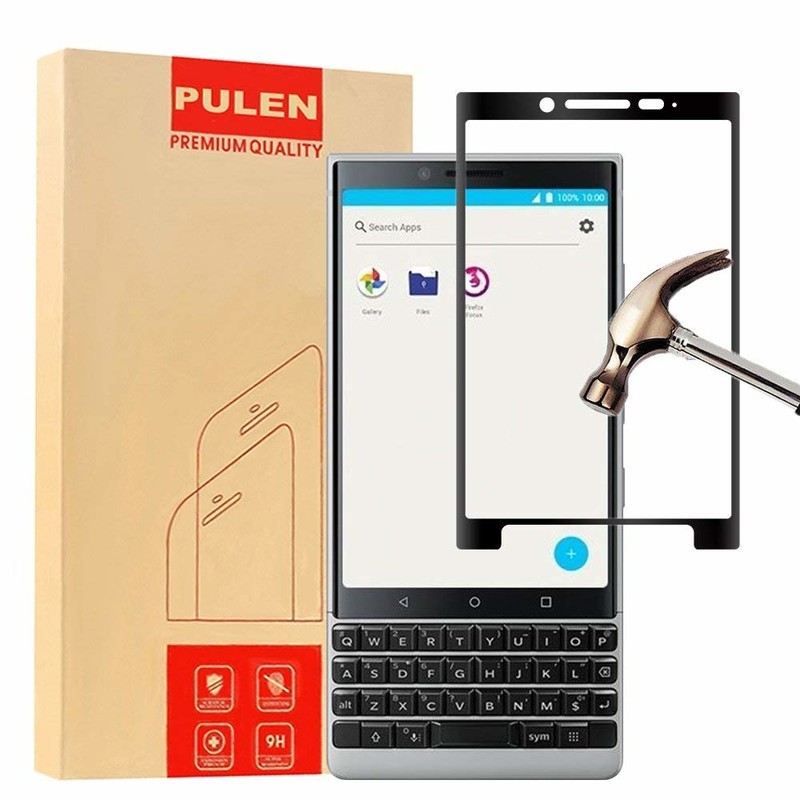
For folks in the market for a tempered glass protector, PULEN’s got you covered.
PUELN’s tempered glass screen protectors are laser-cut for the exact dimensions of the KEY2, resulting in a perfect fit for your device. There’s a 9H hardness rating to ensure no scratches find their way onto the protector, and even if you take a knife to the thing, it’ll still just as good as it did from day one.
The installation process is as easy as can be, with PULEN promising none of those pesky bubbles while doing so. There’s also a hydrophobic and oleophobic coating to prevent residue from sweat and oil.
If you’re interested, you can get a pack of two for just $7.99.
See at Amazon
AVIDET Tempered Glass Screen Protector
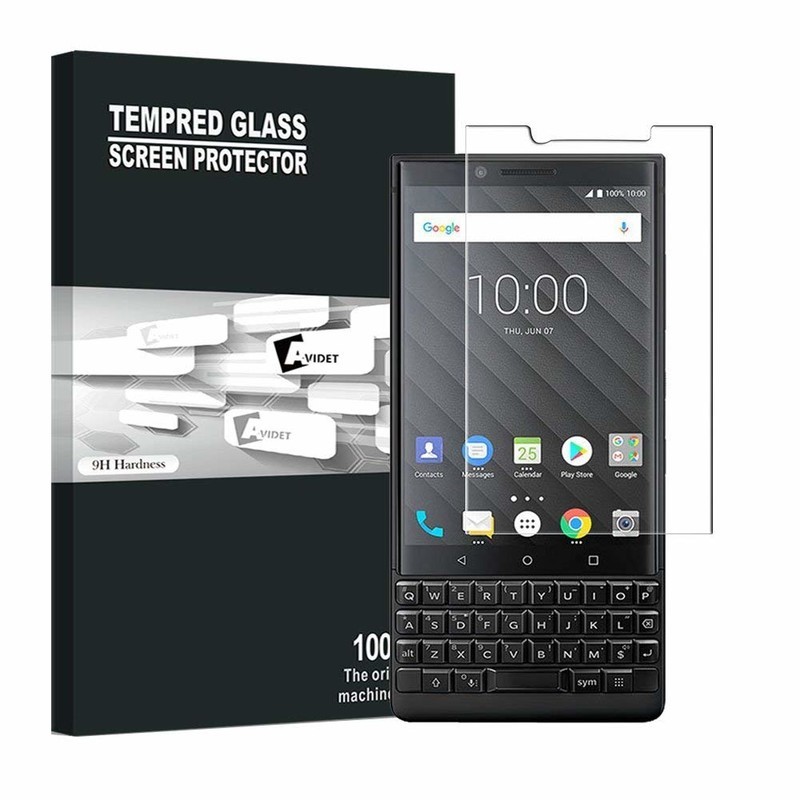
Let’s say you’re in the market for a tempered glass protector but want to spend as little as possible. For you, we’d recommend looking at what AVIDET is selling.
AVIDET’s tempered glass protector costs just $7.69, and while you don’t get two like you do with PULEN, the upfront cost is less.
The protector measures in at just 0.3mm with an impressive 9H hardness rating, 99.9% transparency makes it virtually impossible to see the protector when it’s on your KEY2, and 2.5D curved edges help to prevent any unwanted chipping of the glass.
This is an add-on item on Amazon, meaning it’ll ship on any orders that are over $25 or more.
See at Amazon
Skinomi Film Screen Protector + Full Body Skin
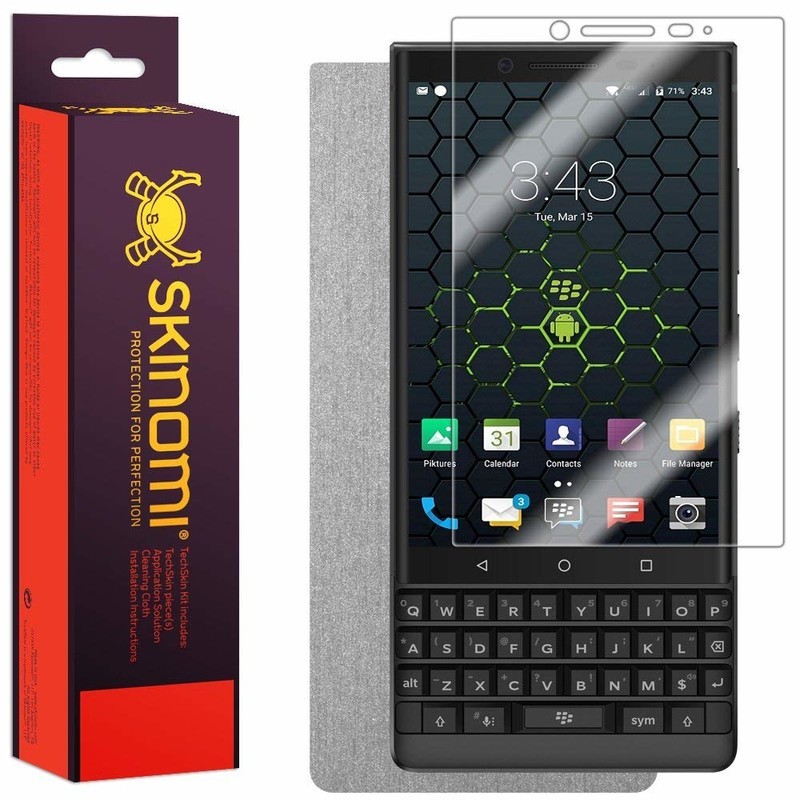
As great as tempered glass screen protectors are, they do have a tendency to crack much easier compared to film protectors. If you’re not about that glass life, Skinomi has a pretty great option for you.
Skinomi used laser cutting to match the size of its screen protector for the exact dimensions of the KEY2, and as such, it fits like a glove. The film protector is extremely easy to install thanks to Skinomi’s grid adhesive that doesn’t require any sort of liquid or solution, and it comes with a 100% risk-free lifetime replacement warranty in case anything goes wrong.
In addition to the film protector, Skinomi also includes a full-body brushed aluminum device skin! You’ll pay a bit more for this combo at $12.95, but even so, it’s a tremendous value.
See at Amazon
DeltaShield Military-Grade Film Screen Protector
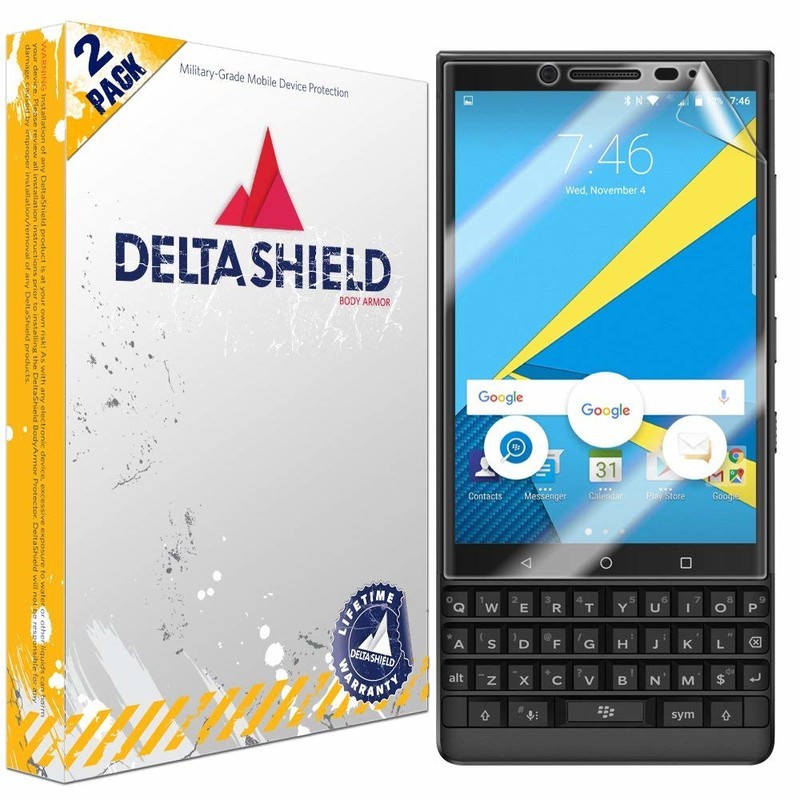
If you want another film option that’s a bit more affordable than what Skinomi’s selling, DeltaShield might have exactly what you’re looking for.
For a little more than $7, you can get two protectors with military-grade protection and a 99.9% transparency rating. DeltaShield’s protectors come with a “Self-Healing” technology that allows any imperfections in the protector to work themselves out over time and a UV-filter protects against troublesome yellowing.
The protector is barely visible once applied, and should anything go awry, DeltaShield covers its protectors with a lifetime warranty.
See at Amazon
TopACE Tempered Glass Screen Protector
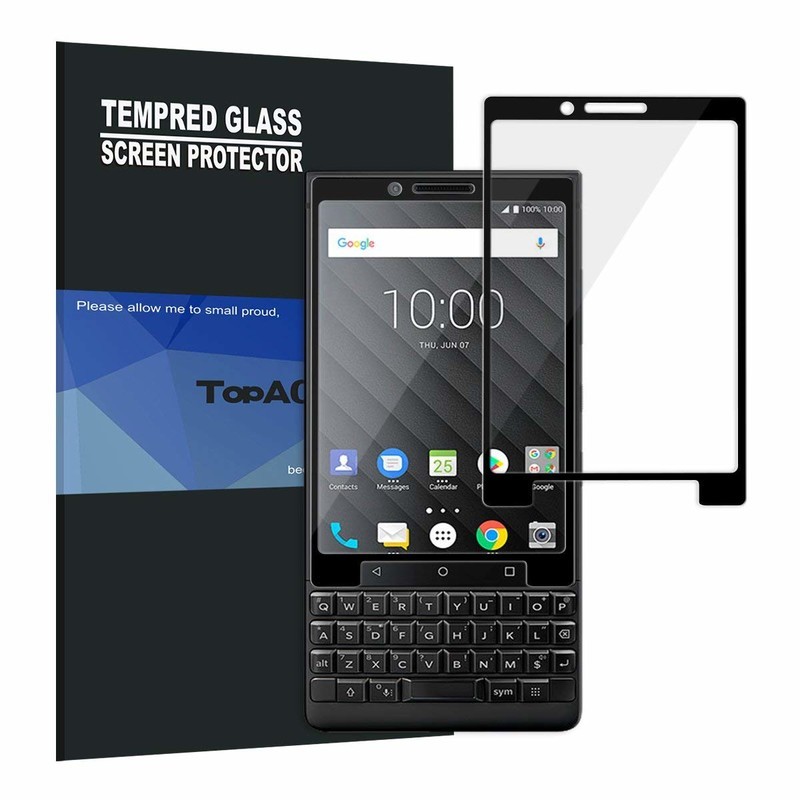
If you want a screen protector that’ll keep your KEY2’s display scratch and crack-free no matter what, tempered glass is the way to go. TopACE has created exactly that, and they’ve done an exceptionally great job.
For just under 10 bucks, you can get one glass protector with 99.9% transparency for a crystal-clear view of your screen, a 9H-rated durability, and full edge-to-edge coverage.
TopACE guarantees that you won’t get any unwanted bubbles during the installation process, and along with the protector, you’ll also get wet/dry wipes and dust removal stickers.
See at Amazon
What’s your pick?
What screen protector are you going to pick up for the KEY2? Is there another option that should be added to our list? Let us know in the comments below!
BlackBerry KEY2
- BlackBerry KEY2 review
- BlackBerry KEY2: Everything you need to know!
- BlackBerry KEY2 specs
- BlackBerry KEYone review: Coming home
- Join our BlackBerry KEY2 forums!
Buy the BlackBerry KEY2
Best microSD Cards for Lenovo Mirage Solo

Temper your expectations.
Lenovo’s Mirage Solo is a compelling option for those that love virtual reality, since you don’t need to buy an expensive phone just to enjoy VR. The Mirage Solo offers 32GB or 64GB of internal storage, but while it includes a microSD slot, it’s not what you’re expecting.
Here’s what you can do with a microSD card in the Mirage Solo, and the best cards!
- What can you do with a microSD card in the Lenovo Mirage Solo?
- Best microSD cards
What can you do with a microSD card on the Lenovo Mirage Solo?

Most Android devices let you use a microSD card as adoptable storage to serve as permanent storage. Failing this, every other Android device lets you browse the contents of the microSD card, and apps like Google Play Music or Netflix let you download music or movies onto the SD card.
The Mirage Solo doesn’t let you do either of these. You can see your movie files with the built-in file browser, but trying to select them doesn’t actually do anything. Similarly, Plex, Netflix and other movie players don’t give you the option to save media to the SD card.
The only official use for a microSD card in the Mirage Solo is to playback footage that was filmed on Lenovo’s Mirage Camera. This is a 180-degree camera specifically for recording VR video.
Best microSD cards
Since you’ll be recording high-resolution video, you’ll need a card that has the fastest write speeds you can find. Here are our picks!
Samsung EVO Plus 256GB

If you need to spend money on a card for capturing videos, you may as well spend a bit more and get the biggest card you can. Samsung’s EVO Plus card offers 256GB of storage, and is fast enough to handle all the footage you take. The card is heat-, water- and cold resistant, so feel free to take your camera to extreme locations. There are other cards that offer more storage for less money, but they aren’t nearly as fast as this one.
The Samsung EVO Plus 256GB is available for about $90.
See at Amazon
Sandisk Extreme Pro 64GB

This card doesn’t offer as much storage, but it’s also not as expensive. Just like the previous choice, this card is safe to use in almost any harsh environment, so you can take your camera snowboarding or hiking without worry. Most importantly, it’s more than fast enough to handle your 180-degree footage. If you don’t mind offloading storage from the Mirage Camera regularly, give this card a look.
The SanDisk Extreme Pro 64GB is available for $38.
See at Amazon
Samsung EVO Select 128GB

Samsung has another card that is a nice middle option, depending on how much storage you’re looking at. The EVO Select is available in 32GB, 64GB, 128GB, and 256GB flavors, but the 256GB version is more expensive than the EVO Plus above. The lower tiers are a great value though: the 128GB version runs for $40. The card offers 100MB/s write speeds, more than fast enough to keep up with your VR camera. Like the other options, this card can withstand seawater and extreme temperatures, meaning your footage will survive wherever you can take the camera.
Samsung’s EVO Select 128GB card is available for $40.
See at Amazon
What say you?
Which card would you pick for the Lenovo Mirage Camera? Let us know down below!

