


This is Apple’s ‘Zombie Check’ Tool Used to Reduce iPhone Repair Fraud
Last week, The Information’s Wayne Ma reported about a sophisticated fraud scheme in which organized thieves would buy or steal iPhones, remove valuable components like the processor or logic board, swap in fake components, and return the purposefully-broken iPhones to receive replacements they could resell.
iPhone Serial Number Reader
Apple became aware of the increasing fraud in 2013 and, in the years since, it has managed to “dramatically reduce” the rate of iPhone-related repair fraud in its retail stores, particularly in China, according to the report.
One of Apple’s countermeasures was to develop diagnostic software that its retail employees could use to quickly detect fake parts in iPhones, the report said. To evade this tactic, however, many fraudsters started to intentionally disable the iPhones so they couldn’t be turned on and subjected to diagnostics.
Fraudsters even went as far as obtaining Apple customer records, including serial numbers, for iPhones that had already been sold in China. In some cases, the incorrect serial numbers would be etched on the back of the iPhones.
To combat the use of stolen serial numbers, The Information reported that Apple came up with a screening method known as “Zombie Check” internally that tested whether serial numbers for the broken iPhones held for inspection were also associated with iPhones still using Apple’s online services like iCloud.
According to an internal Apple document obtained by MacRumors, the tool was initially limited to China, but Apple began rolling it out to Apple Authorized Service Providers around the world in February 2018.
The aptly-named Serial Number Reader is a simple tool with a Lightning connector on one end and USB-A on the other. It is used to validate the serial number of an iPhone 6 or newer that will not power on by retrieving it directly from the logic board, although a source said it doesn’t always work.
To use the tool, a technician connects the end with the Lightning cable to the iPhone and the end with the USB cable to a Mac running macOS 10.8.5 or later. Then, the technician launches the companion Serial Number Reader app on the Mac and the iPhone’s serial number should appear in most cases.

The tool can retrieve serial numbers from iPhones that have been damaged in a variety of ways, including units with a non-functional display. Liquid damage is also no obstacle, so long as the liquid is no longer leaking out of the device.
Apple’s internal document states that “serial number validation ensures warranty and service eligibility associated with a serialized device is appropriately applied.” The document adds that “validation ensures Apple only offers warranty service on genuine Apple products,” thwarting fraudsters.
Apple’s efforts appear to be working. Apple’s annual Form 10-K indicates that, in 2017, Apple’s warranty expenses decreased to $4.32 billion from $4.66 billion a year earlier. The serial number tool, it would appear, is quite effective.
Discuss this article in our forums
Microsoft Testing Revamped Version of Cortana App for iOS
Microsoft is testing a version of its Cortana app for iOS and Android devices that features a major interface overhaul and new features, according to Windows Central.
The updated app, which is being tested by beta testers, features a user interface that’s focused on conversational experiences with Cortana, along with support for music and podcast suggestions, and a focus on setting reminders, timers, and meetings.
For those unfamiliar with Cortana, it is Microsoft’s personal assistant, available on Microsoft devices and other devices through iOS and Android apps. It is equivalent to Apple’s Siri, Samsung’s Bixby, and Google’s Google Assistant.
Full release notes for the new features in the current beta are below:
– An update to the UI enabling conversational experiences with Cortana and a new place to manage and set up your Cortana devices
– Listen to music and podcasts on the go. Just ask Cortana to play your favorite tunes and podcasts with Spotify, iHeartRadio, and TuneIn on your phone or through a paired Bluetooth device
– Stay organized and on task. Set reminders, timers and create meetings with your voice
– Join your next Skype or Teams meeting by simply asking Cortana. You can also manage your calendar or send a quick email by voice
Following the beta testing period for the app, the new features with the redesigned interface will roll out to the official Cortana for iOS app. Cortana for iOS can be downloaded from the App Store for free. [Direct Link]
Tags: Microsoft, Cortana
Discuss this article in our forums
Caviar Launches $6,000+ Custom iPhone XS With Built-In Mechanical Skeleton Watch
Caviar, a site known for creating extravagant, expensive replacement casings for Apple’s iPhone models, today announced the launch of its latest custom creation, an iPhone XS with a built-in skeleton watch.
The Grand Complications Skeleton collection, inspired by luxury watches, features iPhone XS and XS Max models in titanium, pink gold, and black and gold, all of which have mechanical watch components included right in the casing.

The front of the iPhone has been left untouched, but the back features a mechanical watch with an accurate Swiss watch mechanism complemented by intricate guilloche work and matching engravings.

According to Caviar, the watch built into the customized iPhones is wound manually through a crown that’s included on the right side of the casing.
“We’ve been keeping this development as a secret for a long time, that’s why now we’re especially happy to present it to your attention. We ourselves are fascinated by the idea of meeting of the heritage of the past and the achievements of the future in the body of one device. We got used to thinking that a smartphone is all we need today and this is our whole life. But in fact, our life is not limited by the technologies only. The passage of time, majestic and implacable is still worth watching by real hands. The watch is, if we may say so, the beginning of the progress, the mechanism, from which everything has begun. This is why a mechanical watch today is a real luxury.”
Caviar is limiting the Grand Complications Skeleton iPhones to 99 pieces in each colorway, with each iPhone numbered via an engraving on the side of the device.

More details on the new Grand Complications Skeleton collection can be found on Caviar’s website. The new iPhones are priced starting at $6,320 for a 64GB titanium iPhone XS model and go up to $8,080 for a black and gold iPhone XS Max with 512GB storage.

Caviar also sells a range of other customized luxury iPhones made from unique materials and with intricate designs.
Discuss this article in our forums
How to Request a Copy of Your Apple ID Account Data
Apple now allows its customers to download a copy of their personally identifiable data from Apple apps and services. This can include purchase or app usage history, Apple Music and Game Center statistics, marketing history, AppleCare support history, and any data stored on Apple servers, including the likes of calendars, photos, and documents.
This article outlines the steps you need to take to request a copy of your data from Apple. As of writing, the service is available to customers in the United States, Canada, Australia, New Zealand, the European Union, Iceland, Liechtenstein, Norway, and Switzerland. If you live in a country or region that’s not listed above, you can still contact Apple to request a copy of your data.
Apple promises to fulfill all data requests within seven days. Bear in mind that the size of the data download depends on the items that you choose to include (iCloud Photo Libraries can be several gigabytes, for example), but Apple will divide it into multiple files to make the download more manageable.
How to Request a Copy of Your Apple Account Data
Open a web browser on your Mac, PC, or iPad, and navigate to privacy.apple.com. (Note: this procedure won’t work on an iPhone).
Enter your Apple ID email and password, and authorize two-factor authentication on another device if prompted.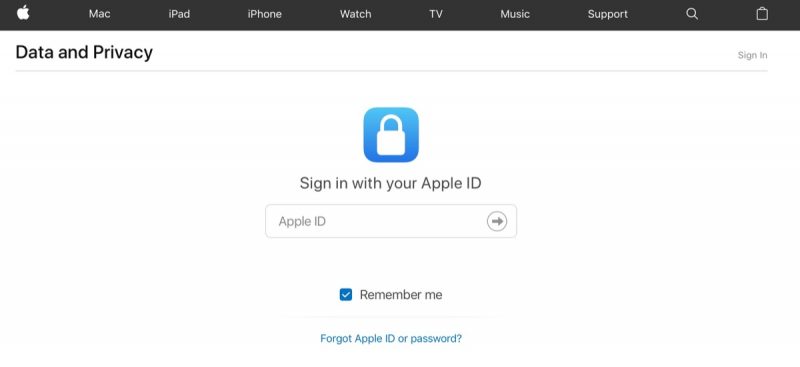
On the Apple ID & Privacy page, click Continue.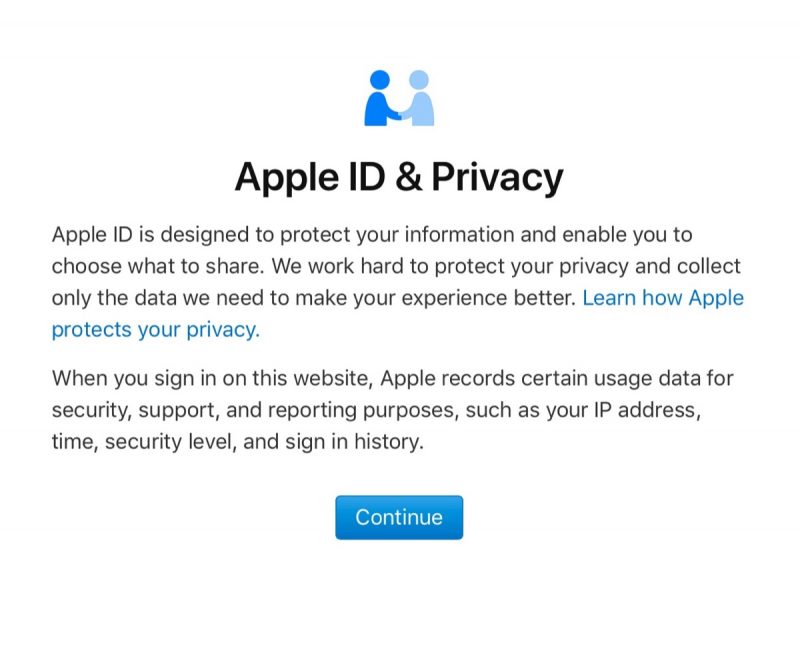
Under “Get a copy of your data”, click Get Started.
On the next page you’ll see a list of data categories. Click the selection box next to each category that you want include in your download. You can refine inclusions from certain categories by clicking Show more to reveal sub-categories of data, or click Select All to include all your information.
Click Continue.
Using the dropdown menu on the next page, choose a maximum file size that you want to download (1GB, 2GB, 5GB, 10GB, or 25GB). Apple divides the data into files of this size or smaller. You can review your selection below the dropdown.
Click Complete Request to confirm.
Apple will email you to let you know it is preparing your data, with a reminder that this process can take up to seven days. As a security measure, Apple uses this time to verify that the request was made by you.
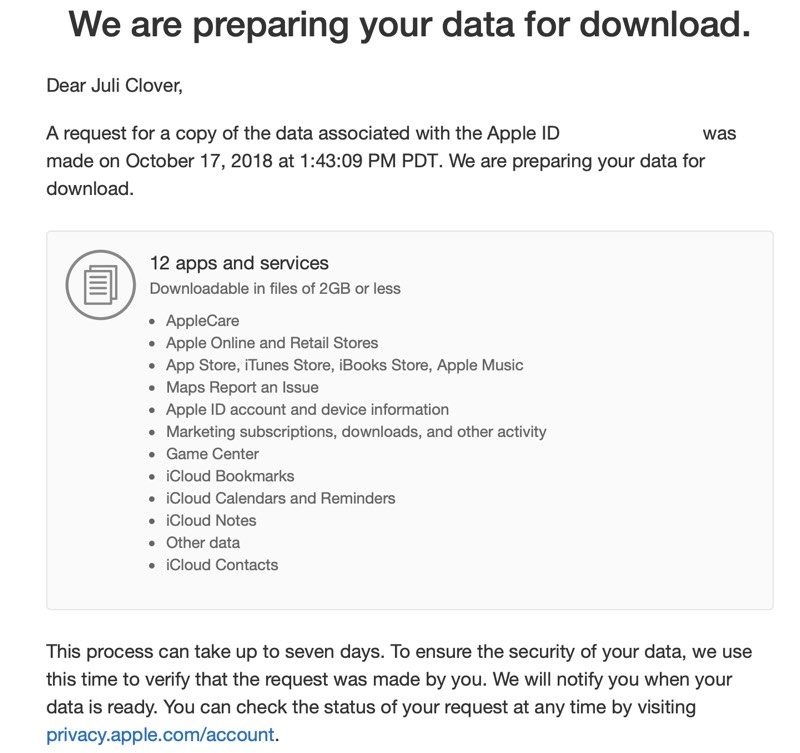
You can view and check check the status of your request at any time by visiting privacy.apple.com/account.
Tag: privacy
Discuss this article in our forums
Gear Up: Check out our favorite smart wallet options
Smart products are everywhere. Anything that we can add technology to, we usually end up doing. That ranges from everything like lights, fans, and security systems to garage doors, car chargers, and more.
Adding smart technology to otherwise dumb products can be a real game changer. No longer do we have to wonder if that shadowy figure in front of our door is a robber or sweet old grandma. Now we can unlock the front door of our home so we can get in even faster since its pouring down rain. Connected tech, in most instances, makes our lives easier.
But, there’s a different kind of tech being added to products too. It’s tech that keeps us from doing dumb things. You can see traces of this in Google’s new Android 9 Pie operating system. It includes the Digital Wellbeing app that alerts us to how much we’re actually on our phones. Smartwatches and fitness trackers can let us know where we’ve gone or how long we’ve been running, but also when we’re doing too much.
Did you know there’s tech that can keep you from losing your wallet too? If you’ve ever been lucky enough to lose your wallet or have it stolen, you know it can be a serious situation.
So, we went on a search for the best connected wallets. There isn’t a ton out there right now but we feel we’ve brought together three of the best options you can purchase right now.
Ekster Senate and Parliament
 Ekster Parliament
The first two wallets we’re taking a look at are both from Ekster, the Senate and Parliament. These two don’t look like traditional wallets, but that’s actually an advantage to some consumers. Sometimes you want something just a little bit different.
Both the Senate and Parliament are a little bit bigger than your standard wallet. While they aren’t as wide, they are taller to account for the card holder inside. This card holder can house up to six cards (three if you have raised print on the cards) or the Trackr, the little device that makes these wallets smart.
Read more: Monet review: All-in-one wallet, kickstand, and phone grip
Trackr is a third-party company that Ekster teamed up with for these wallets. The Trackr device is about the size of a business card and a few centimeters thick. If features a small window for solar recharging (one charge can last three months) and a small button.

Pressing this button interacts with the Trackr app you can download from the Play Store. If you’re ever missing your phone but have your wallet, a quick press of this button will ring your phone through the app. You can also ring your wallet through the app and set up alerts to tell you when you’ve walked out of range of your wallet. You can turn these off or tell the app to not alert you when connected to your home WiFi network.
This Trackr came in especially handy in a recent situation. I asked my brother to carry the wallet and give me his impressions of it. Due to some poor driving in front of him, he, unfortunately, rear-ended a truck and his phone went flying. He remembered that he could press the button to ring his phone and he found it wedged between seats. It saved the day.
 You can see the Trackr poking out of the rear card slot here.
The Trackr app has some other excellent features as well. Of course, you can use it to ring your wallet if you can’t find it. But, it also helps passively find other Trackr devices as well. As I was testing the Senate, I got an alert on my phone that I recently walked passed another Trackr-enabled product that had been lost. The app found the product and alerted its owner with an updated GPS location.


Back to the wallet itself, this is one of the softest leathers I’ve ever felt. I’m not a big leather person, but I never want to put this wallet down because it feels so nice. As you can see in some of the pictures, the brown is wearing rather nicely and should have a nice patina as it gets used more and more.

The biggest difference between the Senate and Parliament is the flap that allows you to store some extra cards. If you want to keep it minimal, you can grab the Senate and just throw your cards in the middle pop-up slot, which is RFID shielded. If you need a bit more, grab the Parliament.
Both wallets have the option for the cash strap that allows you to hold important papers or money. I don’t love having money exposed in this way, but it seems like the best option given the design of the wallets.

Overall, the Ekster Senate and Parliament are not only excellent smart wallets, but they’re also conversation starters. I’ve had multiple people ask me about them as I got out a card to pay. I told them what I’m about to tell you, they’re simply fantastic. Sure, you don’t need a smart wallet, but if you’re as forgetful as I am, I would definitely suggest picking one of these up for the outstanding Trackr support.
If you decide to pick up one of the wallets from Ekster’s site, they’ve provided a discount code for our readers. Just copy and paste androidguys-EKSTER to receive 15% off your order. You can also check out Ekster’s new Kickstarter campaign for its brand new wallet with voice activation tracking!
Ekster Senate purchase links: Ekster | Amazon
Ekster Parliament purchase links: Ekster | Amazon
Nomad Slim Wallet

If you’re looking for something that looks more like a standard wallet, the Nomad Slim Wallet might be for you. There are two big differences between the wallets from Nomad and Ekster; design and tracking.
As we said, the Nomad Slim Wallet looks like a regular wallet. It’s a bi-fold design that features card slots on both sides. One side houses the tracking card and one slot where I keep my license and insurance cards. The other side has four slots for your cards. I’ve found that these are big enough for one card, two if you have something small and laminated. On the back of the wallet is another slot big enough for one more card.
Read more: The world’s thinnest charger can fit in your wallet
The Nomad also uses different leather than the Ekster wallets. It uses Horween leather that doesn’t feel as soft and is pretty lightweight. Now, don’t take that as a negative because it isn’t. Sure, we love some soft leather, but I have zero doubt how well this wallet will stand up to abuse over time and how long it’ll last. It’s a quality product.

As for tracking, Nomad is teaming up with Tile for the Slim Wallet. Yep, that Tile. Tile has been one of the most popular tracking companies in recent years and makes trackers that you can stick in your bag, on your keyring, or pretty much anywhere else you can think of. This time, it’s stuck in a pocket inside the wallet and you can’t tell it is even there. While the Trackr on the Ekster wallets is tall and a little thick, the Tile tracker is much smaller and feels thinner.

There are some downsides to this though. While you can recharge the Trackr, you can’t with the Tile. Tile says the included tracking device has a year-long battery life and then you’ll need to buy a replacement. Luckily, you get a discount on your replacement.
Tile’s app is fantastic it. You get the features you’d expect like tracking, GPS location, and crowd location, as well as the ability to ring your phone from the tracker and vice versa. I love the layout and how easy it is the navigate. Everything feels intuitive.

Overall, I love the Nomad Slim Wallet. It is a fantastic intersection of classic style with modern technology. If you’re as forgetful as I am, you need a wallet with tracking because you’ll definitely leave it behind at some point. If you’re looking for something that looks traditional but offers fantastic features, the Nomad Slim Wallet is the one for you.
Nomad Slim Wallet purchase links: Nomad
Get certified with an HAI photography course!
Breaking into the photography industry can be overwhelming. Where do you start, and where do you find the time to get the required education? You need a comprehensive course that starts from the ground up, and you need to get certified once you’re finished with the course.
Learn the tricks and skills used by professional photographers! Learn more
Hollywood Art Institute has everything you’re looking for — this is a comprehensive photography course that starts with the basics and moves through everything you need to know to gain certification. This type of education, the kind needed for a lucrative career, is usually very pricey.
Right now at Android Central Digital Offers, we’re offering the Hollywood Art Institute photography course with certification for only $19. No, that’s not a typo. That’s a 99% discount from the regular price of about $2600. This course is almost free, and you’re getting everything you need for a career in photography.

In total, there are 22 separate modules that make up the course. Starting with the basics and moving to the techniques used by professionals, you’ll learn through video tutorials, articles, and ebooks, and will be able to test your knowledge with quizzes and flashcards. You will also have direct access to level 3-certified professional photographer tutors — no matter your question, they’ll have an answer.
This course, despite the 99% discount price of $19, even comes with full certification when you’ve completed all modules of the course. This is literally all you need to get started down a new career path. Access to the course remains open indefinitely, which means you can learn at your own pace.
Get lifetime access to 56 hours of content for just $19! Learn more
Have you always had a flair for photography, and now want to become a true, certified professional? With this course from the Hollywood Art Institute, you’ll be able to work around your schedule, and you won’t drown in tuition fees. This 99% discount won’t last forever! Get started today down the path of a new career.
Set yourself up for victory in Call of Duty’s new battle royale mode
Learn how to play the world’s favorite new Battle Royale game.
Call of Duty: Black Ops 4 has three fantastic multiplayer modes on tap. Blackout is the sole newcomer of that bunch, and we’d understand it if more than a few of you have more than a few questions. Read these tips and take what you learn into Blackout mode to see if you can survive as the last one standing.
$60 at Amazon
Blackout basics

As Call of Duty: Black Ops 4 doesn’t have much in the way of a tutorial for Blackout, let us help you. This mode is what we like to call Battle Royale.
The schtick is that there are up to 100 people dropping into a huge map, and their sole goal is to survive as the last person or team standing. That means others will be hostile in their attempts to make it to the end, making this a bloodbath from start to finish.
You’ll drop from a chopper and race to the ground to pick up your first gun, shooting anyone who threatens you and picking up better guns and more useful items on the way. Rival players aren’t the only ones gunning for you, though, with a safe zone that continues to collapse and force everyone inward until, eventually, there’s no more room to run.
You will die and fail, a lot. But don’t let that get you down. The only way to get better at Blackout is to continue playing it and trying to be a little bit better than you were the last time. That said, we have some tips that’ll give you a better fighting chance than if you were to go in blind.
Don’t use vehicles unless you absolutely have to
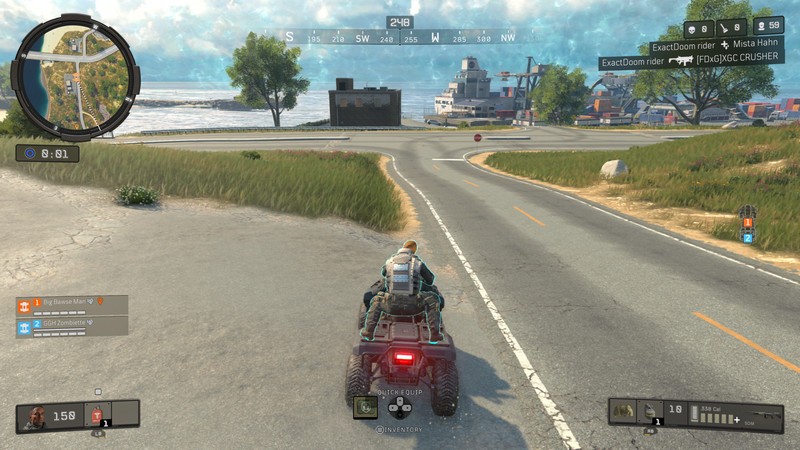
It isn’t often we get vehicles in a Call of Duty game, but there are a whopping four of them to use in Blackout. Land, air, and sea are all covered with a truck and ATV, helicopter, and boat providing your transportation options, respectively.
We understand it if you’d want to hop into these things and take them for a spin every chance you get, but we’d exercise caution with these things. Not only are they loud (which means you’ll be drawing the ire of any hostile bystanders), but they also leave you and your teammates pretty well exposed to gunfire, and the vehicles are also relatively weak to damage.
A fire team of even just 2 people can blow up a military truck with just dozens of rounds. Use the vehicles for desperate getaways or to escape the collapsing circle, but ditch them as soon as you can.
Learn how to land like a pro
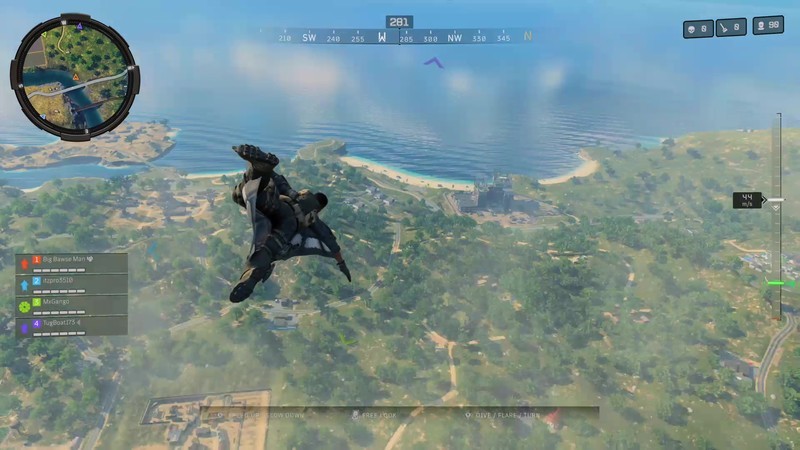
Blackout’s skydiving is some of the most forgiving you’ll find in a battle royale game. It’s smooth and fairly easy to land exactly where you want, so long as you aim your camera roughly at the location you intend to go.
But it can be tricky when you want to land somewhere a bit of ways away from the flight path. Thankfully, it’s pretty easy to reach any corner of the map if you employ the trusty “S-Drop” technique.
As you jump from the chopper, tilt your camera downward until your character hits a swan dive and the meter on the right reads 70 miles-per-hour or faster. Once it does, pull your camera back and level your character out.
Not only will you continue to fly at comparable speeds, but you’ll also be flying horizontally. Do this in a cycle and it’s possible to go cross-country without spending too much time rocking back and forth on a parachute.
Never go without armor
Don’t go anywhere without armor if you can help it. Level 1 armor will suffice, but level 2 armor will block enough body damage to buy you some time in a firefight. Level 3 armor adds even more protection with you gaining a helmet, though you’ll have to be lucky and find this thing in a supply drop or Mystery Box if you want one.
Stay out of the danger zone
The game will warn you about this an annoying amount of times, but it bears stressing anyway: stay out of the danger zone, at least while you’re still learning the game. You’ll find that the first circle starts hitting your health bar for 2 damage per second, and late game circles do far more. You’ll be fine if you have a pocket full of meds, but then you won’t have any of those for when they really count.
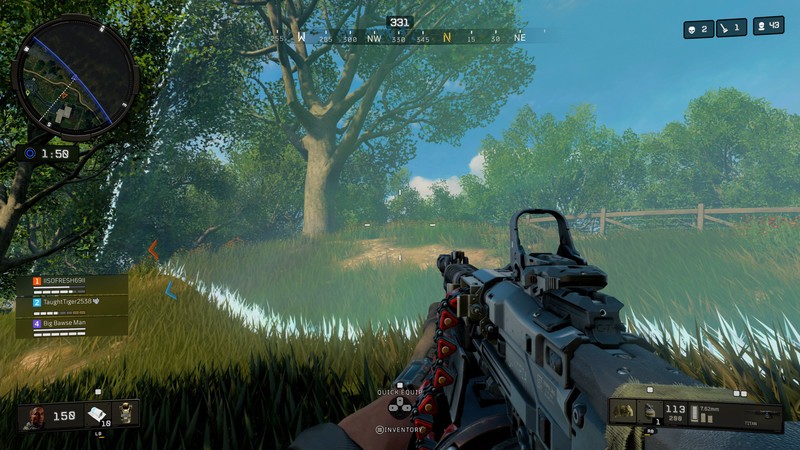
Aim for the head
Headshots are everything in Blackout, especially because the most widely available armor doesn’t offer any cranial protection. Go straight for the head during firefights, because you’ll do way more damage and drop your opponents faster than they can react to your gunfire.
Pick up trauma kits for extra health

Health items are actually plentiful in Blackout. You have bandages and medkits at your disposal, but nothing is better than the trauma kit. These things not only heal you to full form any state, they actually give you an extra 50 health to bring you up to a total of 200. That’s the only way to get that much health in the game, and if you’ve seen how fast the time-to-kill is, you’ll know that every little bit helps.
Use your wingsuit for quick getaways
If you ever find yourself trapped atop a structure, cliff, or even inside a helicopter and you’re looking for a safe way down, just jump off. No, we’re not trying to nominate you for the Darwin Award. You can do this because it’s possible to redeploy your wingsuit at any point in the match. Just jump off like you normally would, only instead of tapping the A button, you hold it. How’s that for a dramatic exit?
Shoot, then look, THEN loot
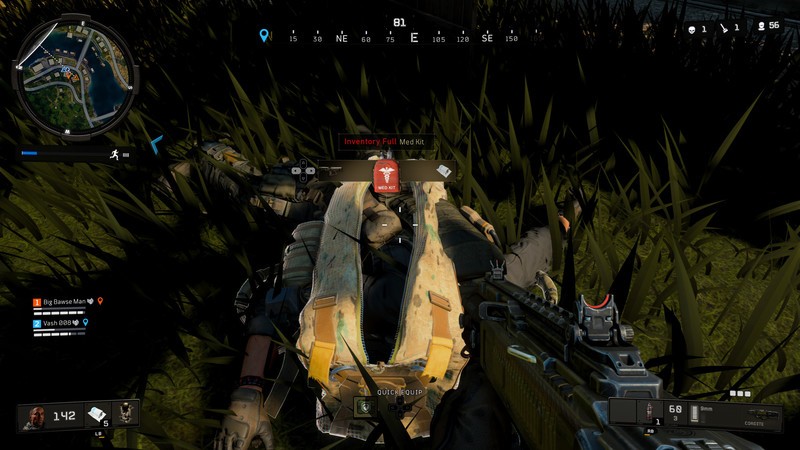
You should always exercise caution when looting in any Battle Royale game, as all the gear in the world won’t mean anything if you’re dead. But that’s doubly true in Blackout because the game actively makes looting a dangerous affair.
You have to actually open enemy bags and scroll through items one by one to see what’s on them. Swapping attachments from one gun to the other requires opening your inventory screen which blocks your vision and makes you unable to move. And you have to actually look down at items to pick them up if they’re sitting on the floor instead of quickly opening a menu and looting an entire building in seconds.
Oh, and if you’re looting out in the open, go prone. Remember, you can’t move, so if anyone sees you while your head is buried in a bag you are as good as dead.
Horde all the ammo
Unlike some other games, ammo does not count toward your hard inventory space in Blackout. Ammo actually has its own place in your bag, allowing you to store massive amounts of ammunition of all types.
As such, there’s no good reason not to pick it all up. Take what you can in the early going just in case you decide to switch guns later on, and if you’re in a squad then your mates will thank you later for having the exact type of ammo they’re looking for.
Stop bombs dead in their tracks
Blackout uniquely offers a trophy system as one of the gadgets you can find lying around. These things can be lifesavers. Camping in a house? Put one on the wall to protect yourself from enemies who might have the sense to chuck a grenade in there.
You can get even cheekier with the thing and attach it to your vehicle. This effectively shields you from any incoming projectiles like, say, a massive rocket. Save some inventory space to store one of these and use it at the right moments to save yourself from unsuspected objects flying your way.
Fix Blackout’s awful looting button
Annoyingly enough, Blackout’s default control scheme has you holding down the X button to pick up loot. Thankfully, Treyarch added an option to change the looting mechanism to a tap mechanic instead. This will make it much more natural and quick to pick items up.
There is a downside to this option, however: if you need to reload while you’re near items, it’ll favor picking up the item over the reload. This can be a deadly downside in a lengthy firefight, so only exercise this option if you’re comfortable with the risk.
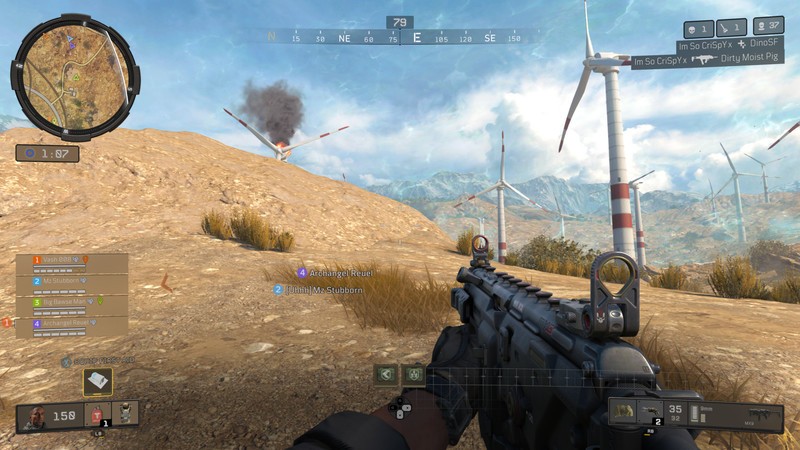
Grab a gift from the sky

Seeing an airplane in other Battle Royale games is a common event, but it’s rare you’ll benefit from it unless you’re just this unkillable specimen of a gamer. Instead of chasing down supply drops that have surely either been looted or is being watched by snipers by the time you get there, try to knock one out of the sky. It’s possible if you’ve found the Hellion rocket launcher, so next time you thought you saw a bird, a plane, or some other strange flying object over your head, let her rip.
Use your items without skipping a beat
As dangerous as it is to go into your inventory, you should know that you don’t have to enter that menu to use gadgets, throwables, consumables, and perks. Simply press up on the d-pad and scroll left or right to access all these items on the fly. Press X to equip your preferred medical equipment, gadgets, and throwables, and hold X when hovered over a perk to activate it. You could even do all of this while in full sprint.
You can run and heal at the same time
Building on the previous tip, let us be perfectly clear that you can use and activate any item in your d-pad menu while moving, including healing items. This means it’ll be much easier to heal while trying to escape the danger zone or in the middle of an intense firefight. Keep moving and don’t stop healing!
Don’t overindulge on perks
Yes, Blackout has perks, and you’ll want to use them as much as you can. But don’t get too crazy picking all of them up and activating them, though. Not only does each perk take up one whole inventory slot, but that inventory slot stays filled throughout the entirety of its duration when activated.
So don’t overindulge. Pick up only what you need, and activate them when it makes the most sense. Some of the perks are highly situational. You won’t need Looter — which lets you see loot through walls — if you’re in the late game and out in the desert, while those who aren’t sniping can ditch the Iron Lungs perk which steadies your aim through a sniper scope (and also lets you hold your breath underwater longer, though that part of it isn’t quite as useful). It’s up to you to decide which scenarios call for which perks and when to pop them, so figure out your preferred playstyle and plan accordingly.
Find stronger weapons (and zombies) at the Mystery Box

Look in the sky and look for a beam of light erecting toward it: there are zombies there, but more importantly, there’s also guaranteed to be a Mystery Box. This little relic from the Zombies mode in Call of Duty: Black Ops 4 will grant you some decent weapons, and if you’re lucky you’ll even find crazy stuff like a ray gun.
The catch is that you’ll need to kill a horde of zombies in that area before the box can open, an act which not only consumes ammo but also makes a ton of noise. It can be worth the risk, though. Grab a cymbal monkey to attract the zombies and blow it up once they’ve huddled around it to make the killings a little bit easier. Snag the weapon and the box will be on its way to another random location.
And if you’re beyond the first few collapses of the safe zone, don’t even think about it. The zombies get stronger the longer the game goes, and you don’t want to be messing around with them when more deadly foes are sure to be right around the corner.
PS: There’s a chance for zombies to drop classic World War 2 weapons, so be on the lookout for those if you want some throwback fun.
Create your own rolling early detection system

This last little trick is worth trying for the cool factor alone, but it’s also damned helpful in a game where information is key. If you find an RC car, take it without hesitation. You can roll it up a hill and around a corner to scope out an area without putting yourself in harm’s way. It’ll be just like Home Alone, only without the terribly neglective parents and dirtbag criminals looking to capture the world’s cutest boy.
Now, if you are really lucky and also come across a sensor dart, you can attach the dart to the RC car and have yourself a rolling enemy detection system that’ll expose anyone in and around the thing. You can also do the same thing to an actual vehicle, though if you’ve been paying attention to now you’ll know that we wouldn’t advise using one of those for too long.
Don’t give up!

Most importantly, don’t let your first few or 10 or 100 games get you down. It’s tough to win a battle royale, and even the best players will eventually fall short of the mark. Just remember that Blackout is all about having fun, going as far as you can, and learning from each game you play,
So, our final tip to you is to shake those bad feelings off you’ll inevitably get after a loss and hop right into the next one. The fun of it all is that no two games are quite the same, so you never know what could end up happening in your next session. Have fun!
PlayStation 4
- PS4 vs. PS4 Slim vs. PS4 Pro: Which should you buy?
- PlayStation VR Review
- Playing PS4 games through your phone is awesome
Amazon
Panasonic RP-HD605N Headphones review: The Bose QC35’s cheaper cousin
Panasonic’s entry into noise-canceling headphones is surprisingly great.

If you own a pair of noise-canceling headphones, there’s a really good chance that they’re made by either Sony or Bose. These two companies have dominated this market with products like the WH1000XM3 and QC35 II, and in an attempt to undercut these two giants, Panasonic decided to enter the ring with its more affordable RP-HD605N headphones.
Panasonic’s goal with the RP-HD605N is to deliver a pair of high-quality wireless headphones that look good and sound great for less money than what you’d pay on a competing pair from either Bose or Sony.
Believe it or not, Panasonic actually seems to have achieved that goal — by quite a lot, too.
A solid choice
Panasonic RP-HD605N

$222 – $299 at Amazon
A great, cheaper alternative to the Bose QC35.
Panasonic isn’t the first name that comes to mind when you think of noise-canceling headphones, but after you use the RP-HD605N, that’ll soon change. These puppies offer great sound, a solid design, and more for at least $50 less than what Bose and Sony have to offer.
Pros
- Really great sound
- Up to 20 hours of batter per charge
- Noise canceling works quite well
- Fun passthrough feature
Cons
- Charges via microUSB
- The Bose QC35 II and Sony WH1000XM3 are just $50 more

Panasonic RP-HD605N What I like
Going into this review, I honestly wasn’t expecting too much out of the RP-HD605N. Panasonic’s not really well-known for great, premium headphones, but after spending some time with the RP-HD605N, I’m thrilled to say that they exceeded my expectations.
In regards to the design and fit, the Panasonic RP-HD605N are a lot sleeker than the name would suggest. There’s very minimalistic Panasonic branding on both earcups, MemoryFoam cushions around the speakers, and a big, cushy leather headband up top.
Adjusting the length of the headphones is as easy as pulling down on the speaker units, and when it comes time to turn your music off, you can easily swivel the headphones up into themselves for compact storage in the included carrying case.
Wearing the RP-HD605N, they felt a bit tighter on my head compared to the Bose QC35s. However, after playing around with the length and wearing them for a couple of days, I ended up really liking how they feel. The leather surrounding the earcups and headband does a great job at allowing you to listen for hours on end. The right speaker offers easy controls for your volume, noise canceling, and power.
As for listening to music on the RP-HD605N, this is another area that caught me off guard. Boy, do these things sound good!
Sound quality and noise cancelation is right up there with Bose and Sony.
I find that the sound on the QC35 II is a bit more balanced and accurate, but the RP-HD605N sound mighty nice. Bass is plenty strong (if a tad too much at times), the volume is plenty loud, and everything from podcasts to Trench just sounds awesome.
When it comes to the noise cancelation, Panasonic gives you three different stages/levels to choose from to help you find the perfect fit. Although not quite as impressive as what Bose and Sony have achieved, the noise canceling here still works darn well and isn’t anything to complain about in the slightest.
Similar to some Sony headphones, the RP-HD605N come with a feature called Ambient Sound Enhancer that allows you to put your hand over the right speaker housing to temporarily allow ambient noise to pass through the headphones so you can hear what’s going on. You need to apply a small amount of force in order for this to work, but when it does, it’s almost like magic and something that could really come in handy if you want to talk to someone quickly without having to take your headphones off.

Panasonic RP-HD605N What I don’t like
What don’t I like about the Panasonic RP-HD605N? Admittedly, not much.
I’ve said it before and I’ll say it again — premium headphones in 2018 should absolutely use USB-C for charging instead of microUSB. The Bose QC35 II don’t do this and neither do the Panasonic RP-HD605N.
This is far from a dealbreaker, but it is annoying to have to once again make sure you’ve got a microUSB cable when most of our other gadgets have already adopted the newer USB-C standard.

Should you buy the Panasonic RP-HD605N? Sure!
Overall, I’m quite impressed with what Panasonic’s cranked out here. The RP-HD605N sounds like the unsexiest pair of headphones you could imagine, but in real world use, they’re surprisingly comparable to the Bose QC35 II and Sony WH1000XM3.
The RP-HD605N are a good buy at the retail price of $299, and for some people that savings of $50 over Bose and Sony’s options is a big deal. If you can afford to spend the extra money, however, you will be able to get headphones that offer a better overall experience.
At the time of publishing this review, the black variant of the RP-HD605N are going for just $222 on Amazon. I’d argue that Bose and Sony’s latest headphones offer $50 more in their fit, finish, and features, but definitely not almost $130 more.
4
out of 5
The Panasonic RP-HD605N are worth looking into at their normal pricing, but if you can find a deal like the one going on now, you’d be a fool to not scoop them up.
See at Amazon
Nest Secure vs. Vivint home security: Which should you buy?
We’re a virtual company made up of tech experts from across the globe. We work from home and need to keep our belongings, both personal and work-related safe. We care about home security because we have to care about it.
Nest Secure
DIY and advanced

$399 at Best Buy
Pros
- No-tool installation.
- Tight Nest and Google Assistant integration.
- Modular.
- Nest Secure is optional.
- “Off-the-shelf” components.
Cons
- Initial expense.
- Basic package is bare-bones.
The Nest Secure package is one of the best DIY home security solutions you’ll find. It’s easy to install without drilling holes and easy to setup. You’ll probably have to buy more pieces and will still end up with a monthly fee, though.
Vivint home security
Professional option

Call 855-668-7885 for quote
Pros
- Customized and complete package.
- Professional installation and monitoring.
- Smart integration and mobile apps.
Cons
- Drilling holes is semi-permanent.
- Contract required.
Vivint home security is a professionally installed smart home security system. You’ll be quoted a monthly price that includes professional monitoring, but it requires a lenghtly service contract.
Do you DIY?

Nest Secure and Vivint home security both are able to monitor and protect your home the way you want it monitored, but the journey there is completely different.
Nest Secure is a modular DIY system that you can install yourself without any tools (it’s perfect for renters) and add any cameras or extra sensors as you need them. Vivnet home security, on the other hand, is a professionally installed and monitored service that’s part of Vivnet SmartHome. The installation is done at your convienence and is free, but it’s also semi-permenant like any good professionally installed system will be.
| Indoor and outdoor components | Yes | Yes |
| Mobile access | Yes | Yes |
| Smart home integration | Yes | Yes |
| Warranty | Two years | Lifetime |
| Installation | DIY | Professional |
| Monthly service plan | Optional | Required (3 – 5 years) |
The big difference between Nest Secure and Vivint is the buying process. You’ll find that most users of both products are very happy with them and once up and running they each work well in your smart home. But like reaching Nirvana, the journey there is the important part.
Nest Secure comes as an expensive base package with a Nest Guard, Nest Tags, and two Nest Detect sensors. While this is a pretty bare-bones system, you can add cameras, more sensors, range extenders, even smart camera-equipped doorbells as needed at any time. The base station also acts as a siren, and a monthly subscription to Nest Aware, a professional monitoring service through Brinks, is entirely optional.
Vivint doesn’t offer any DIY options. You call the company and speak with a specialist to get a security system that’s exactly what you want and need, then schedule a convienent time to have a professional come install it. The initial cost can vary wildly, but the company’s 0% financing option can help. You are required to have a monthly service plan which starts at $40 per month. The length of this contract runs from 3 to 5 years, depending on your pricing.
When everything is said and done, you’ll have a smart (Nest Secure works with Nest and Google Assistant while Vivint works with Google Assistant and Amazon Alexa) home system that works exactly the way you like. That’s the important part. It all depends on how you want to get to that state.
If you’re renting, Vivint probably isn’t going to be an option. Technically the pieces can be removed and the system reinstalled in another place (which is not advised by the company or any reputable contractor I could find) but then you’re left with holes to patch and walls to paint.
If you own your home and plan to stay there forever, decide if you want the fun — and frustration — that comes with a DIY system. Once you’re done buying all the essentials to round out a basic Nest Secure package things will get very pricey, and it’s our opinion that a monthly Nest Aware subscription is almost a must-have with a Nest Secure. But you’re not signing a contract to do so, and that matters.
Nest Secure
DIY and advanced
$399 at Best Buy
Do it your way, yourself
Nest Secure offers the potential to be an outstanding home security system that integrates into any smart home. You’ll just have to figure out what you need and install it yourself.
Vivint home security
Professional option
Call 855-668-7885 for quote
The pro option
Vivint home security is a custom, professionally installed home security system built with your needs in mind. You will need to sign a multi-year contract for service with the company, though.
