


Take a trip to Barcelona in this week’s comments thread
What are you up to this weekend?
Our bosses do everything they can so we have weekends off around here. I love them for it, even though I’m that one guy who doesn’t mind “working” Saturday and Sunday in exchange for time off throughout the week. Having Monday be your Friday is pretty awesome.
All that goes out the window whenever there is a tech “thing” going on somewhere and we have to be there to cover it. This weekend that means Mobile World Congress in beautiful Barcelona, and our own Daniel Bader, Andrew Martonik, and Alex Dobie are there, congressing and stuff. “Stuff” meaning trying to find enough time to see what they need to see and talk to the people they need to talk to. I do not envy them, even if that means a missed opportunity to visit Spain.

I’ll let you in on a secret; one people who travel for work already know. Traveling on the job stops being fun after the first time you get to do it. Seeing people you know and don’t get to talk to very often is nice, but going somewhere like Barcelona or Berlin or San Francisco and spending every waking minute working kind of makes it suck. And you miss sleeping in your own bed and using your own shower and drinking your own milk right from the carton in the middle of the night.
Tech writers get to share all the cool things, but the exhausting parts are rarely mentioned. So let’s raise a glass to Daniel, Andrew, Alex and all the rest of the road warriors who live out of a suitcase and have no idea where they will be sleeping next Wednesday. Cheers, and thanks for doing it.
So that’s what the Android Central staff is up to this weekend — either being at MWC 2018 and covering all the stuff or being at home helping to cover all the stuff. What are you up to this weekend? And if you’re traveling for business or pleasure, share a picture with us!
Pay what you want for the Absolute Python Bundle!
Python is one of the most popular programming languages out there thanks to a fast edit-test-debug cycle and wide versatility. Jumping into Python from a beginner’s standpoint isn’t exactly easy, as there are many routes you can take. The training required to become a Python expert is also generally quite expensive.
What if there was a bundle of courses that included teaching for beginners as well as advanced users? What if, instead of paying more than $500, you could essentially pay what you want and have access to the bundle for life?
Right now, that’s exactly what Android Central Digital Offers has to offer. Right now, you can pay what you want for the Absolute Python Bundle. Instead of paying the regular price of $559, you’ll pay what you want and get one course, or beat the average price (currently under $9) and get all five courses in this bundle!

Included in this bundle are hundreds of lectures and exercises designed to help you understand Python and improve your career prospects. The five available courses are:
- The Complete Python Programming Boot Camp: Beginner to Advanced*
- Python for Programmers
- Learn Python with 70+ Exercises
- Advanced Machine Learning in Python With TensorFlow
- Selenium WebDriver With Python 3.x: Novice to Ninja
Even if you’re a complete beginner to Python, this bundle should have what you need to teach you the ropes. Given how low the average price is right now, there’s no better time to buy! Don’t wait too long; the longer you wait the higher that average price is likely to go!
See at Android Central Digital Offers
Watch the Samsung Galaxy S9 event live from MWC 2018 — Feb 25 at 12:00 ET!
Get ready to see Samsung’s latest Galaxy 🌌.

We’re all hyped out. It’s finally time for the Galaxy S9 and S9+ to be announced. Making a triumphant return to MWC, Samsung is ready to launch its new flagship phones at yet another Unpacked event. The tagline this time around is “The camera. Reimagined.” and we can expect a properly big show.
It all gets going February 25 at 6:00 p.m. CET in Barcelona, which is 12:00 p.m. ET and 9:00 a.m. PT. You can watch it live right here — we’ll have a live stream embedded as soon as it’s available. Of course, the Android Central crew will be on the ground at the event as well, and you can see all of our coverage throughout the event and after!
Samsung Galaxy S9: everything you need to know!
If you can’t pull up and watch on your computer, you can follow along via the Samsung Unpacked Android app on your phone or on Samsung’s Facebook page. Samsung’s website will also have an exclusive 360-degree experience available if you want something a bit more involved.
Samsung Galaxy S9 and S9+
- Latest Galaxy S9 rumors and info!
- Samsung Galaxy S9 launch event set for Feb 25: ‘The camera. Reimagined.’
- The Galaxy A8+ gives us an early look at Galaxy S9 design cues
- Do you plan on getting the Samsung Galaxy S9?
- Join our Galaxy S9 forums
Alcatel makes new 5, 3 and 1 series phones official, topping out at €229 and focusing on value
It’s all about features for the money.

Alcatel gave us an early look at its new range of phones back at CES — comprised of an Alcatel 5 at the high end, plus the Alcatel 3 series and Alcatel 1 series below, all being pitched as providing great value under €250.
Now at MWC 2018, we have some actual pricing and availability details for us to go along with our initial impressions of the group.
The Alcatel 5 is the main device that may get a few people interested in this 2018 lineup, though now in the same ways that made the Alcatel Idol 3 and Idol 4 interesting. Alcatel is going increasingly budget-focused with the 5, setting the price at just €229.
Even at that price you’re getting a brushed metal body, 5.7-inch 18:9 aspect ratio display, USB-C and dual front-facing cameras. Also somewhat surprising at this price point is the inclusion of both a rear-mounted fingerprint sensor and a new face unlock mode.
| Operating system | Android 7.1 Nougat |
| Display | 5.7-inch IPS, 1440 x 720 (18:9) |
| Processor | MT6750 octa-core 1.5GHz |
| Storage | 16/32GB (depending on model) |
| Expandable | MicroSD up to 32GB |
| RAM | 2/3GB (depending on model) |
| Rear camera | 12MP, 1.25-micron, f/2.2, dual-tone flash, HDR |
| Front camera 1 | 13MP, 1.4-micron, f/2 |
| Front camera 2 | 5MP, 120-degree lens |
| Connectivity | LTE Cat 4, 802.11n Wi-Fi, Bluetooth 4.2, NFC, GPS |
| Battery | 3000mAh |
| Charging | USB-C |
| Security | Fingerprint sensor, Face Key unlock |
| Dimensions | 152.3 x 71.1 x 8.4 mm, 144g |
The Alcatel 3 isn’t just one phone … but rather three: there’s the Alcatel 3V, 3X and 3, all with slightly different combinations of features and at slightly different prices. These all fall under €200, but are designed to offer a higher-end look with an 18:9 display and key features like fingerprint sensors. The 3V has a 6-inch 2160×1080 screen, the 3X has a 5.7-inch 1440×720 screen and the bottom-end 3 comes with a 5.5-inch 1440×720 screen. (A little confusing, I know.)
Both the 3V and 3X have dual rear cameras, with the secondary lens providing wide-angle shots. All three have extremely basic plastic hardware design, and you’ll be stuck with a Micro-USB port for charging. Pricing is all extremely close together on these models, but they’re all launching in “select markets” so it wouldn’t be surprising to see little overlap between the models. The Alcatel 3V will set you back just €189, with the 3X at €179 and the 3 at €149.
| Operating system | Android Oreo | Android Nougat | Android Oreo |
| Display | 6-inch, 2160×1080 (18:9) | 5.7-inch, 1440×720 (18:9) | 5.5-inch, 1440×720 (18:9) |
| Processor | MT8735A quad-core 1.45GHz | MT6739 quad-core 1.28GHz | MT6739 quad-core 1.28GHz |
| Storage | 16/32GB | 16/32GB | 16GB |
| Expandable | MicroSD up to 128GB | MicroSD up to 128GB | MicroSD up to 128GB |
| RAM | 2GB | 2/3GB | 2GB |
| Rear camera 1 | 12MP, 1.25-micron, f/2.2, PDAF, LED flash | 13MP, 1.12-micron, f/2 | 13MP, 1.12-micron, f/2, PDAF, LED flash |
| Rear camera 2 | 2MP, 1.25-micron, f/2.4 | 5MP, 1.12-micron, f/2.2, 120-degree lens | n/a |
| Front camera | 5MP, LED flash | 5MP, LED flash | 5MP, LED flash |
| Connectivity | LTE, 802.11n Wi-FiBluetooth 4.2, GPS, NFC | LTE, 802.11n Wi-FiBluetooth 4.2, GPS, NFC | LTE, 802.11n Wi-FiBluetooth 4.2, GPS, NFC |
| Battery | 3000mAh | 3000mAh | 3000mAh |
| Charging | Micro-USB | Micro-USB | Micro-USB |
| Security | Fingerprint sensorFace Key unlock | Fingerprint sensorFace Key unlock | Fingerprint sensorFace Key unlock |
| Dimensions | 162 x 76 x 8.05 mm155g | 153.5 x 71.6 x 8.5mm144g | 147.1 x 68.8 x 8.5mm145g |
While technically the “Alcatel 1 series,” there’s just one model in the series right now: the Alcatel 1X. This isn’t really the type of phone we normally get excited about for ourselves, but is interesting from the perspective that it’s the company’s first Android Go (or “Go edition”) phone running Google’s lightweight version of Android Oreo. For just €99, or €109 in a dual-SIM variant, the Alcatel 1X gives you a solid build with a neat soft suede-like back and unexpected features like a fingerprint sensor and a more modern looking 18:9 display.
Alcatel isn’t known for having great software or keeping its phones up to date with the latest releases, and having Android Go on board here should help with both of those aspects.
| Operating system | Android 8.1 Oreo (Go edition) |
| Display | 5.3-inch, 960×480 (18:9) |
| Processor | MT6739 quad-core 1.28GHz |
| Storage | 16GB |
| Expandable | MicroSD up to 32GB |
| RAM | 1/2GB (depending on model) |
| Rear camera | 8MP or 13MP (depending on model)1.12-micron, 1/4″ sensor, f/2.0, auto focus1080p 30 video |
| Front camera | 5MP, fixed focus, flash, 720p 30 video |
| Connectivity | LTE Cat 4, 802.11n Wi-Fi, Bluetooth 4.2, NFC, GPS |
| Battery | 2460mAh |
| Charging | Micro-USB |
| Security | Fingerprint sensor, Face Key unlock |
| Dimensions | 147.5 x 70.6 x 9.1 mm, 151g |
Alcatel doesn’t have specific country availability for each of the models just yet, but my best guess would be that only the Alcatel 5 will make its way to North America — the rest will be slated for more emerging markets where prices this low are all but required. The Alcatel 5 is already hitting some markets at the end of February, while the 3 series is coming in March and the 1 series is waiting until April.
We’re live from MWC 2018 in Barcelona!
Spring season is right around the corner, and that means it’s time for Mobile World Congress in Barcelona, the world’s biggest phone show. This year, you can expect to be introduced to Samsung’s next flagship smartphone, the Galaxy S9, as well as a slew of other handsets from big-name companies like BlackBerry and Nokia. Yes, you know you love BlackBerry and Nokia. Of course, we’ll likely also come across a bunch of other tech products, such as wearables and others things that could be revealed at the show — Facebook has a press conference, for instance. We’re on the ground for the next week, which means you need to keep your eyes peeled to the site so you won’t miss a thing from MWC 2018.
Catch up on the latest news from MWC 2018 right here.
Ask Engadget: Is a 4K monitor the best choice for my desk?
The support shared between readers in the comments section is one of the things we love most about the Engadget community. Over the years, we’ve known you to offer sage advice on everything from Chromecasts and cameras to drones and smartphones. In fact, our community’s knowledge and insights are a reason why many of you participate in the comments.
We truly value the time and detail you all spend in responding to questions from your fellow tech-obsessed commenters, which is why we’ve decided to bring back the much-missed “Ask Engadget” column. This week’s question comes from a reader who is interested in a 4K monitor purchase but unsure of where to start. Weigh in with your advice in the comments — and feel free to send your own questions along to ask@engadget.com!
I’m considering buying a budget (sub-$500) 4K monitor for desk work. I am not concerned about color quality, refresh rate or any flashy gaming features. I just want a 4K monitor between 32 and 40 inches to avoid a multiple monitor computer setup. I’m aware that I won’t find top-tier brands in that price range, but do you otherwise have any advice? Are there brands I should absolutely avoid? I know in this price range a lot of brands are essentially the same with a different label. And what about manufacturers’ warranties?

Devindra Hardawar
Senior Editor
You’re in luck, dear reader. 4K monitors are a lot cheaper now, compared to just a year or two ago. You can find plenty of great 27-inch options in your price range, like the LG 27UD68P-B and Dell P2715Q.
Things get a bit trickier when you bump up to 32 inches, though. On Newegg.com, there are a few larger 4K models from Acer and LG on sale for under $500, but you’ll have to act quickly to lock in those prices. Personally, I’d trust an LG panel more than Acer’s. I’d also suggest you avoid no-name brands, which typically don’t have great build quality or support.
But, you might also want to ask yourself if you actually need a 4K monitor. They’re great if you want that extra resolution for photo or video editing, but they don’t exactly replicate a multi-monitor setup. And while Windows 10 does a much better job of supporting higher resolutions than before, its 4K handling is still a bit wonky. You’ll likely have to scale up the contents of your screen to make text and apps legible. Depending on the size of your screen, native 4K rendering can sometimes make everything too small to read.
Another option: Consider an ultra-wide monitor. These models offer a 21:9 aspect ratio, compared to the 16:9 on normal widescreen monitors. They make it seem like you have two monitors side-by-side, except you don’t have to worry about annoying bezels separating them. I’ve found ultra-wide monitors to be far more useful for desktop computing than 4K models. Being able to have multiple full-sized windows on my screen at once, or use extra-wide windows for audio and video editing, feels like a genuine upgrade over traditional monitors. They also make gaming more immersive, since they offer a wider field of view.
The only downside to ultra-wide monitors is price. Typically, you’d have to spend around $650 to get a 34-inch screen with a 3,440 by 1,440 resolution. There are cheaper and smaller models out there, typically with a lower 2,560 by 1,080 resolution, but I wouldn’t recommend those since they have less workable screen space. If you really want a single screen to give you the benefits of a multi-monitor setup, an ultra-wide monitor is the way to go.
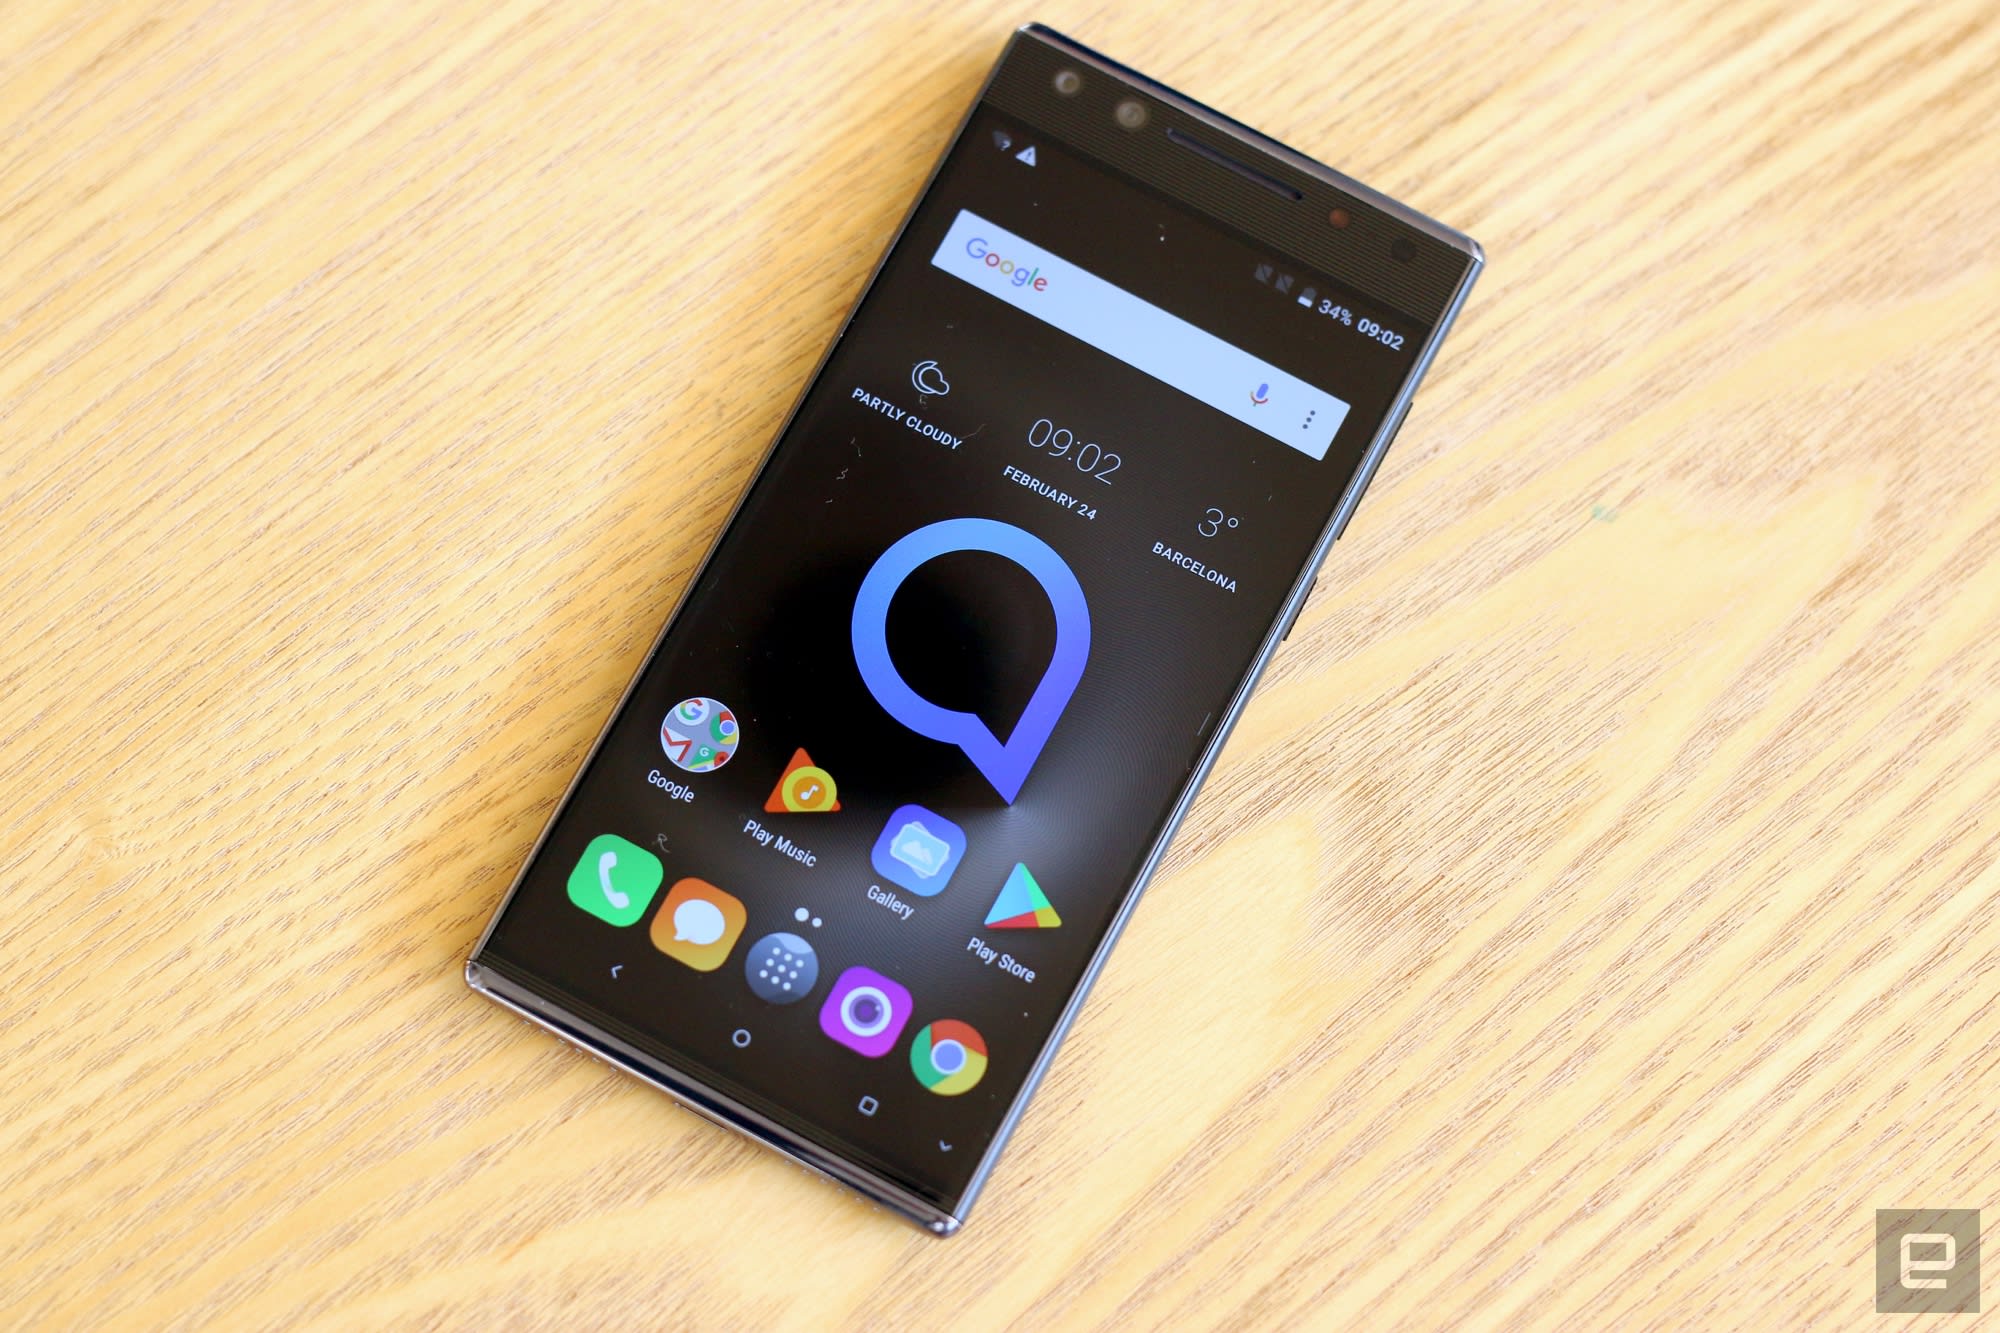
Alcatel crams flagship features into its affordable smartphones
When I first saw its 2018 phone lineup, Alcatel was clear: its plan for this year was to make premium smartphone features available for much less than typical flagship prices. In this case, Alcatel means giving 18:9 screens, fingerprint sensors, and elaborate camera setups to as many people as possible. Based on some hands-on time here in Barcelona, Alcatel seems to have done a fine job democratizing these features; the real question is how they’ll stand up to the rest of the impressive low-cost devices we expect to see as the show goes on.
Anyway, let’s start with the Alcatel 5 — it’s easily the most interesting of the brand’s lineup, if only because of its unusual design. The bezels around the sides and bottom of its 5.7-inch display are barely there, but there’s lots of space between the top of the phone and the top of the screen. (If anyone remembers Sharp’s AQUOS Crystal phones, it’s like one of those upside-down.)
That extra space would be completely unsightly had Alcatel not put that room to good use. There’s a clever dual camera system in place that pairs a 13-megapixel primary camera with a 5MP sensor for 120-degree wide-angle selfies. It’s probably no surprise that photos taken with either camera were passable at best, but the phone is at least smart enough to automatically switch to the wide-angle mode when it detects more than two faces in the frame.
Chris Velazco/Engadget
While the single 12-megapixel camera around back is more traditional, it also produced much better photos. Most sample photos were decently bright and punchy — a shot I took of a croissant bathed in light made me a little too happy — but it sometimes struggled with accurate exposures and limited dynamic range. A so-called “social” mode injects a little levity into an otherwise straightforward camera experience: You can use it to quickly assemble 4-photo collages and photo strips. All told, the results are good enough to pepper your Facebook feed, but I wouldn’t recommend printing any of them out.
Beyond its oddball design and largely decent cameras, the Alcatel 5 gives off an above-average vibe. Benchmarks were verboten, but the octa-core MediaTek chipset running the show kept up well with my fiddling. Jumping between running apps was quick enough, and the whole experience was a smooth one. Alcatel’s relatively light touch with software certainly helped with this. It’s definitely not a stock Android 8.0 Oreo experience — Alcatel loaded this thing up with a lot of extras — but it comes pretty close. Its 5.7-inch, TCL-made LCD display featured some muted colors but held up surprisingly well against the brilliant Barcelona sun. I do wish the screen ran at a resolution higher than 1440×720, but such trade-offs are inevitable considering the 5’s €230 price tag.
Still, it’s nice to know you can get a phone that packs a fingerprint sensor and a face unlock method for that kind of cash. If you’re really concerned about security, though, you should probably stick to the former. Alcatel’s so-called Face Key feature detects 100 points on your face using the front-facing camera to verify your identity, and could theoretically be fooled by a detailed photo. It’s convenient and decently fast, but I wouldn’t use it as my only unlock method. In any case, the speed at which flagship features become mainstream seems to pick up every year, and with the 5 Alcatel proves it can keep up with the pace of progress.
Don’t worry if you don’t have that kind of cash handy, either. The next step down from the Alcatel 5 is the Alcatel 3V, which packs many of the same features as its (slightly) more expensive cousin. Face Key is here, as well that handy rear-mounted fingerprint sensor. The really weird bit is that, for €190, you’ll get a phone that in some ways surpasses the Alcatel 5.

Chris Velazco/Engadget
At 6-inches diagonal, the 3V’s screen is the biggest the phones in the company’s new lineup, and it runs at a higher resolution (2160×1080) to boot. Alcatel also opted to run with a dual camera on the phone’s back — a 12-megapixel sensor does most of the heavy lifting and yielded photos of similar quality to the Alcatel 5, but a secondary 2-megapixel depth camera adds a nice dash of bokeh to tight shots. And for those who can’t deal with the 5’s odd look, the Alcatel 3V features a more conventional design with a glossy, curved back. Some will find this aesthetic pretty generic but it’s still a comforting alternative to the 5’s angular body. And while its performance is quite as fluid to use as the Alcatel 5, the 3V’s quad-core MediaTek chip never felt sluggish. It’s a passable performer and handled a few pre-loaded games without issue.
And the list goes on. Seriously. If you like most of what the 3V offers but would rather save a smidge and get a wide-angle camera, well, there’s the €180 Alcatel 3X. Don’t even need to shoot wide-angle photos? No worries: how about the €150 Alcatel 3? We could keep this game up until we hit the Alcatel 1X, a perfectly adequate smartphone with an 18:9 5.5-inch display and some surprisingly nice finishes. Normally, I’d say this is mid-range overkill, but hey — there really is something for everyone here (unless you want something truly premium, that is).
The worst part of craving a newly-announced phone is having to wait for release, but Alcatel should be getting these things out the door very quickly. In fact, while the 3 series and 1 series phones will all be launched in the coming weeks and months, you can go out and lay claim to an Alcatel 5 right now. The one caveat: Alcatel hasn’t discussed plans to release any of these devices in the United States, so domestic phone fans on a budget will have to look elsewhere for now.
This Japanese-style bench is easy to build and supports butts of all sizes
This sweet little bench is from my newly purchased book of simple but stylish woodworking projects, Build Stuff with Wood. It’s straightforward in every way — you can make the bench with a miter saw and a cordless drill using just a few common cedar deck boards and a single box of deck screws. It’s also deceptively simple to build, considering how nice it looks and how durable it will be outdoors. It’s really the best of all worlds.
What makes it all possible is the way the lower beam passes through a rectangular hole on both legs. Normally that “mortise” would be made by drilling out the waste wood and then using a chisel and mallet to chop the hole square to fit the beam, but here we use a slick trick to make the square hole: gluing and screwing separate boards together to create the exact opening we need. There is no drilling or chopping required.
Note that it’s mostly the screws that hold everything together, plus some glue in a few spots. But these are hidden on the underside and inside of the parts, so you won’t see any of them.
This bench is comfortable on a porch, patio, or deck, on grass or in a garden — but it looks so good, I would even let it sneak indoors. If you bring it inside, I recommend sanding it a bit smoother and adding a couple coats of oil finish to make it look more refined. If you plan to keep it outdoors, the cedar will eventually weather to a silvery grey whether you oil it or not, and it will resist rot regardless, so I wouldn’t bother.
Tools and materials
You really only need a handsaw and a cordless drill to tackle this project, but a miter saw will make things a lot easier. You’ll also need a pair of clamps that can reach at least 18 inches.
The cool part of this bench is how the four pieces in each upright are screwed and glued together to create the hole for the beam. That works because the pieces of 2×2 in the legs are the same thickness as the 2×4 that passes through, or at least they should be. The 2x2s probably won’t be perfectly square, so flip them around at the store to make sure at least one dimension matches the thickness of the 2×4 you choose.
These deck boards have smooth surfaces and nice rounded edges, so they create furniture that is friendly to the hand, butt, and eye. By the way, the parts are called 2x2s, 2x4s, etc., but they are actually 1/2 in. smaller than that in each dimension.
Materials list
- Cedar 2×6 deck board, 8 ft. long
- Cedar 2×4 deck board, 10 ft. long (or you can buy two 8-footers)
- Cedar 2×2 deck board, 8 ft. long
- 2-1/2-in.-long deck screws, one box, tan color
- Wood glue
Pro tip for buying cedar: Like many weather-resistant woods, the heart of a cedar log is the most rot-resistant part. The heartwood has the rich tan color you are probably familiar with. To cut costs, however, some suppliers offer cedar boards with cream-colored sapwood inside, from the outside of the log. That part of the wood lacks the chemicals that resist rot, and will start crumbling in just a few years outdoors. So look for boards without much of that creamy white wood in them, if any.
Quick note about wood glue: Cheap and available everywhere, yellow (or white or tan) wood glue creates a powerful bond. In general, Titebond III is your best bet. It gives you more working time than other versions (before it starts to seize up), and it also happens to be rated for both indoor and outdoor use, which is great for this brag-worthy bench.
Project plan
The diagram below has all the dimensions you need to build this project. Feel free to play with the size and design details. For example, you can make it as long as you want. But 18 inches high will be about right for most body sizes.
Step-by-step instructions
Step 1: Grab the project plan and cut every part to length. You can do this with a handsaw or circular saw, but a miter saw will make a bunch of square, smooth, and accurate cuts in a jiffy. Start by cutting a clean end on each workpiece, then make a pencil line at the other end and chop it off there. You could set up a work stop to make identical parts the exact same length, but working to a pencil mark is plenty accurate for this project. Note that the long 2×4 beam needs angled cuts on the end (at 15 degrees).
Step 2: Assembly starts with the uprights. By screwing and gluing four pieces together in the following sequence, you’ll create a perfect hole for the long beam to pass through, and a pair of strong uprights to support butts large and small. If you watch closely, you’ll see I broke this assembly into two parts: I used screws and glue to attach the small pieces to one of the big ones, and then just glue and clamps to add the other long piece.
- Attach one of short 2x2s to one of the 2×4 pieces. First flip the 2x2s (usually not perfectly square) to match their thickness with the thickness of the 2×4 used to make the beam, so it will pass through the hole in this finished assembly with a snug fit. Mark the faces you’ll be gluing with a check mark to keep track of them. Also sand those faces for a stronger glue joint with the outer pieces of the trestle. These small pieces need clearance holes for the screws so they don’t split. Drill two holes in each piece, spread some glue on one of them, and then drive screws to attach it to one of the 2×4 pieces, even with the end.
- Screw on the other 2×2 and use a piece of the 2×4 as a spacer. Take a cutoff piece of the same 2×4 used for the beam and use it to space the next piece you are attaching, so the hole for the beam ends up the right size. Press that second 2×2 piece firmly against the 2×4 spacer as you screw it on. Use glue and the long screws as before.
- The last piece gets clamped on. Take away the 2×4 spacer block, spread glue on the two pieces of 2×2, and clamp on the last section of 2×4, using any type of woodworking clamp that is long enough. Try to keep the parts flat as you clamp them. If they are curving one way or the other, it might help to put one of the two clamps on the opposite side.
- Rinse and repeat. Wipe off any glue that has squeezed out of the joints, and repeat the process to make another one of these uprights that will form the legs of the bench.
- Trim the ends. Let the glue dry for an hour or so, and then use your miter saw to trim the ends square and even (they probably won’t be). If the saw can’t quite make the width, cut as much as you can and then flip the assembly, line up the blade with the first cut, and nip off the last bit.
Step 3: Add the top and bottom of the uprights to complete the bench legs.
- Bevel the tops and bottoms. The bottom and top pieces are 2x4s with little angles on the ends to jazz them up a bit. These bevels are simple to cut on the miter saw. Start by marking a line 3/4 in. from the ends to guide your cuts. Next, tilt the saw over to 45 degrees, line your mark up with the inside edge of the blade, and make the cut.
- Drill clearance holes. Place these pieces against the upright assembly to mark the best locations for screws, then drill clearance holes so the screws will pass through freely.
- Use a spacer to line up the parts during assembly. The top and bottom pieces overlap the center section about 1 inch on each side, so place a 1-in.-thick spacer of some kind below the uprights to line them up while you drive in long screws. I used a piece of rigid foam insulation, which is cheap at home centers.
Step 4: This is a good time to soften the corners on all the workpieces. Furniture looks much better if the sharp edges and splinters are replaced by nice little bevels or roundovers. Use 120-grrit sandpaper to break all the edges, backed by any sort of flat block.
Step 5: Drill through the tops of the pedestals. This is where you will drive screws to attach the top boards of the bench. It’s fine to drill at a slight angle here.
Step 6: Now insert the beam to complete the base. If you were careful lining up the parts for the uprights, the long 2×4 beam should slide right into them. Check the drawing to see how far it should stick out at both ends. Make sure everything is square, and drive long screws into the side corners of the joints at an angle so they pass through the 2×4 beam into the part of the upright assembly just behind it. Watch this part of the video closely, and you’ll see me driving these screws in from each side.
Step 7: Attach the top boards and you’re done. Figure out which sides of the top (seat) boards look best, and lay those sides face-down on your work table. Now clamp the three boards together so they stay lined up as you attach them. Flip the base over onto the top boards, so you can drive screws through the top of the uprights into the top boards. The 2-1/2-in.-long screws should not pop out the top. Before you drive them, measure the seat overhang at each end to be sure the base is located in the center. Make sure the center 2×2 receives a screw at each end to hold it down. Now flip your finished bench right-side-up and put it where people can see it!
The Weekend Workshop is our weekly column where we showcase a badass DIY project that you can complete with minimal skills and expertise.
What is fake news? How to spot it in an age of misinformation
Nora Carol Photography/Getty Images
In response to a wave of spurious news stories, a publication called the Fourth Estate summarized the general mood of American society: “The public is becoming heartily sick of fake news and fake extras. Some of the newspapers in this town have printed so many lying dispatches that people are beginning to mistrust any statement they make.”
That was 1898, yet it captures the attitude of 2018 as well.
“Fake news” is the phrase on everyone’s lips and every publication’s front page, as people all over the media world try to understand the fake news epidemic. How can readers tell whether an article is honest or not? Here’s how to spot fake news.
Read more than the headline!
Sensationalism starts with the headline, and that’s unfortunate — most people only ever read the headline. A mere “4 in 10 Americans report that they delved deeper into a particular news subject beyond the headlines,” according to the American Press Institute. That tendency to stop at the headline is especially troublesome in an age where social media dominates conversations. A study last year by computer scientists at Columbia University and the French National Institute showed that, of the many stories shared on social media, 59 percent of them didn’t receive clicks, meaning people were sharing them based solely on the headline, not the content within!
Headlines are an important part of journalism — without a captivating headline, people are less likely to read an article, which is the whole point of writing it, after all — but they rarely contain all the important information. No matter the source of an article, whether it be The New York Times or some blog run out of a basement, you should never stop at the headline.
Consider the source
Not all publications are equal in journalistic rigor. Optimists point to the internet’s value as a medium for sharing information, where anyone, anywhere with a connection can broadcast their thoughts, or access those of others. That freedom comes with a lack of quality control, and not everyone broadcasting info on the internet is well-informed, or even honest.
When reading any news story, consider the source before believing or sharing it. Even if you disagree with the opinion pieces in newspapers like the Wall Street Journal or Washington Post, their editorial processes are rigorous, as are their ethics guidelines. Online, you should also take note of the site’s URL. Fake news sites will often have strange URLs, such as the infamous “abcnews.com.co,” a website that went so far as to emulate ABC’s logo.
Check the article’s sources
Any good news piece should involve quotes from people involved, or else experts who can provide informed opinions on the topic. If a site publishes a story about a new tax that Congress is debating, one would expect the reporter to cite Senators and Representatives arguing for or against it, or economists who can explain the ramifications of said tax.
When reading a news story, pay attention to quotes the writer uses. Have they even cited any sources? If so, who? Do a quick search online and see if you can find any information about the people quoted in the story. Even if the article does cite sources, don’t think the link itself is sufficient evidence. Follow the link to make sure it says what the article claims it does. Dishonest writers may include links that go nowhere — an “attribution goose chase,” as Reveal puts it.
Don’t succumb to satire
In the age of Twitter, everyone’s a comedian — or at least considers themselves one. Unfortunately, this can lead to confusion. Many satirical sites today bear names that sound legitimate, and the stories themselves might hew a little too close to reality for people to realize they are satire. If a story seems too weird to be true, check to see if the site has a satire disclaimer.
Take tweets (and social media posts in general) with a grain of salt
“Rumor flies,” Virgil once wrote, and that was back when it could take weeks for a messenger to travel. In the age of social media, news travels more quickly still, and people often feel an impulse to break news over mediums like Twitter, even if the story is unconfirmed (to say nothing of people intentionally spreading lies to suit an agenda). Social networks are taking steps to curtail the spread of fake news, but if you see something outrageous on social media, don’t just share it; check it out first.
Editors’ Recommendations
- This is ‘Bad News’: Game teaches players to create fake news for research
- Facebook’s fake-news flag no longer flies as related articles take over
- Split Facebook News Feed doesn’t decrease fake news, report says
- Governments are stepping in to regulate social media, but there may be a better way
- How a blockchain-based digital photo notary is fighting fraud and fake news
How to delete your Tinder account
Fifteen percent of American adults have used an online dating service at some point in their life to find love (or lust), according to Pew Research, with many turning to the now infamous dating/hookup app Tinder. By 2014 — just two years after its initial launch — Tinder had reached over 50 million users and was registering a billion “swipes” per day, and that number continues to grow. Tinder has transformed modern dating.
Sure, plenty of successful relationships and satisfying sexual encounters have come out of this app, but Tinder is not without its problems. From superficial encounters that value looks over personality, to problematic business practices, to a barrage of inappropriate messages and photos, some users might be looking to jump ship or try their luck at dating IRL.
Simply deleting the app won’t be enough to get rid of Tinder permanently, however, no matter what anyone has told you. If you’re ready to say goodbye to your matches and messages for good, you’ll need to delete your Tinder account. Here’s how:
Deleting from within the app
Step 1. Open the app and tap the profile icon in the upper left-hand corner of the screen (it’s a small grey or pink bust). Select Settings from the resulting screen.
Step 2. Scroll all the way down to the bottom of the page and select Delete Account. You will need to scroll past the logout button, flame symbol, and version number of the app.
Step 3. Next, you will be give the option to pause your account (which will make it private to new matches, but maintain your information if you ever want to come back) or delete it. Select Delete My Account.
Step 4. The app will then prompt you to choose the reason for leaving, which includes having met someone or simply looking for a fresh start. Select whichever option best suits your situation.
Step 5. Depending on your selection, you may be prompted to provide additional information. Once you’ve entered this, click Submit & Delete Account. If you see the message “Account successfully deleted,” then you’re done! You may login again, of course, but you’ll need to create a new account — you just deleted yours, remember?
Note: If you subscribed to Tinder Plus or Tinder Gold through a third party, deleting your account doesn’t necessarily cancel your subscription. It may be necessary to cancel your Tinder subscription through the Apple Store or Google Play.
If you’ve already deleted the app, you have two choices: download the app again and follow the above instructions, or scroll down to learn how to delete your Tinder account using a web browser.
Deleting from your browser
Step 1. Head over to Tinder’s website using your browser of choice, and enter your login information if you are not already logged in.
Step 2. Select My Profile next to your profile picture in the upper-left portion of the screen.
Step 3. Scroll down to the bottom of the menu on the left side of the screen. Select Delete My Account from the very bottom.
Once you’ve confirmed, you’ll be re-directed to the homepage, but there’s nothing else to do. You may login again with your phone number or Facebook account, but doing so will create a new account.
Note: If you subscribed to Tinder Plus or Tinder Gold through a third party, deleting your account doesn’t necessarily cancel your subscription. It may be necessary to cancel your Tinder subscription through the Apple Store or Google Play.
Looking to unplug even further? Check out our guides for deleting your Snapchat and deleting your Facebook accounts.
Editors’ Recommendations
- Tinder tests new ‘Feed’ feature, providing real-time updates on matches
- 20 Netflix tips and tricks to make your streaming experience even better
- Tinder injects some A.I. into your love life with Super Likeable
- How to delete your Gmail account
- Parting ways? Here’s how to delete a Netflix profile from your account
