


Best Cases for Nokia 7 Plus
Safeguard your Nokia 7 Plus with a case.

The Nokia 7 Plus is one of the sturdiest phones you can buy today thanks to Gorilla Glass 3 layer on the screen backed by a series 6000 aluminum chassis. That said, there’s a decent possibility that the screen will shatter should the phone take a particularly nasty tumble onto the pavement or a tiled surface.
While the phone isn’t officially available in the U.S., you can pick it up on Amazon for $348, and the listing is backed by Prime. These are some of the best cases available if you’re thinking of picking up a Nokia 7 Plus.
- Yiakeng Crystal TPU Case
- MAIKEZI Dual Layer Armor Case
- Olixar Leather Wallet Case
- Kwmobile Canvas Wallet Case
- Solimo TPU Mobile Cover
- WOW Imagine Armour Series
Yiakeng Crystal TPU Case

The Nokia 7 Plus has a striking design, and the best way to show it off while still adding a layer of protection is with a clear case. Yiakeng’s TPU case costs just $6.98, and it’s slim enough that it doesn’t add a lot of bulk to the device.
It has the requisite cutouts for the ports and buttons, a raised edge to protect the screen, and rounded corners to absorb impact from tumbles.
See at Amazon
MAIKEZI Dual Layer Armor Case

If you’re looking for an Otterbox-style case, MAIKEZI’s Dual Layer Armor Case should do nicely. As the name suggests, the case has two layers: a hard polycarbonate outer shell and a soft TPU inner layer.
The case surrounds the camera sensor at the back, and has a raised edge all around the front to protect the screen. You get the usual cutouts for the charging and headphone ports, there’s a built-in kickstand, and you get a range of color options with two-tone finishes.
At $7.98, the Dual Layer case costs as much as a basic TPU case, but you get much more value for your money. If you don’t want to take any chances with your Nokia 7 Plus, this should be the case to get.
See at Amazon
Olixar Leather Wallet Case

Need a wallet case to go with the Nokia 7 Plus? Olixar’s offering comes with a provision to store three cards and an inner pocket to store some cash, and the case also doubles up as a kickstand.
The case itself is made out of faux leather, and there’s a magnetic fastener that secures your cards. It is backed by a two-year warranty, and for $12 you really can’t ask for much more from a wallet case.
See at Amazon
Kwmobile Canvas Wallet Case

If you’re looking for a wallet case but don’t want one with faux leather, Kwmobile’s canvas case is a great alternative.
The case has a cardholder as well as an inner pocket, and the two-tone design gives it an upmarket look. It also has a magnetic fastener at the front, and you’ll be able to use the case as a kickstand. For $9.90, it’s a fabulous choice.
See at Amazon
Solimo TPU Mobile Cover

If you’re looking for a clear TPU case that provides an added layer of protection to your Nokia 7 Plus, look no further than Solimo’s offering. Solimo is Amazon’s in-house label, so you can be assured of the case’s quality.
The case has cutouts for all the ports and sensors, and has a raised edge at the front that protects the screen in the event of a fall. It’s extremely slim at 1.2mm, so it doesn’t add a lot of bulk to the device, and it’s slip-resistant as well.
The best part is that the case costs just ₹199 ($2.80), making it an absolute steal.
See at Amazon India
WOW Imagine Armour Series

I’m a fan of Spigen’s Rugged Armor cases, and while the brand doesn’t make cases for HMD devices just yet, you can easily find alternatives on Amazon. The one that looks closest to Spigen’s offering is the WOW Imagine Armour Series. The case has similar carbon fiber accents at the back, and the brand is even advertising a similar Air Cushion technology that absorbs impacts.
The case has raised edges at the front and back to protect the screen as well as the camera sensors, and it has the requisite cutouts for the charging and 3.5mm ports.
You’ll only have to shell out ₹329 ($4.75) to get your hands on the case. If you’re in the market for a rugged case to safeguard your Nokia 7 Plus, this one should fit the bill nicely.
See at Amazon India
Sonos Beam vs. Sonos Playbar: Which should you buy?

Alexa vs. Goliath.
In the world of soundbars, to say there’s variety in what’s offered, and how much you can pay, is an understatement. Searching “soundbar” on Amazon sees companies like Vizio offering a basic $75 option that’s no-frills and pretty well-received, while big names like Yamaha offer hardware twice the size with an included subwoofer — and a $300 price point.
But neither options do, or even claim to do, what Sonos soundbars offer. Sonos is in a league of its own, both for sound quality and extensibility. Adding a Sonos soundbar to your TV experience doesn’t just amp the sound; it opens up convenient music streaming options through Sonos’s excellent app, and when connected to the company’s other speakers, facilitates seamless whole-home audio playback from nearly any source.
Sonos offers two soundbars, the compact and modern $399 Beam and the older, larger, ultra-powerful $699 Playbar. Most people should buy the Beam, and I’ll explain why shortly, but there’s still a market for the Playbar.
Beam vs. Playbar The similarities and differences


At their cores, both the Playbar and Beam are meant to connect directly to a TV set to replace its usually-terrible onboard speakers. Once installed, they take over the main output from the TV and, once configured, respond to the volume controls on your TV’s remote control.
Note: If you’re already using a receiver, both soundbars assume that all your inputs — Apple TV, Switch, etc. — will be connected directly into your TV’s HDMI ports, since neither speaker is designed to be used as passthrough when connected to a receiver. Most TVs have between two and four HDMI ports, and most modern receivers have more than that — if you require more HDMI inputs than your TV currently allows, neither the Beam nor the Playbar will be appropriate for your setup.
| No. of Woofers | 6 | 4 |
| No. of Tweeters | 3 | 1 |
| No. of Radiators | N/A | 3 |
| No. of Amplifiers | 9 (Class D) | 5 (Class D) |
| Optical Audio | Yes | Yes |
| HDMI-ARC | No | Yes |
| Alexa support | No | Yes |
The Playbar, which was released in 2013, is a very large piece of equipment, meant for large living rooms to small theaters. It’s built to rest just in front of a flat-screen TV, on a console or ledge (Sonos logo facing up) or mounted on a wall below the TV (Sonos logo facing forward). Because of its large enclosure, Sonos placed six woofers for bass, three tweeters for mids and highs, and nine Class D amplifiers for power, to fill a room with sound.
At 35 inches in width and just under 12 pounds in weight, the Playbar, which is only available in black, is an imposing piece of equipment that looks more comfortable below a television 55 inches in size or higher.
| Width | 35.3″ | 25.63″ |
| Height | 3.35″ | 2.7″ |
| Depth | 5.51″ | 3.94″ |
| Weight | 11.9 lbs | 6.2 lbs |
On the flip side, the Beam is available in either black or white, and is not just narrower but stouter and skinnier than the Playbar — it was able to fit on the ledge below my LG B7 OLED TV where the Playbar could not. It also benefits from Sonos’s more modern design ethos that it debuted with the Play:1 and new Play:5 — it’s rounder and more inviting but manages to disappear into the environment thanks to its color uniformity.
The Beam’s smaller stature translates into a sound more appropriate for a small-to-medium-sized living area. It has just four woofers, a single tweeter, and three passive radiators in which sound bounces around before being shot out of the speaker. Five Class D amplifiers ensure the top volume is loud enough for most people, but the Beam is not designed for capacious living areas or home theaters.
Sound

The difference between the Playbar and Beam in terms of sound output is significant. The Playbar just has more space to work with, and more individual components from which to send sound directionally. Directionality and soundstage are only important for the mid-range and high-end of a movie or song (bass, or low end, spreads outward from its source but does not care about direction), but it makes a big difference in making a soundbar feel like two, or even five, separate speakers.
In this case, the Playbar is the clear winner: an explosion on the right of the screen sounds like it’s coming from that side, thanks to dedicated drivers, and dialog emerges from a dedicated tweeter in the middle clearer and more distinct than that of the Beam. Bass rumbles more deeply and more accurately than that of the Beam, too, and couches far from the Playbar can feel the effects more easily.

Playbar’s numerous drivers have the same dramatic effect on music as they do on movies and TV shows: not only can the speaker go louder, filling more of space with beautiful harmonies, accurate bass, and pleasing, warm mids, but the separation of instruments and vocals feel more natural.
The Beam sounds very good, too, and produces sound larger and more versatile than one would assume from its size — watching Star Wars: The Last Jedi was about as visceral a movie-watching experience as I can remember — but the components of dialog, sound effects, and music all emerges from the same place. Whereas the Playbar truly makes you believe you’re listening to a set of surround sound speakers, the Beam reminds you that you’re listening to a very good speaker. Singular.
If you listen to a lot of music in your living room, the Playbar is going to sound a lot better than the Beam. For movies, the difference isn’t as significant.
Keep in mind that for movies, the difference between the Playbar and Beam on their own isn’t going to be significant except for those with large, cavernous rooms. The major difference in quality emerges when listening to music, where the Playbar pulls ahead by a wide (pun intended) margin.
Both the Playbar and Beam support true 5.1 surround sound playback by wirelessly syncing surround pairs and a subwoofer. You can make wireless pairs using two Play:1, Sonos One, or Play:5 speakers as rear surrounds, along with Sonos’s $699 dedicated subwoofer. Doing so isn’t cheap, and it’s less necessary with the Playbar up front, but the irony is that many homes that have already invested the money in a Playbar may want to augment it with Sonos’s other components.
Connectivity

Both the Playbar and Beam connect directly to a TV, but the former has only one input method: optical. That fiber-optic cable facilitates great sound, but it’s limited in what else it can do.
On the other hand, the Beam is the first Sonos speaker to support HDMI-ARC, which connects directly to a compatible TV to perform a whole bunch of useful things, like working with the built-in Alexa speaker to turn the set on and off and, when used in conjunction with an Amazon Fire TV box or dongle, perform specific tasks. Those actions can include phrases like “Watch Handmaids Tale on Hulu” or “Play Rihanna on Spotify,” which is super useful.
Note: HDMI-ARM is a standard that’s been around for 10 years, and most TVs support it. But if you’re using an older set or one that doesn’t have an HDMI-ARC input (it’s usually input #2 on most modern sets), Sonos includes an HDMI-to-optical adapter in the Beam’s box.
HDMI-ARC also allows for the Beam’s most useful feature: seamless switching between sound on the TV and sound from other places, be it a knowledge request from Alexa or playing a song on the Beam through the Sonos app. Here’s the way it works: say you’re watching a Netflix show on your Apple TV and decide to ask a question about the actor on screen. You can just say, “Alexa, who is X,” and the database should spit out an answer. Once Alexa is finished, the sound should resume on the show automatically. If you paused it using the Siri remote, you can just press play again and sound will resume over the Beam. If you want to play a song on Beam through Spotify, you can ask Alexa to play whatever you want and the speaker will do its thing, resuming the TV audio once the song is finished.
The whole system is seamless and very useful, and it leads us to our next point of comparison…
Alexa and AirPlay 2

With Alexa built-in, the Beam boasts five directional microphones and a ton of smarts to be able to listen for the hot word at all times. While the Playbar technically supports Alexa, too, you’ll need to link it with an Echo or Echo Dot speaker, which does the listening and routing on the Playbar’s behalf. That extra step is a bit clunky and doesn’t work nearly as well as it does on the Beam.
The Beam will also support AirPlay 2 through an update later this summer, and from early indications, it will be as seamless as it is on Apple’s own HomePod speakers. That means using a nearby HomePod to build a whole-home audio setup, or just using Siri to route Apple Music throughout the house using various commands. Playbar will never support AirPlay 2, and for many Apple Music listeners that may be all they need to know.
Finally, Sonos does promise Google Assistant support for the Beam, but it’s not clear when it will be added.
Who should buy the Playbar?

The Sonos Playbar is, surprisingly, still a very attractive product five years after its announcement. At its $699 price and its limited connectivity options, its appeal is quite limited, but it’s also the best-sounding soundbar I’ve ever heard — by a mile. Crisp highs, beautiful, accurate mids, and deep, accurate, rumbling bass emerge from the six woofers and three tweeters, and if I had a bigger living room I’d probably still use it over the Beam.
Why? Because I have other smart speakers in my living room, including an Amazon Echo for Alexa and a HomePod for dedicated music. If I just wanted the best, most immersive sound possible from a soundbar, the Playbar would be my top pick.
See at Amazon
But.
Who should buy the Beam?

At $399, the Sonos Beam is probably the most versatile soundbar on the market today. Not only does it play music, podcasts, and audiobooks from over 80 sources, including Apple Music, Spotify, Audible, and more, but it has built-in Alexa support for powerful smart home control, and among the best sound quality you’ll find in a compact speaker.
The addition of HDMI-ARC is a big deal for Sonos because it opens the platform up to the future of TV control — voice. It also expands the viability of Beam in general, since its more attractive price and design will see people choosing it over cheaper, less capable soundbars. Sonos has also ensured that the Beam can be wall-mounted, though it requires a separate $59 accessory.
The Sonos Beam is the best soundbar available for most people today, and is a better product than the Playbar in almost every way. If size and convenience are more important than sound quality, the Beam is a no-brainer.
See at Amazon
Which will you buy?
Are you interested in either the Sonos Beam or the Playbar?
How to sideload Android apps to Oculus TV on your Oculus Go

A cooler way to use your standard Android apps
Previously we talked about how to sideload apps onto your Oculus Go. As it turns out, we were given a pleasant surprise today when Reddit user Colonel_Izzi discovered you can sideload standard Android Apps to your device and launch them from within Oculus TV.
Most people were experiencing a problem with a lack of compatibility with the Oculus Go controller and the Android Apps, but we’ve found a solution for you to that as well. This all runs through adb and will require a few downloads and a decent amount of patience. Read on below to see how!
How to get Android apps onto your Oculus Go

In order to get the apps you want to try out on the Oculus Go, you’ll need to sideload them through a series of steps. After the apps are installed you won’t need any more steps to have them show up in the actual Oculus Go TV app. When the app is installed a new section in the TV app itself will appear labeled “Unknown Sources”. From there you can click on the app you want to load and get the party started.
Most of the apps you open through Oculus TV won’t be compatible with your Oculus Go controller. Sometimes it won’t allow you to scroll through menus and other times it won’t allow you to use any controls at all. The answer to this is using Vysor, an app that will mirror your Oculus Go onto your computer. See how to use Vysor below!
Click here for the instructions on how to sideload apps to your Oculus Go
How to get your Oculus Go ready for Android apps

Vysor will mirror the screen of your Oculus Go onto your computer and allow you to work the controls when your Go controller isn’t working – for whatever reason. Alternatively, it can allow the option of screen captures and more by controls on your computer when it’s locked on your actual device.
How to enable Developer Mode on your Oculus Go


In order to get your Oculus Go into developer mode, you will first need to create a developer account on the Oculus website.
Go to this website and sign into your Oculus account.
Create a name for your “Organization”.
Read over the “Developer Non-Disclosure Agreement”.
If you agree to the terms, check the box and press “I Agree.”
This will allow debugging on your Oculus Go after you turn the Developer Mode options on by following the instructions below.
Open the Oculus app on your phone.
Select settings from the bottom right.
Select your Oculus Go headset.
Select “More Settings”.
Toggle Developer Mode on.
How to download your Oculus Go ADB files
Download your ADB Oculus Go drivers here.
Go into your device manager on your computer.
When you connect your Oculus Go it will show up on the list.
Right click on your Oculus Go click the option that says “Update driver.”‘
Click, “Browse my computer for driver software.”
Click the option to send it to a folder yourself and select the folder where your downloaded ADB driver is.
Select the downloaded file and it will automatically update the driver.
Check to make sure you have you ADB connected by typing this command prompt into your computer, “adb devices”.
If the device code pops up into your command prompt this shows that the adb can see the device and you can move onto using Vysor.
How to use Vysor with Oculus Go


You’ll want to download the following files to your computer. After the downloads are complete the next section will go over how to use them with your device.
Download the Vysor app here.
Make sure your Oculus Go is plugged into your computer via USB port and your debugging option is still enabled.
Press the gears icon above settings.
Check to make sure it’s showing the details of your Oculus Go and press “Connect”.
A second screen will now appear on your computer, showing you what your Oculus Go is currently seeing. From here you can use your computer mouse to control everything in the Oculus Go. This will help with the compatibility issues in your standard Android apps you’re looking to use inside of Oculus TV.
Now go have fun

Now you should be all set up to get yourself up and running. You can use your normal Oculus Go controller to launch our Oculus TV app and select which app from the “Unknown Sources” section you want to use. From there, if you experience any controller issues, you can move on to using your mouse on the computer to control what is going on in your Oculus Go.
If you have any questions let us know in the comment section below! Other than that, tell us what apps you’re using and why they are or aren’t your favorites!
Select Dash Buttons are down to $1 for Prime members today with a $5 credit
Press the button to order.

Amazon has a few great deals today for its Prime members, including a bunch of different Dash Buttons for just $0.99 each. These normally sell for $4.99 each and come with a $5 credit after using it for the first time. The discounted buttons still score you the same $5 credit, which means that you essentially make $4 in Amazon credit for buying these today.
- Peets Coffee Dash Button
- ZipLoc Dash Button
- Cascde Dash Button
- AmazonBasics Batteries Dash Button
- Keurig K-Cup Pods Dash Button
- Gatorade Dash Button
- Dunkin Donuts Dash Button
This is just a small sample of all the buttons that are available. Each of these can be set up to reorder a variety of products in the brand’s category. Not sure if Dash Buttons will work for you? Be sure to check out this review from our pal Modern Dad.
These prices are exclusive to Amazon Prime members, so if you aren’t already a member, you’ll want to sign up for a free 30-day trial right now.
See at Amazon
Android P features we love: Adaptive Battery support

Google taps into Artificial Intelligence to learn when to shut down apps and save your battery.
Artificial Intelligence is something you’ll hear a lot of talk about, but much of that talk can be a little confusing. That doesn’t mean that AI can’t be used to do simple things that have a real benefit to the way you use our connected things and Android P’s Adaptive Battery is one of them.
It’s one of the least spectacular yet most effective ways of using AI in our phones that we’ve seen so far. Google’s AI can track the way you use the apps on your phone and know when to clamp them down so they aren’t running wide-open in the background. This keeps those apps from using your network and the processor and frees up a bit of your phone’s memory so something that you might want or need to use can stay there instead.
Adaptive Battery might not use AI to fly drones at night, but it can do something even better — save some battery power.
How it works is as simple as it sounds: The operating system knows when you open an app, when you use that app and when you “close” it. In Android when you close an app it may not really close. The OS is designed to keep apps alive in the background until there is no more room left in your memory for a new thing to open. It then has a set of rules — these are defined by the company/person who built the OS from the source code — about what apps it will purge from your memory to make room for a new one.
This makes sure apps you use the most are usually ready to open in an instant and that apps which need to do something in the background every now and then are able to without disrupting your experience. It’s a good way to do things, but like most every idea there is always room for improvement, and Adaptive Battery refines the way it’s done.
If, for example, you wake up every morning at the same time, sit down for a cup of coffee and open the Twitter app, the OS knows this. It also knows that you tend to keep the app open for 10 minutes or so and then tap the home button to go do something else. When that happens, Twitter is still running in the background. If you normally don’t check Twitter again until lunch at noon, there is really no need for Twitter to keep fully running and refreshing in the background until 11:50.
We all are creatures of habit. AI can leverage that.
AI can “learn” these habits. In the example above, you might get a message when you look at your phone at 10 AM that says Twitter is still running, and if you like it can be optimized so that it saves some battery when the OS knows you’ll not be using it, and start back up when it thinks you will. If you say yes, the Twitter app is changed to run in a very low-power state so it’s barely running and not refreshing at its regular intervals. If Android can put Twitter to sleep every morning after you’re done reading and tweeting, it saves battery power. For the most part, this works well.
You won’t want to allow it to optimize apps you use throughout the day unless you don’t mind waiting for a second or two for them to be completely reopened and then sync with their online data, but a lot of what we do is routine and can be managed by AI this way. Adaptive Battery might not be the sexiest way to use AI, but if it saves us some battery power it might be one of the best!
Android P
- Android P: Everything you need to know
- Android P Beta hands-on: The best and worst features
- All the big Android announcements from Google I/O 2018
- Will my phone get Android P?
- How to manually update your Pixel to Android P
- Join the Discussion
Microsoft Takes on Apple’s Entry-Level iPad With 10-inch ‘Surface Go’ Starting at $399
Microsoft yesterday unveiled the 10-inch Surface Go, the company’s smallest and lightest tablet computer to date. Priced at $399, the device is aimed at the same $500-and-under market as Apple’s 9.7-inch iPad, which starts at $329.
Looks-wise, the Go is basically a smaller version of the $799 Surface Pro, including the integrated kickstand and a front-facing camera above the 1800 x 1200 resolution IPS touchscreen display.
On the right side of the Go is a magnetic Surface Connector port for charging and connecting to a desktop dock, one USB-C port, and a headphone jack, with a microSD card slot located underneath the hinge.
Inside, the Go features a fanless Kaby Lake dual-core Intel Pentium Gold processor, 4GB or 8GB RAM, and 64GB or 128GB solid-state storage. Microsoft claims the Go has up to 9 hours of battery life.
Weighing in at 1.15lbs, the Go is slightly heavier than Apple’s iPad. Like the Surface Pro, the Go supports the $99 Surface Pen (Apple added Apple Pencil support to its $329 iPad in March.) and optional keyboard cover, which starts at $99 in black, with four color options costing $129. The optional Surface Mobile Mouse costs $35.
Off the shelf, Surface Go devices will run Windows 10 in “S mode”, a streamlined version of Microsoft’s desktop OS that only runs verified apps downloaded from the Windows Store, although customers can switch to the regular version of Windows 10 at no additional cost. For business customers, Microsoft is also offering a Surface Go with Windows 10 Pro installed for $449.
The $399 Surface Go ships August 2 in the U.S. and two dozen other markets, with Wi-Fi versions available initially and LTE versions to come later in the year.
Related Roundup: iPadTags: Microsoft, Surface GoBuyer’s Guide: iPad (Buy Now)
Discuss this article in our forums
Happy 10th Anniversary, App Store!
Today marks the 10th anniversary of the App Store for iOS devices, which launched on July 10, 2008, just a day before the iPhone 3G came out. The iPhone 3G was the device Apple used to debut the App Store, with the new functionality built into the iPhone 3G’s operating system, iPhone OS 2.
Prior to the launch of the App Store, Apple in March of 2008 introduced an iPhone SDK, providing early app developers with the tools to build the first third-party apps. On stage at the announcement event, demo apps included EA’s Spore Origins for the iPhone, AIM, Sega’s Super Monkey Ball, and a Salesforce app, and within a matter of days, the original iPhone SDK had been downloaded more than 100,000 times.
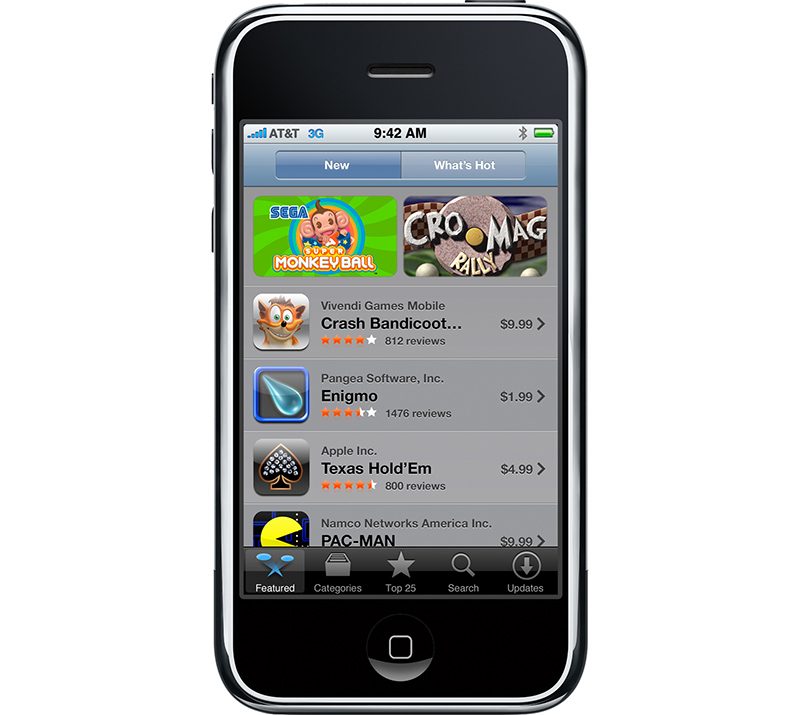
When the App Store opened up in July 2008, 500 third-party apps were ready to download, and in less than a week, Apple announced 10 million apps had been downloaded. From Apple CEO Steve Jobs:
“The App Store is a grand slam, with a staggering 10 million applications downloaded in just three days. Developers have created some extraordinary applications, and the App Store can wirelessly deliver them to every iPhone and iPod touch user instantly.”
Since that initial debut, the App Store has evolved on a yearly basis, with Apple continually refining and revamping the App Store experience for both consumers and developers. We thought we’d explore the App Store’s history, highlighting the major evolutionary steps (and a few fun facts) that have ultimately transformed the way we use our iOS devices.
– July 10, 2008 – The App Store launches with 500 apps available, 25 percent of which were free, and 75 percent that customers had to purchase.
– August 20, 2008 – A Koi Pond app becomes the number one selling app in the App Store.
– September 3, 2008 – Apple rejects a “Pull My Finger” app for limited utility, giving us a first taste of the (sometimes confusing and conflicting) curation and moderation policies that have since governed the App Store. Other early app rejections were for reasons that included excessive data transfer, pornography/nudity, duplicating iPhone features, objectionable words (in a dictionary app), and fake reviews.
– September 18, 2008 – Trism, one of the first popular games in the App Store, generates $250,000 in revenue in two months. Trism 2, Trism’s sequel, is launching today in celebration of the 10th anniversary of the App Store.
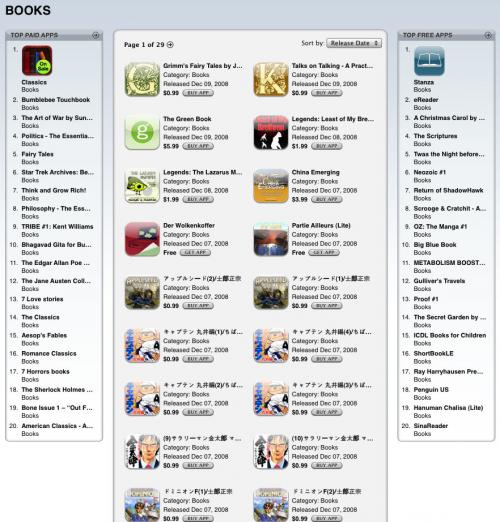
– December 11, 2008 – Apple adds the first Top Charts section to the iTunes App Store.
– March 30, 2009 – The iPhone wins 6 out 7 categories of the Independent Game Festival Awards at the 2009 Game Developers Conference (GDC), establishing it as a serious gaming device. Gaming has since become one of the most popular App Store categories.
– April 23, 2009 – Apple issues its first App Store apology for approving an app called “Baby Shaker, where the aim of the game was to make a baby stop crying by shaking the iPhone.
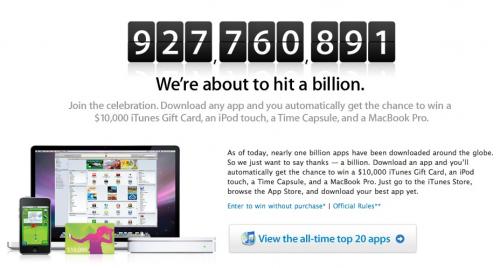
– April 24, 2009 – Apple hits its one billion apps downloaded milestone and awards a $10,000 iTunes gift card and other prizes to one lucky winner.
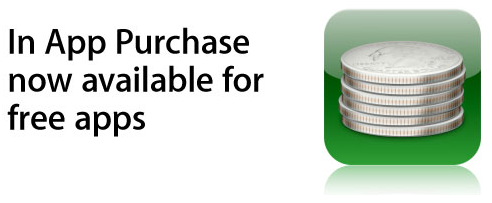
– October 15, 2009 – Apple starts allowing in-app purchases in free apps, leading to the freemium apps that dominate the App Store today.
– April 3, 2010 – The first iPad is released in the United States, and along with it, the first iPad apps come out, including the original “iBooks” app for the iPad, and the first Netflix app. 2,000 iPad apps were available at launch, a number that grew to 7,000 within two months.

– January 6, 2011 – The Mac App Store launches and sees one million app downloads during its first day of availability.
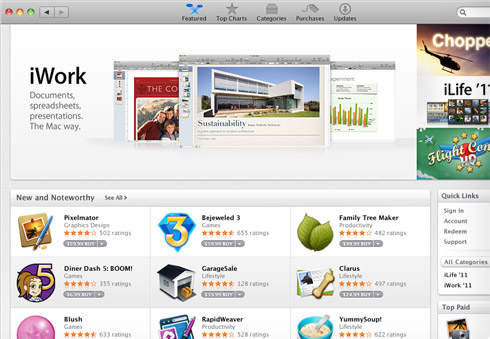
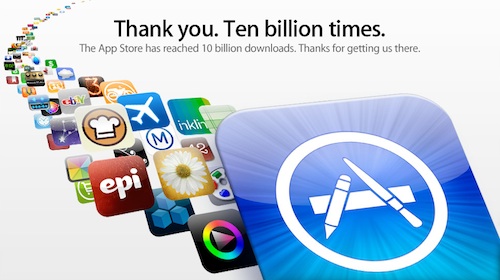
– January 22, 2011 – Apple hits a new milestone, 10 billion apps downloaded, and awards another $10,000 iTunes gift card.
– February 15, 2011 – Apple launches subscriptions for the App Store, paving the way for App Store users to subscribe to services like Netflix with billing through iTunes. At the same time, Apple makes a rule that apps that offer subscription services must make those services available for purchase in apps, with Apple taking a 30% cut. The rule was reversed four months later.

– March 10, 2011 – Apple begins requiring passwords for in-app purchases after children spend thousands of dollars within “free” apps. Apple later settles a lawsuit levied by parents affected by the lax in-app purchase rules.
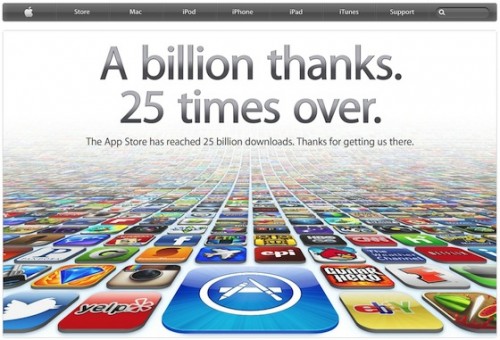
– March 5, 2012 – Apple hits a new milestone, 25 billion apps downloaded. Disney’s “Where’s My Water? Free” was the lucky 25 billionth app that the winner downloaded.
– July 13, 2012 – A hack lets people bypass Apple’s in-app purchase mechanism and download apps for free. Piracy continues to be a problem throughout 2012, and even shutters one app, Battle Dungeon.
– May 6, 2013 – Apple starts heavily cracking down on app discovery apps that mimic the App Store, like AppGratis and AppShopper.
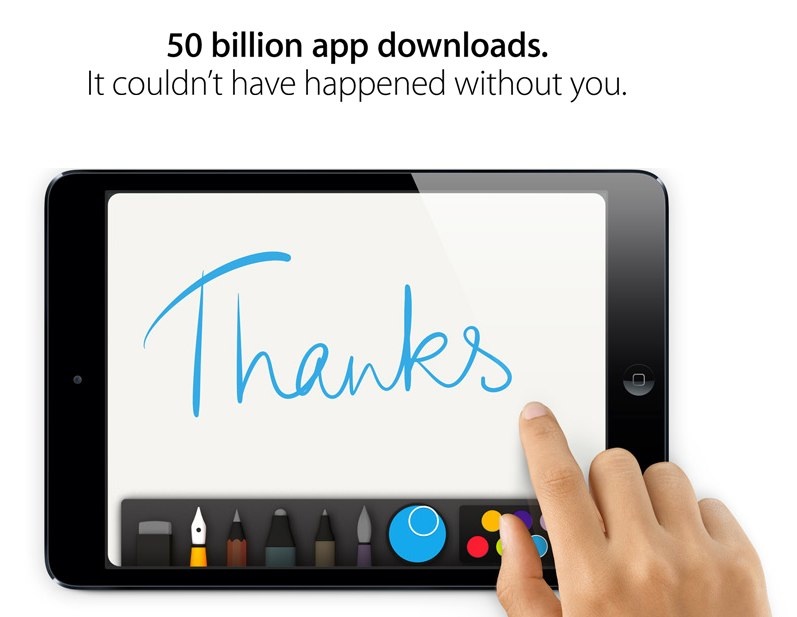
– May 15, 2013 – The App Store hits 50 billion downloads., and Apple gives more prizes away.
– June 10, 2013 – Apple unveils iOS 7 with an overhauled interface, including a new look for the App Store. New features include “Apps Near Me” and automatic app updates.
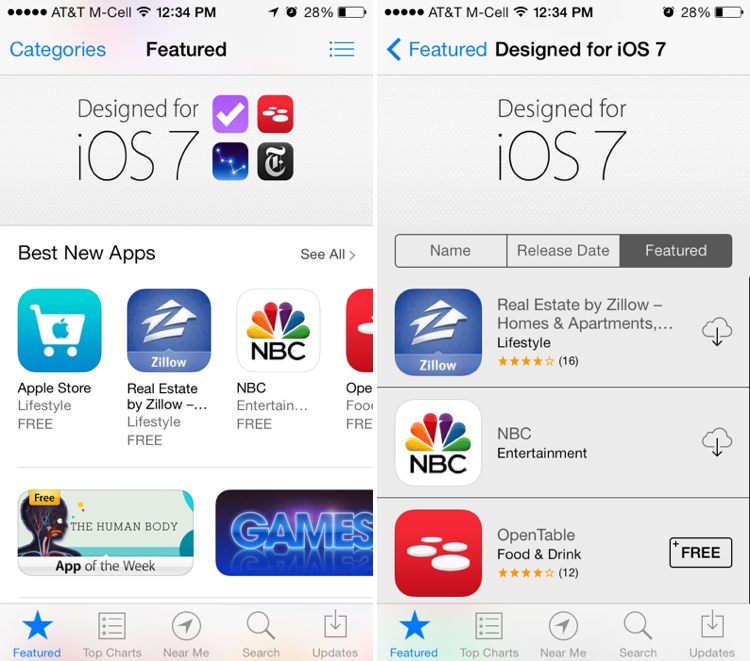
– July 26, 2013 – The Developer Center gets hacked, goes offline for eight days.
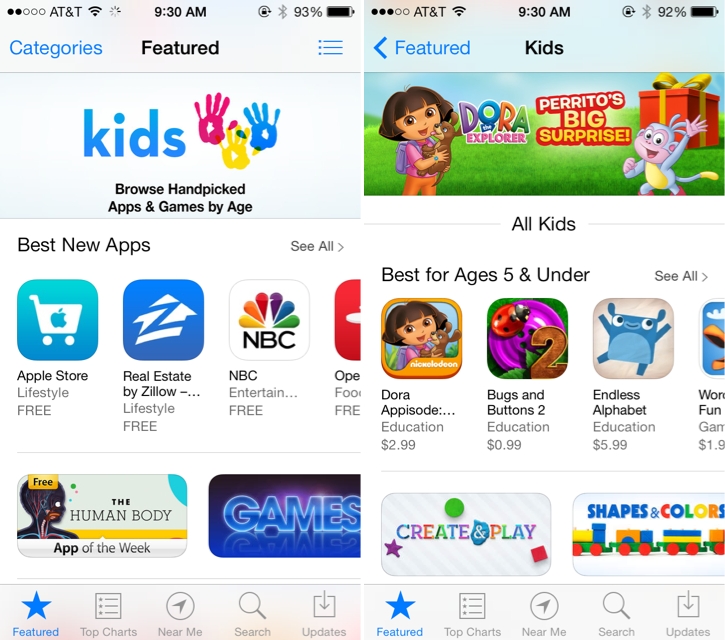
– September 19, 2013 – The App Store gains a dedicated Kids category.
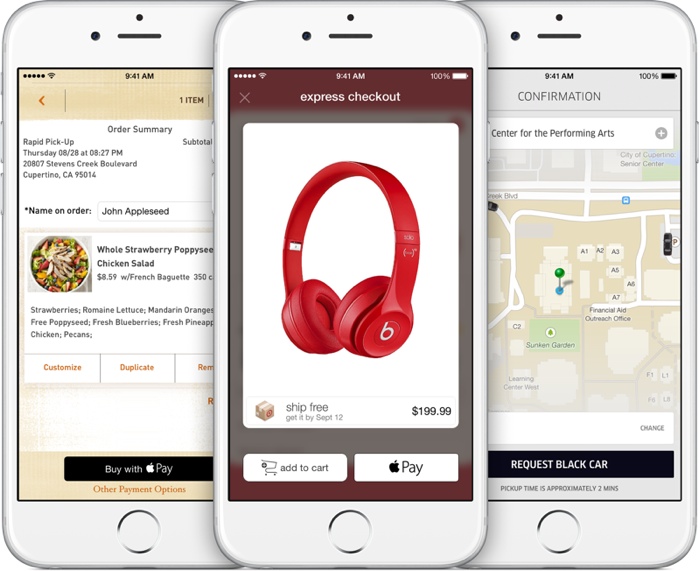
– October 20, 2014 – Apple Pay launches and can be used in apps to make purchases.
– October 23, 2014 – TestFlight launches, making it easier for developers and customers to beta test apps.
– November 19, 2014 – Apple changes the download button for all “Free” apps to “Get” to signify that free apps may have in-app purchases.
– April 25, 2015 – The first Apple Watch launches, bringing Apple Watch apps with it. Apple Watch apps are tied to iOS apps and are installed as an add-on.
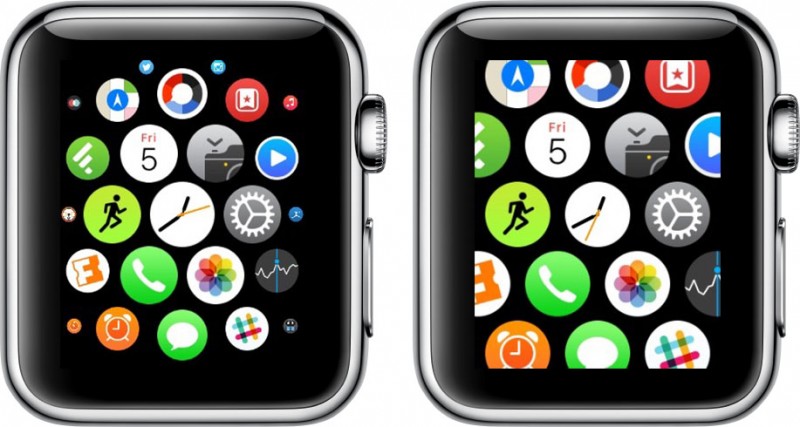
– June 8, 2015 – The App Store surpasses 100 billion lifetime app downloads.
– October 30, 2015 – The fourth-generation Apple TV with built-in App Store launches, allowing third-party apps and games to be downloaded on the Apple TV for the first time.
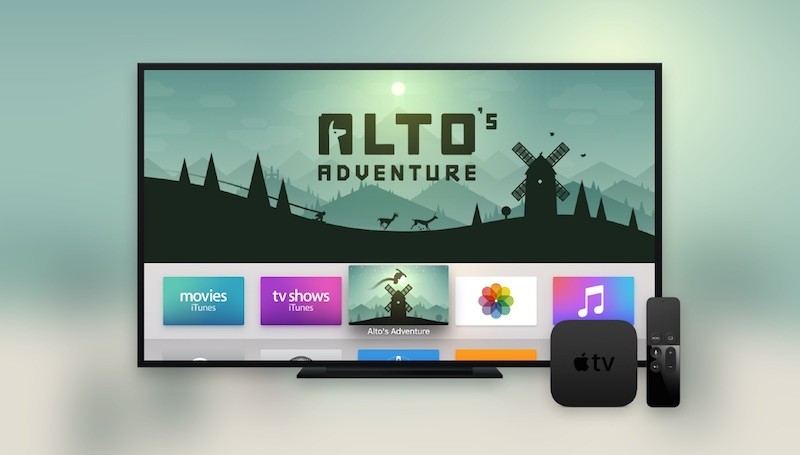
– December 17, 2015 – Marketing chief Phil Schiller takes over the App Store, which was previously led by Eddy Cue. He promises a “renewed focus and energy” on the App Store.
– June 8, 2016 – Apple announces major App Store changes, including subscription terms that cut down on Apple’s fees after a year, search ads, and the availability of subscription options for all apps. This also includes a commitment to clean up the App Store, eliminating old and outdated apps.
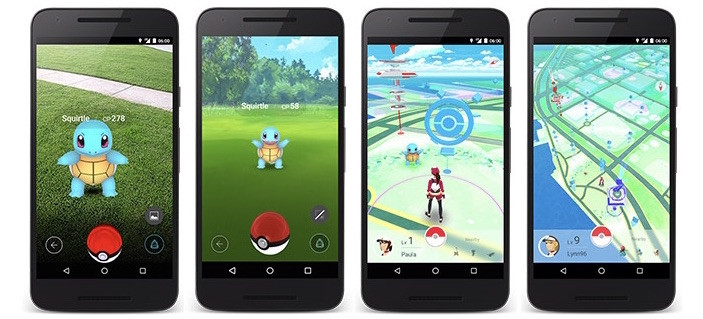
– July 5, 2016 – Pokémon Go, the first super popular augmented reality app for iOS devices, launches. It spends 74 days as the highest grossing app in the U.S. App Store and remains popular today.
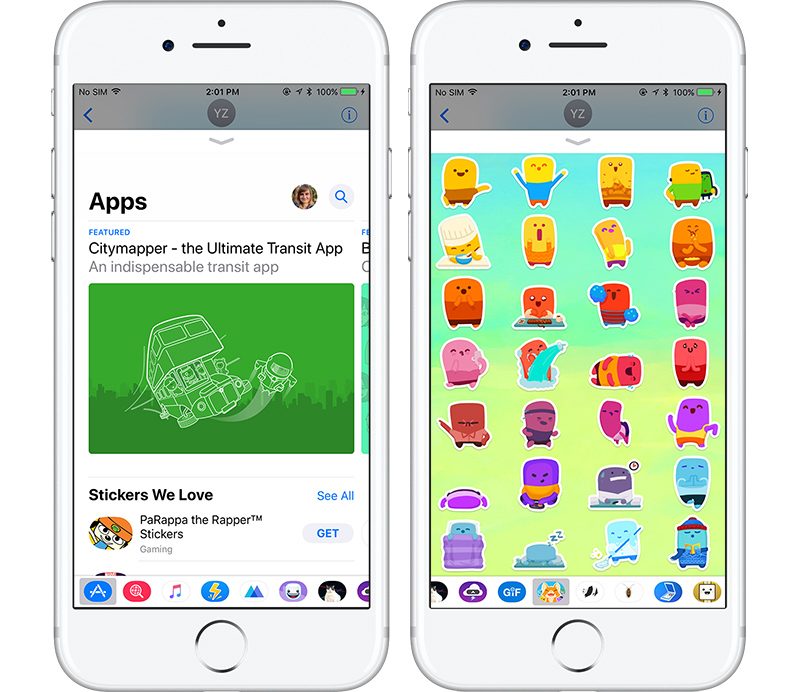
– September 13, 2016 – iOS 10 launches with Messages App Store, filled with apps that work in the Messages app and stickers.
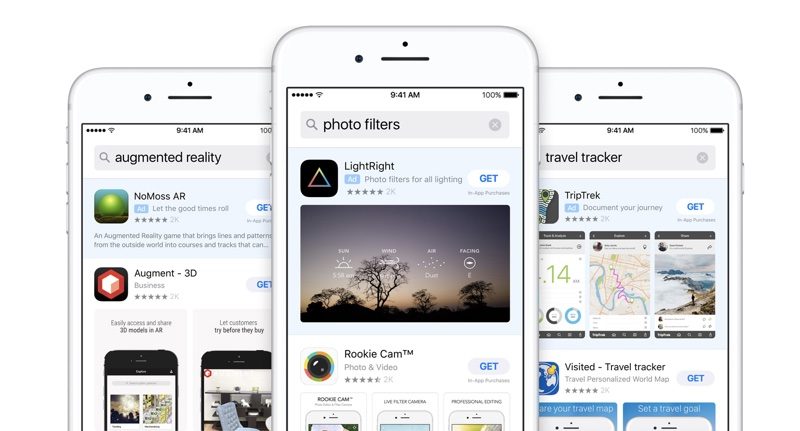
– October 6, 2016 – App Store search ads roll out, providing developers with new ways to promote their apps.
– December 15, 2016 – Nintendo launches Super Mario Run, its first app from an ultra popular franchise, which makes more than $53 million in under two months. Fire Emblem Heroes and Animal Crossing follow in later months.
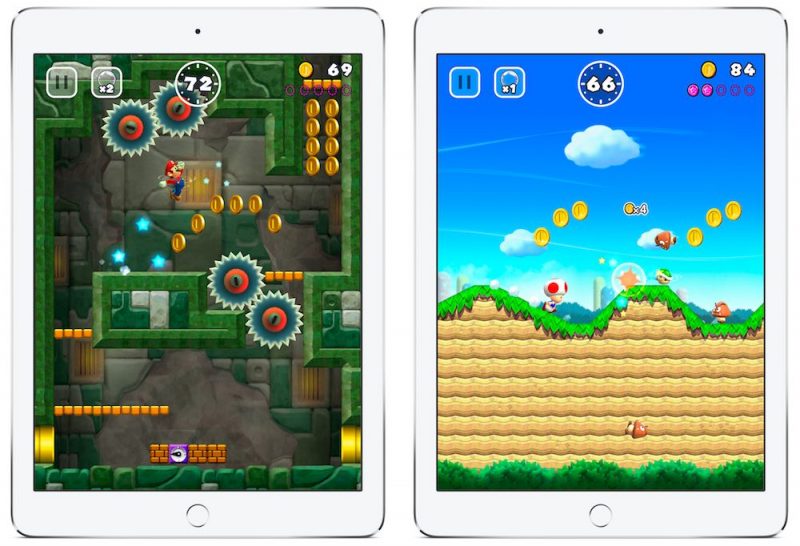
– September 12, 2017 – Apple releases iTunes 12.7, which removes the built-in iTunes App Store. Apple later released a version of iTunes 12.6.3 that retains the App Store for businesses that require desktop access to apps.
– September 19, 2017 – iOS 11 launches with an entirely revamped App Store.
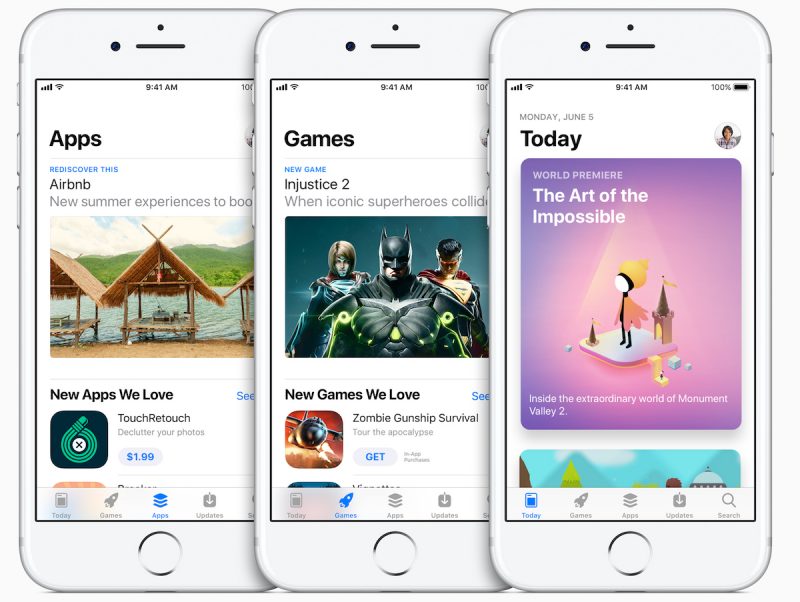
– September 19, 2017 – Alongside the revamped App Store in iOS 11, Apple launches ARKit, turning iOS into the largest augmented reality platform overnight.
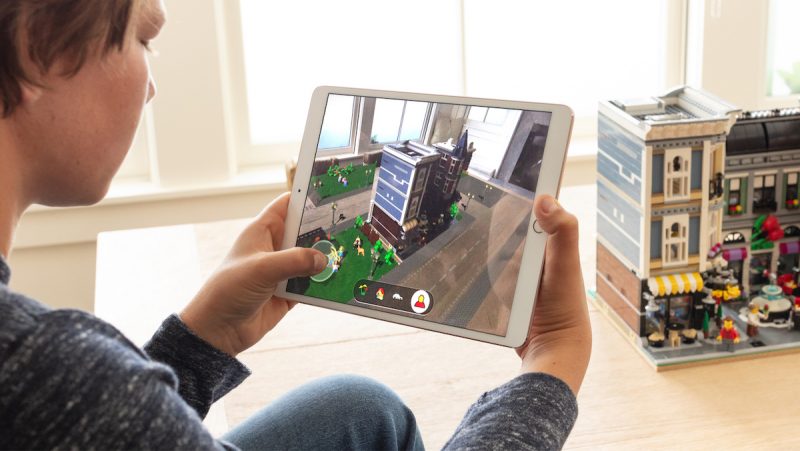
– December 11, 2017 – Apple begins allowing developers to offer app pre-orders.
– June 4, 2018 – Apple announces macOS Mojave with a major overhaul for the oft-overlooked Mac App Store that brings it in line with the iOS 11 iOS App Store redesign, which should improve app discovery and lure more developers to the platform.
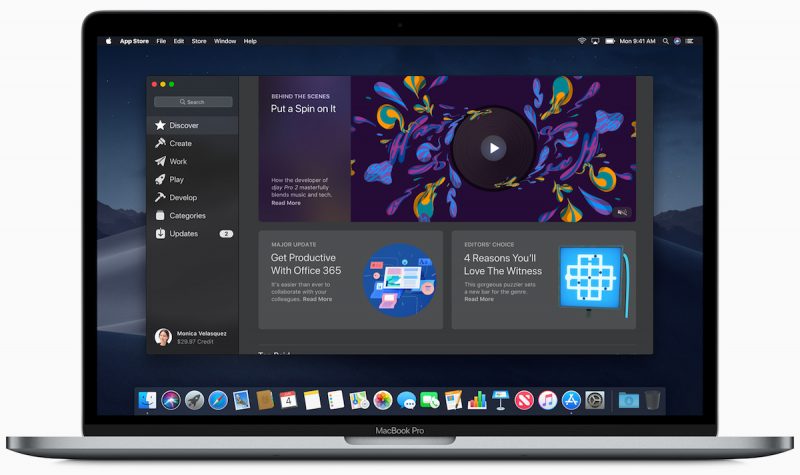
– June 5, 2018 – Apple changes its App Store guidelines, allowing all apps, not just subscription apps, to offer free trials to customers.
As of today, apps are available across all of Apple’s platforms, from the iPhone, iPod touch and iPad to the Mac, Apple TV, and Apple Watch. The new iOS 11 App Store sees more than 500 million weekly visitors, and developers have earned a total of $100 billion in revenue as of June 2018. There are more than 1.3 million apps available for the iPad, 28,000 apps that offer subscriptions, and 3,000 augmented reality apps.
Apple last week published its own retrospective of the App Store, which is well worth reading as it explores thoughts from some of the most influential developers along with milestones that Apple feels are most important. In a statement, Apple’s Phil Schiller said the App Store has exceeded the company’s “wildest expectations.”
“In its first decade, the App Store has surpassed all of our wildest expectations — from the innovative apps that developers have dreamed up, to the way customers have made apps part of their daily lives — and this is just the beginning. We could not be more proud of what developers have created and what the next 10 years have in store.”
There’s more in store for the App Store in the future, with some major changes in the works. In addition to the redesigned Mac App Store, Apple is developing common frameworks for iOS and Mac apps, with the eventual goal of making it easier for third-party developers to port iOS apps to the Mac.
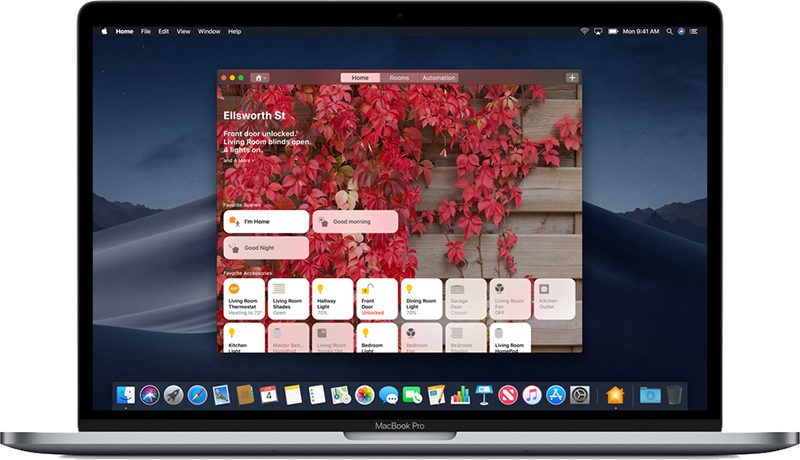
As a first step, several iOS-only apps have been brought to the Mac, including Apple News, Stocks, Home, and Voice Memos. Starting in 2019, Apple plans to let developers begin porting iOS apps to the Mac using these frameworks, which will increase the availability of Mac apps.
What changes do you hope to see Apple introduce to the App Store in the future? What was your favorite change that’s been implemented so far? Let us know in the comments.
Tag: App Store
Discuss this article in our forums
Apple to Use Bezel-Reducing Backlighting Chips in Upcoming 6.1-inch LCD iPhone
Apple may adopt LED backlighting chips for the LCD panels in its forthcoming 6.1-inch iPhone that enable it to reduce screen bezel size and bring LCD panels closer to bezel-free OLED screens.
DigiTimes reports that Japan-based Nichia will become the exclusive supplier of the LED chips for use in backlighting of the panels used in the 6.1-inch LCD iPhone, which Apple is expected to launch around September.
While LTPS-LCD smartphone screens with backlights using 0.4t LED chips have bottom bezels of 4.0-4.5mm, use of 0.3t LED chips can reduce them to 2.0-2.5mm, enhancing LCD screens’ competitiveness against OLED all (bezel-free) screens panels, the sources explained.
Packaging of 0.3t LED chips for side-view backlighting of LTPS-LCD smartphone panels is more difficult in accuracy and stability than that of 0.4t LED chips, the sources noted, adding Nichia began trial production of 0.3t LED chips for use in high-end smartphone models launched by China- and Japan-based vendors in the first half of 2018.
Apple is expected to launch three new smartphones later this year: Two OLED models measuring in at 5.8 and 6.5 inches and a 6.1-inch lower-cost LCD model. All three are believed to feature Face ID and edge-to-edge displays.
Apple analyst Ming-Chi Kuo, who first predicted Apple would introduce a low-cost LCD iPhone, believes the device will have a price tag that comes in at $700 to $800, similar to the iPhone 8 and the iPhone 8 Plus.
Previous rumors have suggested the use of upgraded display technology in the lower-cost device. For example, Apple may use Full Active LCDs from Japan Display, which are said to match or exceed some of the benefits of an OLED display at a lower cost. Japan Display is said to be ramping up LCD production in an effort to fulfill orders from Apple.
According to The Wall Street Journal, sources involved with Apple’s supply chain claim that Apple now expects LCD models to make up the majority of iPhone sales in its upcoming lineup. Apple initially wanted roughly equal production of iPhone models with LCDs and OLED displays, but now plans to make more of the LCD model, as it supposedly anticipates strong customer demand for the more affordable X-like model.
DigiTimes sources suggest trial production of the 6.1-inch iPhone will begin in July, with small-volume production in August and volume production beginning September. Based on that timeline, Nichia’s production capacity for the enhanced LED backlighting chips is expected to be booked up by Apple in the second half of 2018.
Additional details on what to expect in the iPhones coming in 2018, likely in the September timeframe, can be found in our 2018 iPhones roundup.
Related Roundup: 2018 iPhones
Discuss this article in our forums
Guy dunks a ‘naked’ iPhone X to make a whimsical underwater movie
A water-resistant smartphone offers peace of mind when you need to pull it out in the rain. It’s positively vital if you drop it down the toilet or in the bath, though its protective qualities also enhance the possibilities for those of a creative bent.
Take Frederic van Strydonck. The London-based filmmaker recently decided to have some fun with his iPhone X, Apple’s flagship handset that’s capable of surviving dips of up to 30 minutes in shallow water.
Frederic said that initially he just wanted to test out the phone’s ability to handle multiple dunks while shooting short video clips. But he soon realized that the dreamy sequences he created could make for an interesting short film.
“I recently decided to see how an iPhone would fare when filming underwater,” Frederic told PetaPixel. “The series of tests slowly became this weird little experimental short.”
He added: “I didn’t use any special waterproof casing for this. Just an iPhone.”
The result is Spltch, a two-and-a-half-minute movie (above) that he describes as “a little film about water.”
The whimsical short that takes the viewer to multiple locations, a new one revealed as the camera emerges from each subsequent dunk.
But before you rush out and dive into the nearest lake, river or ocean with your iPhone X, be aware that intentionally submerging the device may not be the best course of action for your $999 phone.
Its water resistance has been tested to a depth of one meter, and Frederic is keen to point out that while shooting the film, he erred on the side of caution by submerging only a part of the phone for each shot, and was sure not to leave it underwater for long periods.
In other words, putting Apple’s high-end phone underwater for longer than necessary is really done at your own risk.
With the iPhone X costing as much as it does, the fact is you’ll want to get yourself a durable case to protect it from knocks and drops, though some cases also offer increased protection against splashes and dunks, too. Digital Trends has pulled together a collection of some of the best iPhone X cases available today, with price tags ranging from as little as $4 all the way up to $175.
Editors’ Recommendations
- Jimmy O. Yang on replacing Erlich, becoming the Urkel of ‘Silicon Valley’
- What the hell? How Jonathan Higbee shoots these impossible street photos
- Here’s everything we know about Hideo Kojima’s mysterious ‘Death Stranding’
- Kygo Sound A9/600 BT review
- ‘Solo: A Star Wars Story’ review
Security Researchers Find Vulnerability in Apple’s USB Restricted Mode for iOS Devices
Security researchers claim to have discovered a loophole that bypasses USB Restricted Mode, Apple’s latest anti-hacking feature in iOS 12 beta and iOS 11.4.1, which was released on Monday.
USB Restricted Mode is designed to make iPhones and iPads immune to certain hacking techniques that use a USB connection to download data through the Lightning connector to crack the passcode.
iOS 11.4.1 and iOS 12 prevent this by default by disabling data access to the Lightning port if it’s been more than an hour since the iOS device was last unlocked. Users can also quickly disable the USB connection manually by engaging Emergency SOS mode.
However, researchers at cybersecurity firm ElcomSoft claim to have discovered a loophole that resets the one-hour counter. The bypass technique involves connecting a USB accessory into the Lightning port of the iOS device, which prevents USB Restricted Mode from locking after one hour.
ElcomSoft’s Oleg Afonin explained the technique in a blog post:
What we discovered is that iOS will reset the USB Restrictive Mode countdown timer even if one connects the iPhone to an untrusted USB accessory, one that has never been paired to the iPhone before (well, in fact the accessories do not require pairing at all). In other words, once the police officer seizes an iPhone, he or she would need to immediately connect that iPhone to a compatible USB accessory to prevent USB Restricted Mode lock after one hour. Importantly, this only helps if the iPhone has still not entered USB Restricted Mode.
According to Afonin, Apple’s own $39 Lightning to USB 3 Camera Adapter can be used to reset the counter. Researchers are currently testing a mix of official and third-party adapters to see what else works with the bypass technique.

Afonin notes that ElcomSoft found no obvious way to break USB Restricted Mode once it has been engaged, suggesting the vulnerability is, in his words, “probably nothing more than an oversight” on Apple’s part. Still, at present its existence provides a potential avenue for law enforcement or other potentially malicious actors to prevent USB Restricted Mode from activating shortly after seizure.
Both iOS 11.4.1 and iOS 12 beta 2 are said to exhibit the same behavior when exploiting the loophole. However, expect this to change in subsequent versions of iOS – Apple continually works on strengthening security protections and addressing iPhone vulnerabilities as quickly as possible to defend against hackers.
Apple reportedly introduced USB restrictions to disable commercial passcode cracking tools like GrayKey. Afonin cites rumors that the newer GrayShift tool is able to defeat the protection provided by USB Restricted Mode, but the research community has yet to see firm evidence confirming this.
Related Roundups: iOS 11, iOS 12Tag: Apple security
Discuss this article in our forums

