


Review: Fibaro’s ‘The Button’ Adds Physical Control Options to Your HomeKit Setup
“The Button” from Fibaro is the latest HomeKit accessory that’s designed to add physical control options to your HomeKit setup, making it easier to access HomeKit devices without an iOS device or HomePod.
Design wise, The Button looks like you might expect something called “The Button” to look. Made of smooth plastic, it has a small round base that holds a slightly larger button that depresses to activate HomeKit commands.
I like the look of the button, and it offers a satisfying button-like press that’s better than some of the other competing button and tap-style devices that offer physical HomeKit controls. The button I reviewed was white, but it is also available black and red.

The Button supports just three gestures: a single click, a double click, and a press and hold. This limits what can be done with The Button, so a household may need more than one if there are a lot of HomeKit products and you want granular control over each one.

You can attach the button to a wall or a desk using included adhesive or by nailing the plastic mounting plate into the wall. You can also just use it sans adhesive or mounting plate if it’s just sitting on a desk or nightstand, or if you want to be able to move it around.

There is no light to indicate that The Button is turned on and has power, but you can enable an audio feedback option in the settings section of the Fibaro app to have it beep when a button press is activated.

Setting up The Button is a little more involved than the setup process for some other HomeKit products. You need to press down and rotate The Button in a counterclockwise direction (like a childproof pill bottle) to open it up to remove the battery blocker.
Once open, you need to take out the user-replaceable 1/2AA battery that powers the accessory to remove the small piece of paper before putting the battery back in place and closing it back up. From there, you can download the Fibaro app or the Home app and add it to a HomeKit setup using the QR code in the manual.
There is no HomeKit code on The Button itself, which is going to be frustrating if it ever needs to be reset and re-added to HomeKit. I won’t be able to get rid of the manual, and will instead need to store it some place.
I thought the Fibaro app was one of the worst HomeKit apps I’ve ever used. It’s cluttered, has an unintuitive UI, and uses a color scheme that makes text hard to read. It also has no real instructions on programming The Button, which is going to be confusing for those who are new to HomeKit and unfamiliar with automations.

Most users will probably be better off controlling and programming The Button with the Apple Home app, where you can more easily assign Scenes and automations to each button press.
With The Button, you can do things like activate a specific scene to turn off all of the lights in the house at night, lock the door, and turn down the thermostat, or turn on all the lights in the morning and turn up the thermostat, all depending on which HomeKit devices you have installed and what you want The Button to do.

I set a single press to turn off all of the lights in my office with the exception of my night lights, and a double press turns them all back on in the morning. A long press sets an evening scene that dims the lights. The Button can do a huge variety of things depending on the HomeKit products you own, but I’ve found it most useful for lighting. It can turn lights on and off, dim lights, change colors, and more.
The Button was always responsive during my testing over the past couple of weeks, with each of the three button presses clearly activating each scene assigned to it. I didn’t run into any connectivity problems or other issues while using The Button, which is always a plus.
Bottom Line
When you just want to turn the lights on or execute a quick action, it can be a hassle to pull out your iPhone and open up the Home app or use Siri. Physical control products like The Button add a lot of convenience to a HomeKit setup, and they’re a must have for guests who don’t have access to your HomeKit devices but need to control something simple like a light.

At $60, The Button is more expensive than competing options like the Eve Button, or the Hue Tap, but it’s on par with the Logitech Pop and it’s arguably one of the more fun button devices you can purchase given its intuitive button design and the range of colors it’s available in.
How to Buy
You can purchase Fibaro’s The Button from Amazon for $59.99.
Tag: HomeKit
Discuss this article in our forums
Nintendo Labo: Here’s how to make your own apps in the Toy-Con Garage
Much of Nintendo Labo is bound by a strict ruleset. The Toy-Cons, Labo’s cardboard peripherals, must be built as specified to work properly with the game’s included apps. Once you have built them all, though, the experience expands greatly thanks to Toy-Con Garage, an in-game programming toolset. Available in both the Variety and Robot Kits, Toy-Con Garage lets you create new toys and gadgets by setting simple, mechanical reactions to make your Switch, Joy-Cons, and Toy-Cons work in new ways. Here’s how to use the Toy-Con Garage.
Where is it?
The Toy-Con Garage is kind of a secret. The game front-loads its “Make” and “Play” sections to get players building Toy-Cons before trying anything else. You have to work your way through the instructions to construct at least one of the following Toy-Cons: Fishing rod, piano, motorbike, house, or robot, if you have the Robot Kit. Afterward, head over to the Discover section from the main menu. Here you can click on completed Toy-Cons to learn more about how they work. Once you watch one of them, a new icon, initially dubbed “secret lab,” appears at the bottom of the Discover page.
Click on that and voila, you have gained entry into the Toy-Con Garage.
Node-based programming
The Toy-Con Garage uses “node-based programming,” a flowchart-like visual language that lets users create simple, input-based tools (or toys) with no coding experience. Labo explains the basic principals of how the system works in a brief tutorial when you first enter the garage. After that, it’s up to you to create your own commands.
From the start, you will notice the screen is very plain. It’s black and white, with small red and blue connector tabs pointing out from the side of each box. Blue connectors belong to input boxes. Red connectors go on output boxes. If you connect an input to an output by drawing a line on the touchscreen, an event is created.
For instance, if your input box says “touch” and your output box says “vibrate” with a 1 and L in the upper lefthand corner, when you touch the input box, the left Joy-Con will vibrate once.
At first glance, it’s not a very elaborate system, but you can make it as complex as you want by modifying inputs, outputs, and introducing middle events that serve as segues between the two.
Inputs
There are nine types of inputs, many of which can be further modified to create very specific controls schemes. The input is what you have to do to tell the console to execute the output.
- If Touched: Touch the input box to initiate the output command.
- If Shaken: Can either be assigned to left or right Joy-Con.
- If Button is Pressed: Can be assigned to a single button or as many buttons as you like.
- If a Control Stick is Moved: Assigned to either left or right Joy-Con. Can be modified to either up, down, left, right, or any direction.
- If the Joy-Con is Face-Up: Face-Up means any of the six different positions the Joy-Con can be held or rest.
- Console: A combination of If Shaken and Face-Up but using the Switch console instead.
- If an IR Marker is Seen: The IR marker is located on the bottom of the right Joy-Con. It’s the infrared camera. If the console detects the IR through movement, the output is executed.
- Toy-Con: Pertaining to the fishing rod, house, motorbike, and piano. Let’s you execute commands with Toy-Con movement. Alternatively, the robot can be used for this input with the Robot Kit. Sadly, you can’t combine Robot Kit movements with the Variety Kit.
You can also connect two inputs to an output or vice versa, so when you execute an input such as touching the screen, you can make both the screen light up and tell a Joy-Con to vibrate. If an output connects to two inputs, it acts as an OR statement, which means that either input will execute the output.
Editing inputs
When you want to change options such as button inputs or Face-Up commands, click on the setting wheel in the lower lefthand corner of the input box. This is where you can further customize your inputs to your liking.
You can also change the size of the input box by dragging the arrow in the lower righthand corner. This is primarily used for touchscreen controls, but if you create a sizable project with many different commands, you may want to make the boxes smaller to avoid cluttering your screen. You can also zoom in and out by pinching and pulling the screen with two fingers.
Outputs
The output is what happens when the input is committed. There are four outputs:
- Emit IR Light: This one tells the right Joy-Con camera to light up its infrared sensor. You can have up to two Joy-Cons with infrared sensors connected at once.
- Light Up Screen: The output box lights up when the input is executed.
- Make Sound: Music notes play when the input is executed.
- Vibrate: Joy-Con vibrates when input is executed.
Like inputs, you can modify outputs by pressing the setting wheel in the lower righthand corner of the box. For instance, you can modify the “make sound” output from its default piano to sound like a guitar, singing cats, or oddly tuned men and women. As with inputs, you can change the size of the output box. This comes in handy when making different sized light-up nodes.
Middles
You can further modify commands by inserting middle blocks between inputs and outputs. There are five middle options, not including the “comments” tool, which lets you write notes, but has no mechanical effect on your creation.
- Counter: The counter keeps track of the number of times an input is executed. You have to attach three inputs to this node, one that makes the counter go up, one that makes it go down, and one that sets it back to zero. As you execute input commands, the output will gradually appear on screen as the counter goes up. For instance, a light-up output will gradually turn the node white as the counter goes up.
- Timer: Adding a timer puts any output on a delay, anywhere from one to 10 seconds.
- NOT: Anything that is not the input will cause the output. So if you set the screen to not light up when you touch it, any time you are not touching it the screen will be lit.
- AND: Combines two inputs for a single output. Using an And box makes it so you need to use both inputs to trigger an output.
- Bullseye: This one’s a little tricky. The bullseye acts more like one half of a two-part input, not a “middle.” The bullseye, when used in conjunction with an IR Marker, allows you to create a target on your Switch screen, which you can trigger with the IR camera on the right Joy-Con. To work, the bullseye must be connected to an IR Marker, and the marker must be placed over the Bullseye as much as possible.
Analog, digital, and range
You will notice that numerous Inputs have analog or digital settings that can be switched through the settings wheel. By default, these are set to “analog.” Analog is more like a slider. For example, if you shake the Joy-Con gently, the output will be less pronounced. If you shake it harshly, the output will be stronger (your screen lights up faster, Joy-Con rumbles harder, etc.)
Digital outputs are more simplistic. No matter how hard you shake the Joy-Con, the output will always be the same.
The range bar further modifies an output’s conditions. Located under the Digital/Analog settings, the bar features a pair of sliders on a scale from 0.00 to 1.00. Moving the left slider increases or decreases the minimum power for an analog output. The right slider starts on the far right of the range bar and can be used to decrease the output’s maximum power. On a digital output, the device will default to the maximum output every time.
Playing, naming, and saving your file
If you want to test your project at any point, simply press the play button on the top of the screen. To go back to edit mode, press the play button again.
Your progress automatically saves when you exit the garage, but if you want to start a new project make sure you save your current one. Click the menu icon in the upper lefthand corner to name and save your project. You can have up to eight projects saved at once.
There is really no wrong way to create a Nintendo Labo app of your own once you understand the basics. Check out these eight playful Labo creations, most of which were made using Toy-Con Garage.
Editors’ Recommendations
- Nintendo Labo parent guide walks your child through the building process
- Nintendo Labo review
- Nintendo Labo: Tips for a clean and efficient building experience
- How to connect a Nintendo Switch controller to your PC
- Windows 10 vs. MacOS vs. Chrome OS
How to factory reset a Samsung Galaxy S7 or S7 Edge
Samsung Galaxy S7 and S7 Edge Jessica Lee Star/Digital Trends
There comes a time when you’re either running into software issues with your smartphone or you’re about to sell it, and you need to reset and erase all data. This process always comes with a word of caution to back up anything precious before you begin. Your smartphone will warn you that all data including contact information, photos, and account information will be erased because you’re basically resetting the smartphone to where it was when it was taken out of the box for the first time.
Let’s go ahead and factory reset a Samsung Galaxy S7 the right way.
Factory Reset Protection (FRP)
This is very important: You must disable FRP before you erase your smartphone, if you’re planning on selling it or giving this device to someone else. If you don’t do this, the next person will see this message on the screen:
“This device was reset. Sign in with a Google Account that was previously synced on this device.”
If this happens then you will have to give the new owner your password, and nobody wants to do that.
How to disable FRP
- In Settings, go to Lock screen and security and remove all passwords, patterns, or PINs. Everything under Screen lock type must be removed.
- Open Settings, go to Cloud and Accounts > Accounts and tap on Google, then tap the menu (three dots) at the top right and select Remove account.
- Once you remove all accounts from your device, you can reset your smartphone.
Now you’re ready to erase your smartphone. Remember, just like the screen says, all of your data will be erased and your phone will be completely wiped, back to how it was the day it came out of the box.
There are two kinds of resets. You can do a factory reset from the settings menu or by using the hardware keys to enter recovery mode. Let’s take a look at the easy way first.
How to factory reset a Galaxy S7 from the settings
- Go to Settings.
- Scroll down to Backup and Reset.
- Go to Factory Data Reset.
- Here you will see the Reset Device button.
- To confirm, it will ask you for your password, PIN, or pattern.
- Then choose Delete All.
How to factory reset via recovery mode
There may be times when you can’t get your S7 to start properly. Maybe after an update or some other software issue that prevents it from booting up or sends the device into a boot loop. In this case you can perform a reset through the Android recovery menu using the hardware keys. It is similar to pressing F8 while booting into Windows. It requires us to turn on the smartphone a certain way to access the recovery mode menu.
- With your Galaxy S7 turned off, press and hold the Power, Home, and Volume Up buttons at the same time.
- Keep holding down Power, Home, and Volume Up until you see Recovery Booting at the top of your screen (in the case of my Exynos S7, a dancing Android robot). When you see that, then you can let go of the buttons.
- Now please wait a moment while it boots into Recovery Mode. Once you’re in Recovery Mode, you will see a list of options.
- Scroll down using the Volume Down button until wipe data/factory reset is highlighted.
- Push the Power button to select this option.
- It will ask you to confirm.
- Press the Volume Down button to select Yes and confirm the reset.
So, now your Samsung Galaxy S7 is reset and as clean as a whistle. If you remembered to disable FRP then it is ready to be sold or passed to the next user.
If you erased your Galaxy S7 to fix issues and they’re still not resolved, please check out our 15 major Galaxy S7 problems, and what to do about them and 15 annoying Galaxy S7 Edge problems and how to fix them for more advice.
Editors’ Recommendations
- Don’t live on the edge, get one of the best Galaxy S7 Edge cases
- How to take a screenshot on a Galaxy S8, S7, Note, or any other Android device
- How to factory reset a PS4
- How to reset a Galaxy S9
- How to reset your iPhone
News junkies, Google News looks set for a major overhaul
Google News is in the news. Reports suggest that the service is about to receive a major makeover that could be announced as early as next week.
Changes look set to involve a fresh design for the web interface that will also incorporate elements of Google’s digital magazine Newsstand app, which itself could be replaced, AdAge reported on Thursday, May 3.
The revamped tool is also expected to include the news section of YouTube as Google works to add depth to its content while making better use of video already available on its network of offerings.
An unnamed source with knowledge of the changes told AdAge that the Newsstand app, currently available for Android and iOS, is likely to be replaced with an all-new Google News app. Newsstand pulls together news sources from around the world and lets you set up a daily briefing that delivers the most important stories of the day. You can also save stories or download particular publications to read later. Its recommendation system is designed to improve over time, serving up content according to a user’s interests. It remains to be seen precisely which, if any, of these features Google is transferring to its redesigned news offering.
The source said that the upcoming changes are essentially “a consolidation of all the ways you can interact with news on Google,” adding that the aim is to bring all of Google’s news services under one brand.
The company will also incorporate its Accelerated Mobile Apps technology that helps web content to load more quickly on smartphones, the report said.
To summarize, the update will apply to Google News for web, with a reworked news app also offered for mobile users.
Rival tech giant Apple, which dug deep into news delivery with the launch of its News app in 2015, could be on the verge of making major changes to its own service. A Bloomberg report last month claimed the company is working on a premium subscription-based offering that will give news junkies access to a slew of digital magazines and news sources.
The all-new Google News service, meanwhile, could be unveiled next week during Google I/O, the company’s annual developer bash where new products are showcased. Check back for more information from May 8, when the conference begins.
Editors’ Recommendations
- Keep up-to-date with the best news apps on iPhone and Android
- Apple reportedly wants to become the Netflix of magazines via Apple News
- New Apple News section lets you stay updated on all things Olympics
- Seven months after being acquired by Comcast, Stringify is back with new features
- Moto G6 vs. Moto G5: Is it time to crown a new budget king?
Verizon doesn’t care about Sprint and T-Mobile’s merger, says it’ll win 5G race
“We frankly don’t care,” is Verizon’s CEO Lowell McAdam’s response to the recently announced plan for competitors Sprint and T-Mobile to merge. His comment came during an interview ahead of the carrier’s annual shareholder’s meeting, according to the Seattle Times. McAdam had been asked to comment on the impending arrival of a sizable new competitor, and added, “We don’t have a point of view on whether it goes through or it doesn’t.”
The T-Mobile and Sprint merger has been tried twice before. Neither time has resulted in success, but this time it seems both firms have agreed on terms and conditions. The new company will be called T-Mobile, and will be home to 126 million customers, or around 25 million fewer than U.S. market leader Verizon. T-Mobile CEO John Legere called it, “A larger, stronger competitor that will be a force for positive change.”
While Verizon’s CEO is publicly nonplussed about the merger, expect a considerably increased amount of hype — as if it was needed — around 5G technology in the near future. Verizon considers itself the most prepared of the competition when it comes to the next generation of wireless connectivity. T-Mobile and Sprint are using 5G as a major selling point of the merger, and Legere is rarely quiet about anything that helps sell his company to customers, and in this case, regulators overlooking the merger.
“Services are going to be broadened, prices are going to go down, speeds are going to go up. If you liked the competition before, you’re going to love what’s coming with this one,” he proclaimed to CNBC. Moving on to 5G, he said, “We are behind. It’s the early innovation cycle of 5G. We are behind China. This is not something we can allow.” Sprint CEO Marcelo Claure agreed: “The U.S. needs to lead in 5G. The only want to lead 5G is by combining Sprint and T-Mobile. AT&T cannot do it. Verizon cannot do it.”
Unsurprisingly, Verizon’s McAdam doesn’t see it that way. He estimated to GeekWire a merged T-Mobile and Sprint will take two years to get up and running, and Verizon will make the most out of that time. He summarized his feelings by saying, “I don’t think the merger matters from a 5G perspective.”
It’s not the first time Verizon has talked up its 5G prowess. At a telecoms conference in March, Verizon Wireless president Ronan Dunne said the carrier would deliver the best service in 5G, like it had done with 2G, 3G, and 4G LTE. “That’s one thing you can be absolutely certain about. Everything else will be fake news,” he’s quoted as saying. Like Verizon, AT&T also plans a limited launch of 5G in several U.S. cities this year.
Editors’ Recommendations
- T-Mobile and Sprint are merging — here’s what it means for you
- Everything you need to know about the T-Mobile and Sprint merger
- For ‘Black Panther’ star Michael B. Jordan, Killmonger isn’t just another villain
- Hey, I didn’t order this dollhouse! 6 hilarious Alexa mishaps
- Qualcomm’s ‘Always On’ PCs are coming to T-Mobile and AT&T
Facebook’s very, very sorry, and it has absolutely no intention to change
Less than a month after Mark Zuckerberg apologized to Congress for his company’s failure to prevent Cambridge Analytica from stealing and abusing private data on millions of users, he found himself once again in the spotlight. This time, though, it was a spotlight he controlled: F8, the company’s annual developer conference.
While Zuckerberg’s apology tour continued, conducting it on home turf noticeably changed the CEO’s attitude. The tense, tight, thin-lipped man we saw at Congress was replaced by a lively, optimistic character who, though still awkward, managed something akin to charm.
The tense, tight, thin-lipped man we saw at Congress was replaced by a lively, optimistic character who, though still awkward, managed something akin to charm.
It was a remarkably brash performance. Zuckerberg turned his senate appearance into a gag. In doing so, he humanized himself and his company while painting critics – including the senators who questioned him – as inconsequential. It was a good joke. It also made Facebook’s intent clear.
Build it, whether they want it or not
For a time, it seemed the keynote made us witness to the most unlikely of supernatural occurrences. It was as if Steve Ballmer, bored and frustrated by his Clippers’ lackluster performance, possessed the body of Zuckerberg and projected his consciousness into F8’s convention hall. If not that, there was at least some forced enthusiasm from the normally stilted Zuckerberg.
Josh Edelson/AFP/Getty Images
“We will keep building!” he bellowed, like a general rallying his troops. “This is an important moment. We need to do more to keep people safe, and we will. But we also need to keep building and bring the world closer together.” At least Zuckerberg didn’t jump around the stage.
The company did throw all of us a bone with its new Clear History function, which lets you delete your Facebook data history in a manner akin to erasing your web history in a browser. It’s a useful, appreciated feature, but not one worth much applause. Companies like Google and Microsoft both have in-depth transparency of collected data, with the option to remove it, so Facebook’s big announcement is merely an attempt to catch up with its peers.
“We need to do more to keep people safe, and we will. But we also need to keep building and bring the world closer together.”
Facebook followed Clear History with a full salvo of new features that might cause privacy concerns – like Dating.
Zuckerberg’s mockery of his senate appearance was a good joke, but it can’t compare to the bitter irony of Dating’s arrival.
Facebook’s image as bad as it has ever been. It’s struggling to retain young users and constantly alienating people already on the service with its privacy screw-ups. A recent Gallup poll found that 74 percent of people who use Facebook are “very concerned” or “somewhat concerned” about invasion of privacy. Only 11 percent said they’re “not concerned at all.”
Those are staggering numbers. The average American is more likely to believe Bigfoot exists than trust Facebook. So, yeah… why not let Facebook into your love life? What could possibly go wrong? Plenty, of course. There’s a reason why most people don’t use major social media websites for dating. Independent sites offer a degree of anonymity.
Even Tinder, which directly links to Facebook, pulls in only so much data from the social network. Zuckerberg of course promises that Dating will be oh-so-responsible with your private information, displaying only first names, but it’s not yet clear how you’ll decide what photos, information, and interests appear.
While Dating was the creepiest new tendril built by Facebook at F8, it wasn’t alone. The company’s pursuit of VR is plenty disconcerting, since it implies a desire to insert Facebook between people and their virtual experiences – which, of course, will often be social.
The average American is more likely to believe Bigfoot exists than trust Facebook.
At another point, Zuckerberg went all starry-eyed over a computer vision technology that can recreate the rooms of a home in virtual reality using only photos. Though presented as a way to revisit your childhood home, it’s not hard to think of more nefarious uses. Computer vision already lets people make fake pornography of famous actresses, or anyone else with a few hundred photos posted online. Now, Facebook is showing us how people might recreate an intimate scene on someone’s couch using nothing more than photographs.
Jeez. It’s hardly a wonder everyone at Facebook seems so happy.
Nothing to see here
It’s easy to criticize, of course, and Facebook would like you to remember that. Facebook’s constant references to positivity are more than part of corporation culture. They’re also an obvious public relations ploy meant to distraction us – and developers, who are F8’s intended audience — from the company’s problems. Facebook’s naïve optimism is that of a child elbow-deep in a bag of Oreos who, once caught, insists she only took them to share with everyone.
Justin Sullivan/Getty Images
What would be your response to that scene? Would you thank the kid for her kindness? Would you let her go outside to ‘share’ them freely? Would you give her access to your instant messages? Am I taking this metaphor too far?
You get the point. Facebook is playing us for fools. The positive tone is meant to disguise a more sinister message. The company thinks it knows what you want better than you do, and it’s going to build what it thinks you want, whether you like it or not. I mean, what are you going to do? Leave? Hah!
Don’t be fooled. Facebook’s F8 keynote changed nothing. It’s still the same company it was before, prone to familiar mistakes, making hollow promises. Above all, it’s a company — one that makes its money by selling your personal data. Give that a moment’s thought before you sign up to make Zuckerberg your personal matchmaker.
Editors’ Recommendations
- Amazon is very interested in Arlington County, Virginia
- Could Facebook be broken up over privacy concerns?
- Facing Facebook: Congress should take action to protect our privacy
- Facebook takes aim at Tinder and Bumble with its own dating service
- Facebook’s F8 starts Tuesday. What do you want to hear about?
MacBook Pro users are sticklers about sticky keyboards, demand Apple recall
Thousands of MacBook Pro owners have started a petition to encourage Apple to recall their MacBook Pros following continued difficulties with the laptops’ keyboard. Declaring all MacBook Pro keyboards since late-2016 “defective” due to a design failure, the petition demands that Apple recall the laptops and replace the keyboards with something new “that just works.”
In the never-ending race to make the slimmest and lightest laptops, Apple, alongside other manufacturers, has been trimming the fat on its notebooks for years. One way Apple did so in recent generations of the MacBook Pro, was redesigning the keyboard with a new “butterfly” switch of its own making. It’s gone through a couple of iterations, but failure rates have skyrocketed and MacBook Pro users claim that all of them are at risk of breaking or becoming stuck due to their innate fragility.
Like most of Apple’s laptops, the MacBook Pros have very poor ratings when it comes to user-repairability, so those faced with sticky or stuck keys have been forced to go down the official Apple repair route. As VentureBeat highlights though, those repairs can be expensive, with some users quoted as much as $700 for the fix. That, according to the authors of the petition, is simply not good enough, and they’re demanding that Apple do something about it.
The petition has so far been signed by just over 3,800 people and quotes a number of MacBook Pro owners who have run into various keyboard issues, from sticky keys, to defective keys, to those who have found their MacBook Pro entirely unusable because of keyboard failure. They demand not only a replacement program and recall for all MacBook Pros sold since late 2016, but a fully redesigned keyboard, not just a replaced one.
If enacted, such a recall would be of an enormous scale and could cost Apple dearly. However, it’s not like Apple doesn’t do product recalls when it does encounter significant problems with its hardware. It recently announced a recall of the 13-inch MacBook Pro due to potential problems with its battery. However, that MacBook Pro is limited to the non-touch-bar version and only those produced between October 2016 and October 2017. A recall of all MacBook Pros for keyboard replacement would be on a far grander scale.
Editors’ Recommendations
- Failure rate of MacBook Pro ‘butterfly’ keyboards is double that of older models
- Dell XPS 13 vs. MacBook Pro 13
- What if Apple replaced the MacBook keyboard with a giant screen?
- Apple files patent for a crumb-resistant MacBook keyboard
- The best MacBook
Where to buy Oculus Go

VR goes cordless
Now that we have received the update that Oculus Go will be shipping today and it’s time to see all the reasons why you need to add it to your battle station of games and technology. Check out below to see where to get your own Oculus Go!
See on Amazon
What is Oculus Go?
First, there was the Oculus Rift and Gear VR, but now Oculus has created the Oculus Go(OGO). This headset is completely cordless and severs the need for a high-end computer or a quality phone. The device will be manufactured by Xiaomi and the price will be $199. To see where the money you’re putting into this device is going click here
Yes, significantly better. BTW, did someone from support get in touch with you about the video regression? There is a task open.
— John Carmack (@ID_AA_Carmack) February 23, 2018
Around February 2nd the trusted developers received their dev kits, letting the world know their thoughts. One in particular, Kevin W. mentions ” The display is much crisper than CV1. The FOV(field of view) seemed slightly tighter (not much). Felt like the same performance as a GVR(Gear VR), just better screen.” Then, John Carmack, the Oculus VR CTO, tweeted that the Oculus Go will run “significantly better” than the Galaxy 7 on a Gear VR.
So, not only is the OGO going to be the first VR headset released that is completely cordless, but it’s going to top some of the headsets that are used through other devices. So, when you can get a Gear VR off of Amazon for about $100 why not take the $99 plunge into having something with a better performance that’s standalone for the new age?
Read more about the Oculus Go here!
Where can I get one?

All the listed sites sell the 32GB for $199 and the 63GB for $249.
Amazon
As of right now the best place to order your Oculus Go headset is through Amazon. With your Amazon Prime subscription, you can have it shipped to you in two days! Amazon does not have UK and other major EU country shipping options as of yet, but we will keep you posted!
See on Amazon
Oculus Store
Other than Amazon, you can also order your Oculus Go to the Oculus Store. Confirmed they are shipping in the UK and major EU countries!
See at Oculus
Best Buy – UK & EU country shipping available
Other than that call your local Best Buy as they already have them on the shelves if you prefer to buy them in person. The fun doesn’t stop there, either. Going to buy them in store you can also do a demo of the Oculus Go in stores. They also have options to buy online! Check the link below!
See at Best Buy
Where will you buy yours?
Tell us in the comment section below! How excited are you?
Update May 3, 2018 : Best Buy now has in-store demos, starting today!
Traveling to India? These are the apps you need to install
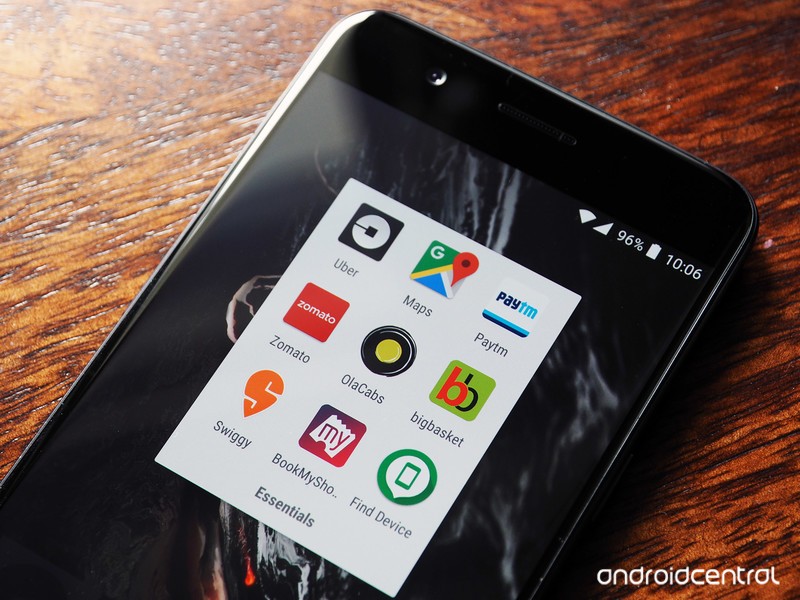
India has a thriving local app ecosystem.
India is now the second-largest smartphone market, only behind China. Mainstream availability of 4G and an influx of affordable handsets has led to a meteoric rise in smartphone adoption in the country, and for millions of users, a phone is the only gateway to the internet. As a result, there’s a thriving app ecosystem in the country.
If you’re traveling to India for the first time or are returning to the country, these are the apps you need to install on your phone.
Google Maps
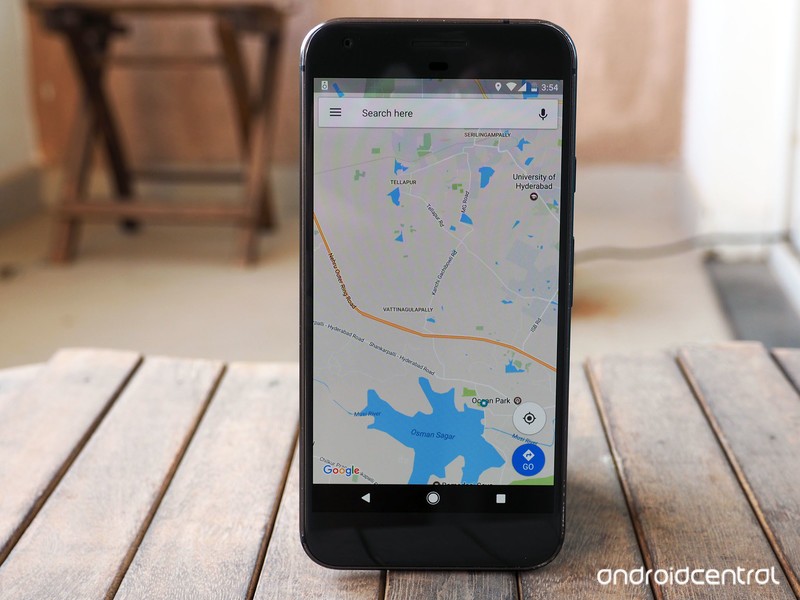
Google Maps comes bundled with every Android phone, which is a good thing as the service is invaluable in India. Most cities in the country aren’t well-planned, and a distinct lack of road signs makes getting to your destination harder than it should be. While you can ask around for directions — English literacy is high in most parts of the country — a better option is to just use Google Maps.
Google has invested significant resources into its Maps program in India, and the service is as reliable as it is in Western markets. You get easy access to live traffic information, along with schedules for public transit, the ability to download areas offline, and turn-by-turn directions. Google also offers features like two-wheeler mode, which made its debut in the Indian market.
If you’re heading to a city like Bangalore, where the traffic situation is unpredictable at best and downright horrendous most days, you’re going to need Maps.
Everything you need to know about Google Maps
Uber/Ola
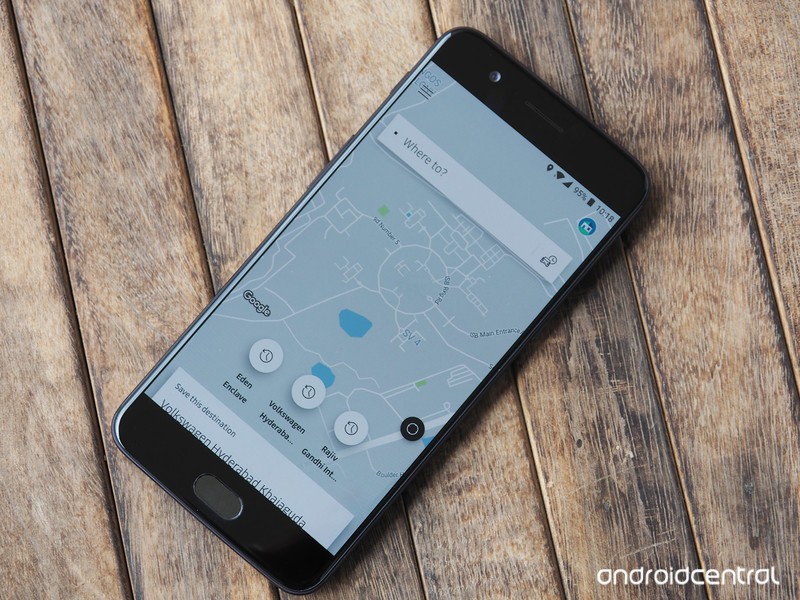
Public transportation isn’t the best way of getting around in India, but there’s no dearth of ride-hailing services in the country. India is one of Uber’s largest markets, and you’re likely to find a cab at any hours of the day in most cities. In the odd instance that you cannot get a cab on Uber, you can rely on Ola, India’s local ride-hailing alternative.
Both Uber and Ola let you book a ride in advance. With Uber, you can use the number and credit card account that’s already associated with your account, but with Ola you’ll have to use a local number. If you don’t already have a local number, you can easily get your hands on one. When it comes to payment, you can add your credit card, or use cash.
- Download Uber from the Play Store
- Download Ola from the Play Store
Google Translate
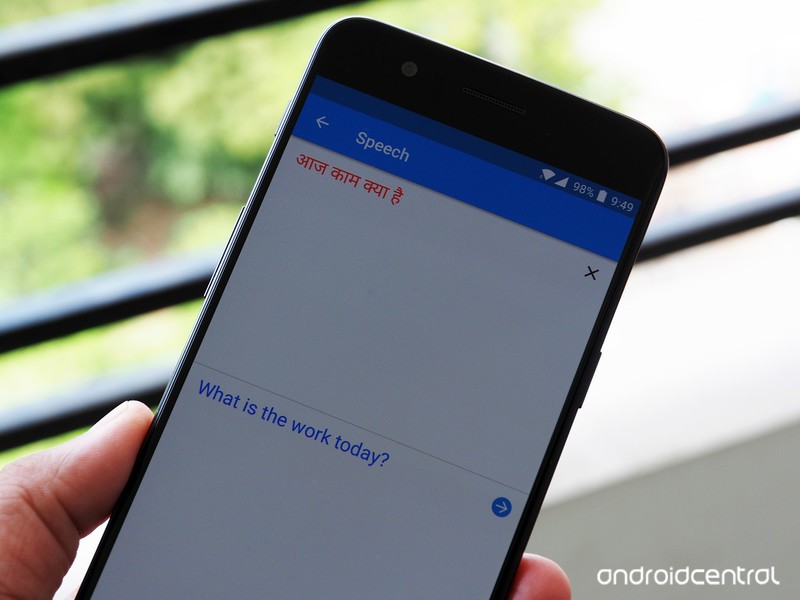
English literacy is great in most sections of India, but there will be times when you’ll run into locales where there’s only Hindi or other regional languages. India has over 23 official languages, so a good bet is to have Translate installed. Because India is a major market for Google, the search giant has done a lot of the legwork in translating some of the more commonly used languages in the country.
As such, you’ll be able to get on-the-fly translation even if you’re in remote sections of India.
Download Google Translate from the Play Store
Paytm

Paytm is one of the most useful services in India. The app lets you book local flights, trains, and buses, and offers the easiest way to pay for purchases at most local stores. The service started out as a digital wallet, and most merchants — including restaurants, retail stores, and street vendors — now accept Paytm as a valid form of payment.
To get started, you’ll need to have a local SIM card as Paytm relies on a mobile number for sending a OTP (one-time password) during account creation. Once you set up, you can send money by scanning a QR code at an establishment, or via entering the recipient’s mobile number.
- Download Paytm from the Play Store
- How to pick up a local SIM in India
Zomato

Zomato is India’s version of Yelp. You can easily find a restaurant of your liking based on your cuisine or budget preferences, and it has a curated list that highlights prominent eateries in a particular city. Like Yelp, Zomato has an active community of users that rate restaurants.
Download Zomato from the Play Store
BookMyShow/Insider
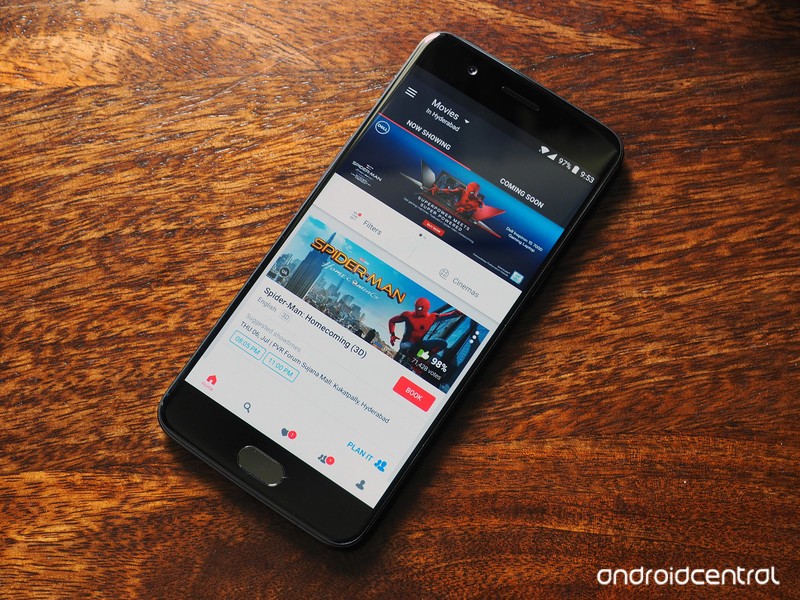
If you’re going to be in India for a while or are looking to explore local events — there are plenty of gigs every weekend in major cities — you should take a look at BookMyShow. The service is present in most major cities, and gives you a detailed selection of all the events in town.
BookMyShow’s user experience has deteriorated over the course of the last year — you’ll see ads everywhere — but the service is still great at highlighting events in your city. An alternative to BookMyShow is Insider, which is slowly gaining ground.
- Download BookMyShow from the Play Store
- Download Insider from the Play Store
Hyperlocal delivery

If you’re not looking to go out, there are several apps that you can use to get food delivered to your location. Swiggy and Zomato Order are two of the leading hyperlocal delivery services, with both apps serving up options around a five-kilometer radius from your location.
Need to get groceries delivered? No problem. BigBasket is the FreshDirect of India, and you’ll be able to buy everything from fruits and vegetables to packaged goods and household essentials. The best part is that delivery only costs ₹20 (30 cents), and the service also offers a 90-minute delivery option if you’re in a hurry that will set you back just ₹30 ($45 cents).
If you’re traveling to Bangalore, you should try out Google’s own solution, Aero. The app collates information from several hyperlocal services, giving you a variety of options from a single interface.
- Download Swiggy from the Play Store
- Download Zomato Order from the Play Store
- Download BigBasket from the Play Store
Find My Device
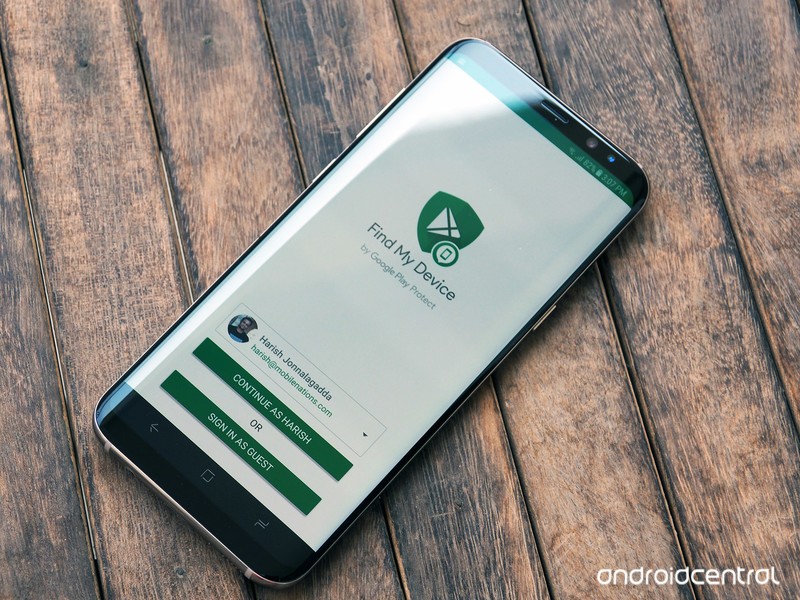
Finally, before you head off on your travels, make sure you have Find My Device installed and set up. Google recently overhauled the user interface, but the core functionality is still intact. Find My Device lets you remotely track, lock, and erase the data on a lost or stolen phone.
- Download Find My Device from the Play Store
- Find My Device: The ultimate guide to finding your lost phone
Got any questions? Let us know in the comments below.
Updated May 2018 with new features added to Google Maps.
