


How to use Google Docs
Whether you’re a student or a working professional, chances are you’ll need to use a document creation program at some point. Depending on your field, you may need to know one really well, or at least be able to utilize a few of its lesser-known features. Thankfully, unlike Microsoft’s renowned counterpart and some of the other alternatives, Google Drive offers a large buffet of productivity apps and features free of charge. Learning the ins and outs of Google’s answer to Word can take time, however, assuming you have no idea how to navigate the suite.
There’s no need to fret, however! This guide will walk you through the many facets of Google Docs, so you can create a document, collaborate with others, and edit your work in no time. Read on for all the details, or check out our guide on how to use Google Drive if you’re looking to make the most of Google’s entire arsenal.
Step 1: Setting up your Google account
Using Google Docs requires you to sign up for Google account. It’s free to do so, though, and your account also provides you with access to Gmail, Google Maps, and YouTube, as well as the entire Drive suite.
To create a Google account, navigate to the sign-up page. Enter your information — including your name, email address, and birth date — and click Next Step. Read the Privacy Policy and Terms of Service and hit I Agree. Congratulations! You now have a Google account. If you already have an account, just log in as you normally would.
Step 2: Launching Google Docs
There are several ways to access Google Docs, depending on your device. You can download the app from the App Store or Google Play, or click the Apps icon in the upper-right corner of the Google homepage (represented by nine squares). You must then click the Docs button — you may have to click More in the pop-up menu to see it.
Alternatively, you can navigate to Google Drive and select Docs within the My Drive menu at the top, or select Docs after you’ve clicked New on the right-hand side of the page. The last option is to navigate directly to Google Docs. Once you’ve launched the web app, you’ll be ready to create a document.
Step 3: Creating a document
To make a new document, click the blank page with a blue addition sign inside it, which is located the upper-left corner of the main Google Docs page. If you can’t find this menu, scroll up or click the red arrow in the lower-left corner of your screen.
If you are creating a document from Drive, selecting Google Docs after hitting New will automatically create a blank document. If you click the small, right-facing arrow next to Google Docs, you can even choose to create a new document based on a provided template. There are a variety to choose from, including résumés, business letters, and a selection of third-party templates. You can even upload an existing .doc or .docx file to your Drive by clicking New, followed by File Upload.
Step 4: Start working
Once you’ve created a document, you can get to work. Click Untitled document in the upper-left corner to add a title to your document. You can also adjust the font type, text size, and much more via the toolbar at the top of the page. Clicking the three horizontal dots near the right side of the page will bring up some additional formatting options. If you can’t see your title or the menu bar at the top of the page, those options may be hidden. If that’s the case, click the downward-facing arrow in the upper-right corner to display them.
Since you’re working within your browser, any changes made to your document will be saved automatically. If you look to the right of the Help option at the top of the screen, you should either see Saving… or All changes saved in Drive. Wait for the second message to appear before exiting out, just to ensure all your work has been saved. To show the Version History of the doc at hand, click Saving… or All changes saved in Drive, which will allow you to review the changes.
How to share your stuff
To share your documents with other people, click the blue Share button in the upper-right corner of the doc you wish to share. The button will be wedged between your picture — assuming you’ve added one to your Google account — and the comments icon. Afterward, invite other users by entering the appropriate email address in the resulting window.
People you share with can either edit, view, or comment on a document depending on what permissions you grant them. This can be changed by tapping the menu directly to the right of the empty address field. If you want to share the document with people using something other than email, click Get shareable link at the top of the Share window. A link will then appear directly beneath (it will also be copied to your clipboard).
If you click the Advanced button in the lower-right corner of this window, you can also share the file via Gmail, Google+, Facebook, or Twitter, but this will require you to make your document public. Google Docs sets the privacy settings to Private by default, but you can always click the blue Change button in the middle of the Advanced window (under “Who can access”) to adjust your privacy settings.
Use the comment and chat functions
With Google Docs, you can watch in real time as other people make changes to a document. By clicking the Comments button in the upper-right corner of your screen, you or anyone else who is in the document can start a discussion about your project. You can also see which users are currently looking at the document using the series of circles located to the left of the Comment button. If no one besides you is looking at a given page, nothing will appear here.
You can also set it so that you receive notifications when people make changes to the document, or when someone mentions your name or interacts with one of your comments. This can be a very useful tool for collaborating with large groups of people or a group that’s not in the same physical space. If for some reason you don’t want users to be given the option to add comments to a given document, you can also change the editing mode (more on that in the next section).
Get to know the various editing modes
Located directly beneath the Share button are options for viewing, suggesting edits, and editing documents. While the Editing option lets you make edits, Suggesting and Viewing allow you to suggest edits and view or print your document, respectively. The Suggesting option is similar to the Track Changes function in Word, and will denote any changes made to the document in green. This gives other users the option to approve or delete these edits before they become a part of the final document. Even if you’re not using the Suggesting mode, you can always view a document’s revision history by going to File > Version history > See revision history.
Try out a different document type
Google Drive has more to offer than just text documents. Slides, for instance, is Google’s version of Microsoft PowerPoint, while Sheets is the company’s take on Microsoft Excel. While not always as extensive as Office 365 in terms of functionality, the G Suite is a useful and convenient way to create content online, and is free to use once you have a Google account.
Editors’ Recommendations
- How to use Google Drive
- How to go live on Instagram
- How to change your YouTube name
- How to convert M4A files to MP3 format for listening on any device
- How to send webpages from Google Chrome to your Android phone
How to use Google Drive
Of all the cloud storage and file synchronization services available, Google Drive is arguably the best. The idea behind it is simple: Place or create a file in Drive and so long as you have access to the internet (or download the offline Chrome extension), you can view and edit files on any compatible device. Sure, Google isn’t the only company offering this kind of service, but given its seamless integration with other Google services and its simple set of collaboration tools, Drive easily stands out from the pack.
In fact, it’s probably one of the easiest cloud services to start using. So, rather than providing you with every detail under the sun, this guide offers a brief introduction to the Drive interface, allowing you to better navigate and use the suite. We’ve also included a few tips to help you get the most out of Google’s freemium offering.
Getting started
Accessing Google Drive
Step 1: If you don’t have one already, you’ll need to get a Google account before proceeding with Drive. It’s free to sign up, and doing so will give you easy, synchronized access to all of Google’s services. You’ll need to pay a fee if you want more than 15GB of storage, but whether you choose to do so will not affect your ability to use the service. Downloading Google Chrome doesn’t hurt either, given the popular web browser features a number of extensions and tools that integrate well with Drive.
Step 2: Once you’ve signed up (or logged into your existing account), you can access Drive via your browser or the dedicated mobile app, which is currently available for both Android and iOS.
Navigating
Once signed into Drive, click the blue New button in the upper-left corner or My Drive, which is located toward the center of the screen. In the mobile app, press the blue circle with the plus sign in the lower-right corner. This opens a menu that will allow you to create or upload a file to Drive. You can make a spreadsheet, word document, slideshow presentation, form, drawing, and a bunch of other things via third-party apps.
We won’t go in-depth on how to use each of these free programs here, but here are a few tips for learning how to use these services quickly:
Tip 1: The buttons across Drive are pretty straightforward, but if you’re ever unsure of what one does, just hover over it with your mouse. A pop-up window should appear explaining the function of the button.
Tip 2: If you’ve ever used Microsoft Office — i.e., Excel, Word, or PowerPoint — then Google’s Sheets, Docs, and Slides software should look familiar. They operate in a similar manner, and are arguably more intuitive. You won’t find as many advanced features as in Microsoft’s software, but Drive is free, so that’s to be expected.
Tip 3: While you can go to the main Docs, Sheets, or Slides page to see all the files of that type in a single place, creating folders might be a better way to keep organized. To create a folder, click the blue New button in the upper-left corner, select Folder, and name the file directory. Then, simply drag your file(s) into the folder of your own choosing from the main Drive page.
You can also star files you’ll want to access later by clicking Add star in that item’s menu, though, keep in mind that they can only be viewed by the person who added them and not by those who you’ve shared a particular item with.
Tip 4: Another way to quickly find an item in your Drive is by utilizing the Search Drive function; on the top of every page is a field where you can search for a file using its name or file type. If you press the downward-facing arrow in this field or More search tools, you can specify even further, and search for files based on a specific criteria, such as the date or who you’ve shared the file with.
Getting the most out of Google Drive
Uploading and sharing documents
To upload a document to Drive, click the Upload files button under New or My Drive and select a file from your computer. Drive is great for personal use, but what sets it apart from other cloud services is its powerful collaboration tools. If you need to work remotely with someone on a project, you can share a document with them and make changes together in real time.
To share a document after you’ve created it, look to the upper right-hand corner of the file window and find the Share button.
To share a document after you’ve created it, click the Share button in the upper-right corner, add your collaborators using their email addresses, and click the blue Done button at the bottom of the window. Once they’ve been granted access, the document should show up under the Shared with me tab in their Drive dashboard, and a link to the shared document will also be sent to their email inbox.
You can use the shareable link in the upper-right corner of the Share with others menu to send the file via text or another messaging service.
Whilst inside a shared document, you can see who else is currently editing it by looking in the top-right corner of the window. Collaborator names will be displayed in different colors (or with their account picture), so you can easily tell them apart. Just hover your cursor over any color to see who it represents.
Downloading documents and accessing files offline
Another useful Drive feature is the ability to view and edit files even if you don’t have access to the internet. All you need to do is download the Google Docs Offline extension for Google Chrome. Once downloaded — and enabled in your Drive settings — you can access certain files (Docs, Sheets, and Slides) even when you’re traveling or without internet for a few hours. A gray circle with a lightning bolt through it will appear next to your file name in the file window, letting you know when you are offline.
One of the downsides of this, however, is that you can only access files you’ve created and haven’t shared with anyone. You also must have already opened Google Drive in your browser to do so. Files can be accessed offline via the mobile app as well, assuming you’ve turned on the function in Settings beforehand.
Adding multiple collaborators via a Google Group
If you’d like to share a document with a large group of people, you can avoid entering each email address individually by sharing the document with an entire Google Group. Every person in that group (as well as people added to the group later on) will then have access to whatever you’ve shared.
Sharing multiple files at once
Need to share a bunch of files all at once? Rather than sharing each file individually, you can move them into a folder and share that folder. Everyone you share the folder with will have access to all the files inside of it.
Converting documents created with other programs
Need to share a document with co-workers or friends so they can collaborate on it, but you already have the file in another, similar program? No need to fret. As long as the documents are in the correct format, most files can easily be converted into Google Docs, which can then be shared and edited collaboratively. To do this, just upload the desired file and open it in Drive. Next, click the File menu and choose Open with…. Depending on the file type, Google will suggest the appropriate program to open it with. Below are the file formats that can currently be converted into Google Drive.
Documents
Spreadsheets
Presentations
Drawings
OCR
.doc
.xls
.ppt
.wmf
.jpg
.docx
.xlsx
.pps
.gif
.html
.ods
.pptx
.png
plain text (.txt)
.csv
.rtf
.tsv
.txt
.tab
Reverting to an older version of a document
A major problem with collaboration is that it’s generally a pain to fix something that someone else screwed up. Thankfully, you don’t have to worry if you find yourself in one of these situations — Google has your back. Drive is programmed to save every updated version of your documents for 30 days or 100 revisions, whichever comes first. This makes it simple to revert back to an older version of a document, if necessary.
To retrieve an older revision of a document, open the document you want to change, click File, and select See revision history at the bottom. After you select this, a bar should appear on the right side of the document that lists the previous revisions in chronological order. Click on any one of them to get a preview of that specific revision. If it’s the one you’re after, click the blue Restore this version link and everything will return to its former state.
Utilizing Google Drive Apps
Drive is more than just a file synchronization service or a suite of office software. Google clearly has bigger plans for it. In addition to its proprietary software, Google offers dozens of third-party applications through Drive — apps that let you make diagrams, edit photos, build 3D models, make sketches, and more that we haven’t discovered yet. Files created within these apps will be saved and synced to your Drive account just like any Google app. Check them out here.
Editors’ Recommendations
- How to use Google Docs
- How to take a screenshot on a Chromebook
- Google Drive vs. Dropbox
- 100 awesome Android apps that will transform your tired tablet
- The best free video converters
Everything you need to know about Masterwork gear in ‘Destiny 2’
Destiny 2 rarely sees substantial changes to the way players gain experience or earn equipment, but in a December 2017 update, Bungie added a new tier of weapons and armor with the potential to change your strategy both in solo play and in multiplayer. “Masterwork” Gear, a customizable tier higher than Legendary items, offers additional benefits previously reserved for Exotic-level weapons and armor.
Masterworks, both weapons and armor, add lots of little details (and significant grind) to the Destiny 2 endgame: Your gear is more upgradable but gathering what you need to make those upgrades takes time. With Destiny 2‘s second expansion, Warmind, bringing Exotic weapon Masterworks into the fray, there is even more to wrap your head around. Here is what you need to know about Masterwork Gear to get your guardian in top shape.
What Masterwork Gear does … and what it doesn’t do
Before we dive into what Masterwork Gear offers players, it’s important to understand the nature of the upgrades. Masterwork items do not offer any damage or power level boost compared to standard Legendary or Exotic gear. The gear will still be around the same level as your current gear, and it could be lower in some cases. If you aren’t sure whether or not you’re going to use the weapon at all, it’s best to store it in your vault, as it can always be infused or broken down later on.
The good news: Legendary Masterwork items are technically considered modified versions of Legendary weapons and armor. As such, they do not count against the “one Exotic weapon” and “one Exotic piece of armor” rules. We coupled a Masterwork fusion rifle with an Exotic scout rifle, allowing us to cause serious carnage against enemies.
What enhancements do Masterwork Weapons offer?
Legendary Masterwork Weapons offer several bonuses on top of the attributes you find in standard Legendary Weapons. Perhaps most important is a Masterwork Weapon’s orb-generating ability: Earning a multi-kill with a Masterwork Weapon — killing two or more enemies in a few seconds — will automatically generate an orb of light that’s used for charging up your super ability. During solo play, this is a handy way to take down targets more quickly, but it’s more powerful during cooperative strikes. If you focus on smaller targets that can be multi-killed while your teammates attack a larger boss, you can generate a constant supply of orbs for them to use.
Each Masterwork Weapon also comes with one statistical bonus, offering anything from increased reloading speed to better weapon range, or even blast radius. According to players on Reddit, these are the stats that Masterwork Weapons can enhance:
- Impact (sniper rifles, fusion rifles, and swords only)
- Range (not available on rocket and grenade launchers)
- Stability (not available on swords)
- Handling
- Reload Speed (not available on swords)
- Magazine
- Blast Radius (rocket and grenade launchers only)
- Velocity (rocket and grenade launchers only)
The Masterwork Bonus cannot be upgraded, but if you aren’t happy with what you received, you can “re-roll” the upgrade by spending three “Masterwork Cores.” Masterwork Cores can only be acquired by breaking down Masterwork Weapons. Breaking down a Masterwork Weapon generally yields one to three Masterwork Cores. With that in mind, you usually want to hold onto Masterwork Weapons or break them down, rather than re-rolling. It’s worth noting that re-rolling only comes into play with Legendary gear. Each Exotic Weapon has one and only one Masterwork, specifically created for it.
Like some emblems, Masterwork Weapons also track the kills you earn. These can be either total kills with the Masterwork weapon, or simply those you earned in the Crucible multiplayer mode. On the “details” page for your weapon, this tally will be visible directly under the weapon’s power level.
Exotic Masterwork Weapons add the same orb- and kill-tracking abilities found in Legendary Masterworks to an Exotic Weapon, as well as unique perks and stat upgrades. Unlike Legendary Masterworks, the upgrades are not random and cannot be re-rolled. On the other hand, the benefits are also more substantial. According to a PlayStation Access explainer video, for example, Vigilance Wing — a popular exotic pulse rifle — gains a full-auto option when fully upgraded.
What about Masterwork Armor?
Legendary Masterwork Armor offers a similar, albeit less variable bonus to standard Legendary gear. Masterwork Armor pieces grant a three percent damage reduction while using a super move. As a result, a complete Masterwork Armor set grants a 15 percent damage reduction.
You can modify Masterwork Armor by combining one Masterwork Core with 10 Legendary shards. Modifications tweak stats to create either heavy, light, or restorative armor.
Beware, though, because Bungie said a bug sometimes causes the upgrade to occur without adding new stats. Luckily, none of your cores or shards seem to get used if this occurs, so just make sure to double-check your gear after you’ve finished the upgrade.
How do I get Masterwork Gear?
Legendary Masterworks
Masterwork Gear can only be earned by Guardians at power level 250 or above. Once you’ve crossed that threshold, which is particularly easy now if you have the Curse of Osiris expansion, you will be able to earn Masterwork Weapons by decoding legendary (purple) engrams. These could come from random drops in the middle of a strike or as a reward for completing a milestone, or even be purchased directly from the Cryptarch at the Tower using Legendary shards. You’ll be able to tell a weapon is a Masterwork by the gold border around its picture in your inventory.
Don’t forget about the reputation tokens you’ve earned on the game’s various planets, either. Though the items you earn from these are likely far below your current power level at this point, they still have a chance to become Masterworks, and you can then infuse them to bring them up to your current power level. It will take you a little bit longer to make your way across each planet in order to speak to the vendor, but you’ll be saving your Legendary shards for more important things.
The chance of earning Masterworks through any of these methods is quite low — you can go through 20 or 30 engrams without ever finding one. However, the drop rates for Masterworks increase during high-level activities. Bungie specifically said players will have better luck finding Masterworks during the “Leviathan” raid and the Trials of the Nine multiplayer event, but similar endgame events such as the “Eater of Worlds” and “Spire of Stars” raid lairs and the Iron Banner tournament may offer better drop rates as well.
Exotic Masterwork Weapons
In season 3 of Destiny 2, Bungie added Exotic Masterwork Weapons. Rather than dropping randomly, each Exotic weapon you acquire has or will have the capacity to become a Masterwork Weapon (not all Exotics will have a Masterwork version available at the jump).
To upgrade an Exotic weapon, you must find its corresponding Exotic Masterwork Catalyst, an item that will trigger a mission or otherwise grant you instructions telling you what you need to do. Like the upgrades, both the catalyst and the instructions are different for each weapon. Some catalysts will be in specific places — Bungie said some weapons will have clues on them if you inspect them closely — while others will drop at random. After acquiring and applying the Masterwork Catalyst to your weapon, there will be a set number of more direct steps to complete in order to grind the Masterwork to its final, most masterful state.
One more thing you should know: Unlike Legendary Masterwork gear, you cannot customize the upgrades on Exotic Masterworks. Each piece of Masterwork Gear has one, custom-tailored Masterwork.
Can I upgrade a Legendary weapon to make it a Masterwork?
If you dream of making your favorite assault rifle a Masterwork, then prepare for some good news! All Legendary weapons can be upgraded to Masterwork Weapons by powering them up with 10 Masterworks cores. Again, you earn Masterwork cores by breaking down your Masterworks, so be absolutely sure that the weapon you’re upgrading is something you plan to use for the foreseeable future.
Editors’ Recommendations
- ‘Destiny 2’ Legendary Shards guide: What they are and how to get them
- ‘Metal Gear Survive’ review
- ‘God of War’: How to help Kratos conquer every Muspelheim trial
- The best smart tennis gear
- Warmind update will make ‘Destiny 2’ exotic weapons much more powerful
How to connect your PlayStation 4 controller to a PC
Sony launched the PlayStation 4 more than four years ago, and included a next-generation controller with the next-generation console. The DualShock 4 debuted with an impressive set of features, allowing it to quickly supplant the DualShock 3 among Sony loyalists. Though slightly heavier than its predecessor, the controller showcased improved analog sticks and triggers, not to mention the addition of a capacitive touchpad.
Perhaps one of its greatest features was Sony’s commitment to making the DualShock 4 compatible with Windows-based PCs. That promised compatibility proved elusive, however, and only recently surfaced. But now that Sony has officially released an external dongle for PCs — and third-party applications such as Steam and DS4Windows continue to improve support for the controller — there are more ways than ever to connect your DualShock 4 to your Windows PC. Here’s how.
Option 1: Connecting with a Sony Wireless Adapter
The simplest, quickest way to get your PC and DualShock 4 controllers talking is with the official Sony Wireless Adapter ($25). This device is fairly inexpensive, and plugs directly into a standard USB port on your PC. To get it working, simply:
Step 1: Plug the adapter into your PC.
Step 2: Turn on your DualShock 4 controller, and the two should automatically detect one another.
That’s it! This is definitely the easiest solution, even if it is somewhat inconvenient. Also, keep in mind that the adapter measures about 3 inches long, meaning it will stick out of your PC or laptop like a big flash drive. Luckily, you have other options.
Option 2: Connecting with Steam
Steam, the most popular PC gaming portal, offers native controller support for the DualShock 4. It’s incredibly easy to use your DualShock 4 to play games on Steam — All you have to do is:
Step 1: Make sure your Steam client is updated.
Step 2: Just plug your controller into your PC.
Problem solved! Well, almost. Even if Steam is up-to-date, you may encounter a few hiccups while setting up your controller. Steam supports the DS4 as a platform, but that doesn’t mean every PC game works with the controller automatically. If you fire up Dark Souls III, you’ll see what we mean. Steam detects the controller, but Dark Souls III doesn’t. If you find yourself in that boat, or just want to use your controller wirelessly without using Steam, you’re not out of luck. DS4Windows might be the solution for you.
Option 3: Connect using DS4Windows
This solution requires a bit of setup, but it’s still the best way to get your PC and DualShock 4 controllers talking without any major headaches. You can connect your DualShock 4 controller to your PC using DS4Windows, a third-party application, in either wired or wireless mode (if your PC has Bluetooth). Unless you buy the adapter, this is the best option if you want you plan to play games through Origin, UPlay, GoG, or other PC gaming portals.
Step 1: Download the latest version of DS4Windows, which can be found on the application’s official website.
Step 2: Extract it using an archive manager such as WinRAR or 7Zip. You will then have two files, DS4Windows and DS4Update.
Step 3: Double-click DS4Windows to run the installer, which will prompt the following dialogue box:
Step 5: Follow the on-screen instructions, beginning with driver installation. The installation is quick, so you won’t have to wait long. Click on Install 360 Driver if you’re running Windows 7 or older — the driver comes preloaded on Windows 8 and 10 machines.
Step 6: Once you’ve completed both installations, your controller is ready to be connected. Simply plug the DualShock 4 into your PC using a Micro USB cable (the same kind used for most Android phones). This will also charge the DualShock 4 battery, but in order to use the DualShock 4 wirelessly, you’ll need to pair the controller with your PC using Bluetooth.
Step 7: Hold the PS Button on your DualShock 4 for three seconds, or until the light bar begins to flash.
Step 8: Open the Bluetooth settings on your PC.
Step 9: Connect to Wireless Controller.
Step 10: If prompted to input a pair code, enter “0000”.
Step 11: Click Finish on the DS4Windows installer.
Customizing your setup
The primary DS4Windows interface allows players to adjust almost every facet of the controller, right down to the color of the LED light bar. The default controller profile should work for most recent PC games, especially if they’re designed to work with the Xbox controller already.
For games that aren’t easily adaptable to controllers, users can select specific premade profiles or create their own, assigning more or less any keystroke to any of the DualShock’s buttons. Touchpad sensitivity, macros, and game-specific profiles are supported — just look around to see what works best for you.
Troubleshooting
If you run into issues while using your DualShock 4 controller, you have a couple of options.
Step 1: First, under the settings tab is an option to Hide DS4 Controller. This is handy if your DualShock 4 is taking priority over other connected controllers — such as an Xbox 360 controller — or if you want to make sure your DS4Windows settings take precedence over Steam’s DualShock 4 configuration.
Step 2: Similarly, if the DualShock 4 isn’t working correctly while other input devices are connected, there is a button at the bottom of DS4Windows you can select to connect the DualShock 4 exclusively, making it the primary input source for games.
Step 3: The other file included in the DS4Windows installation, DS4Update, will check for and automatically download the latest version of DS4Windows. Be sure to run this every once in a while to keep the program current, which will help ensure the DualShock 4 continues to work properly with your PC.
Editors’ Recommendations
- How to share your screen on Skype
- How to stream on Twitch
- How to stream on YouTube Gaming
- How to partition your hard drive in Windows
- How to password protect a PDF
YouTube takes control of Vevo music video ads
Vevo has struck a deal with YouTube that will significantly change the ads you see played on your favorite artist’s music videos, ReCode has reported. Rather than ads for other Vevo videos, as you mostly see now, you’re likely to see the same ads that Google puts on videos from its “preferred” channels. That’s because YouTube will be able to sell Vevo clips directly to its own advertisers, taking a cut of the revenue and passing the rest on to Vevo.
Vevo is owned by music labels Sony Music Entertainment, Universal Music Group and Warner Music Group. It was formed in the first place to capitalize on the extreme popularity of YouTube music videos from the likes of Taylor Swift, Justin Bieber and Katy Perry. Until now, Vevo sold its own ads for music videos, effectively cutting YouTube out of much of the action.
At YouTube’s Brandcast event, however, Google told advertisers that Vevo videos are now fair game for advertisers. “This gives you the unprecedented opportunity to advertise against virtually all music in the world,” said YouTube’s chief business officer Robert Kyncl.
YouTube recently changed the way you see artist videos, creating Official Artist Channels that put all of an artists work — from concert footage, album cuts, song lyrics and official music videos — all in one place. That had the effect of stripping Vevo’s branding from many artists’ channels.
The new move, as ReCode notes, also reduces Vevo’s role, letting labels interact more directly with YouTube. From a consumer standpoint, it doesn’t seem like a benefit, as you’re more likely to see ads from brands rather than promos for other videos you might want to see.
Source: ReCode
iPhone With Triple-Lens Rear Camera Will ‘Likely’ Launch Next Year Says Analyst
Apple is likely to launch at least one new iPhone model with a triple-lens rear camera in the second half of next year, according to the Taipei Times, citing a research note from Yuanta Securities analyst Jeff Pu.
A triple-lens iPhone X mockup by Martin Hajek via iDrop News
The report does not provide any additional details, but a Chinese report from the Economic Daily News last month suggested the camera system will have a 6P lens design with up to 5x zoom and at least one 12-megapixel lens.
The addition of a third lens would likely enable 3x optical zoom on an iPhone for the first time, enabling users to magnify the image in the viewfinder by up to 3x without a blurry reduction in quality like digital zoom. iPhone 7 Plus, iPhone 8 Plus, and iPhone X models feature 2x optical zoom for comparison.
A triple-lens rear camera would likely be a feature reserved for Apple’s highest-end iPhones, so if accurate, this rumor probably applies to a third-generation iPhone X and/or iPhone X Plus launching around September 2019.
 Huawei P20 Pro
Huawei’s new P20 Pro smartphone is the first with a triple-lens rear camera system, including a 40-megapixel lens, a 20-megapixel monochrome lens, and an 8-megapixel telephoto lens with 3x optical zoom. The Verge’s Vlad Savov said he prefers the P20 Pro’s camera over those on the iPhone X and Galaxy S9.
For anyone hoping this might be a 2018 move instead, former KGI Securities analyst Ming-Chi Kuo has previously ruled out any significant changes occurring to the iPhone X’s current dual-lens rear camera system this year.
Tag: 2019 iPhones
Discuss this article in our forums
Don’t hold your breath for Vine 2 — it’s on hold indefinitely, co-founder says
If you’re waiting for the second iteration of Vine, the short-form video app, don’t hold your breath. As per a recent announcement from the social media app’s co-founder Dom Hofmann, Vine 2 (aka V2) has been placed on hold for “an indefinite amount of time.” As it turns out, when you’re the new social network on the block, it’s tough to give the established players in the space a run for their money, especially when you have very little of your own.
As Hofmann wrote of his “very difficult decision,” there were several contributing factors to the postponement. The most significant, however, seem to be related to “financial and legal hurdles.” As Hofmann further explained on the community forum he’d built specifically for Vine 2, “legal fees have been overwhelming,” and taking on a rebuild of the product would also require “sizable external funding, probably from investors.” Unfortunately for the Vine team, this simply isn’t something that they have for the time being. In fact, V2 has been an entirely bootstrapped enterprise — something that Hofmann decided to do late last year after Twitter pulled the plug on Vine.
The idea behind the new app was to allow users to record or upload two to six-second looping videos (much like the original app), but with far superior anti-harassment safety features. When Hofmann first announced that he would be seeking to launch V2 in 2018, he said that he “underestimated the amount of enthusiasm and attention the announcement would generate.” As it turns out, it was in fact the public’s desire for Vine that proved problematic.
The original version of Vine was acquired by Twitter before it even launched in 2012, and eventually, claimed a whopping 200 million users. However, the popularity of the app slowly petered out, and by 2016, Twitter had announced that it would no longer be supporting the app. And now it looks like we’re going to have to go a while longer without a new and improved version.
“I’m very, very sorry for the disappointment. If it’s any consolation, I think it would have been more disappointing if this service had been developed and released incorrectly, which is where we were headed. I’d like for us to get it right,” Hofmann wrote. “We take a step back. The code and ideas still exist, but until everything else comes together, we can’t move forward. Again, this is indefinite, which means that it could take a long time. But it’s necessary.”
Editors’ Recommendations
- Sleep tight: Airbus wants to fill plane cargo holds with beds
- Hold on to your butts: These are the fastest cars in the world
- Hold my beer, I’ve got a new UTV!
- How to use Apple’s Business Chat on your iPhone or iPad in iOS 11.3
- Can Apple’s iPad/Pencil combo and education software banish Chromebooks?
Top 5 things I learned traveling with the Huawei P20 Pro
Huawei’s P20 Pro offers an incredible camera and all-day battery life.

Starting last year, I decided not to take a dedicated camera with me when going on vacation. I relied on compact shooters like the Sony RX100 in the past, but with smartphone cameras getting significantly better over the course of the last two years, I decided to use my phone primarily for taking photos while traveling.
The Galaxy Note 8 served me very well in Thailand last year, and over the last week I’ve been using the Huawei P20 Pro in Dubai. The city has plenty of sights to offer, from the soaring Burj Khalifa to the towering dunes of the Arabian Desert.
I decided to go with the P20 Pro in lieu of the Galaxy S9+ as the former has much better battery life, and I was also keen on trying out the 40MP primary camera and the new night mode. Here’s what I learned traveling with the Huawei P20 Pro.
The camera is fantastic

The Huawei P20 Pro is the first phone to feature three imaging sensors, totaling 68MP: the 40MP primary camera is joined by a 20MP monochrome sensor, and an 8MP telephoto lens with 3x lossless zoom.
As you’d imagine, the phone offers one of the best smartphone camera experiences available today, with the primary camera consistently able to produce outstanding images.


The phone’s party trick is its night mode, which uses pixel binning and Huawei’s AI wizardry to layer shots with varying exposures taken over four seconds into a single image. The result is that the low-light shots from the P20 Pro are the best you’ll find on a phone today.


Shooting with the P20 Pro isn’t as effortless as the Pixel 2 as there are several modes available, but for the most part the AI does a decent job of picking out the right mode for the scene. The upside is that you get much better images — particularly in low-light conditions with night mode — than the likes of the Pixel 2 or the Galaxy S9.
… But the AI is still finicky at times

One of the core tenets of the camera experience on the P20 Pro is an AI feature that automatically changes the shooting mode based on the subject in focus. If you’re trying to take a photo at night, it automatically switches to night mode. Similarly, if you’re trying to take a photo of a person, it switches to portrait mode to create a background blur effect.
While the AI worked incredibly well most of the time, there were a few scenarios where it failed to accurately register a scene. There were also issues with oversaturation in a few shooting modes like Blue Sky, where the algorithm just rendered a blue hue over most parts of the image.
You’ll easily get all-day battery life

Nothing takes a toll on a phone’s battery more than travel, but I consistently got a day’s worth of usage from the P20 Pro, averaging over three hours of screen-on-time spread out across 19 hours or more. I took around 300 photos on average daily, and had data roaming enabled throughout the journey.
I never had to worry about the phone running out of charge, but I enabled power-saving mode on one occasion to limit background data usage. Huawei’s fast charging standard is great as well, with the phone charging up to 60% in just under an hour.
The display holds up under harsh sunlight

The Arabian Desert turned out to be the ideal proving ground for testing the P20 Pro’s screen, and thankfully I had no issues reading the contents on the display under intense heat. The screen offers vibrant colors and excellent contrast levels, and in general posed zero issues.
That said, I’m still not sold on the idea of the notch. It’s irritating, and I don’t really understand the reasoning for its existence on the P20 Pro, particularly considering the phone has a sizeable bezel at the bottom that houses the fingerprint sensor.
It takes a while to get used to the fingerprint sensor

Most phones have switched to rear-mounted fingerprint sensors, but the P20 Pro still has a home button up front with an embedded sensor. The sensor itself is one of the fastest I’ve used on a phone, but I still prefer a rear fingerprint module — and that would’ve freed up real estate at the front.
Furthermore, I got used to swiping down on the fingerprint sensor to pull down the notification shade, which isn’t possible on the P20 Pro. It’s a minor quibble, but a rear fingerprint sensor would have made more sense on this particular device.
Overall, I’m glad I went with the P20 Pro: the camera is outstanding, the 4000mAh battery easily delivers a day’s worth of charge, and the AMOLED panel is one of the best available today.
Huawei P20 + P20 Pro review: Camera kings
How to pair Bluetooth headphones with an Android phone
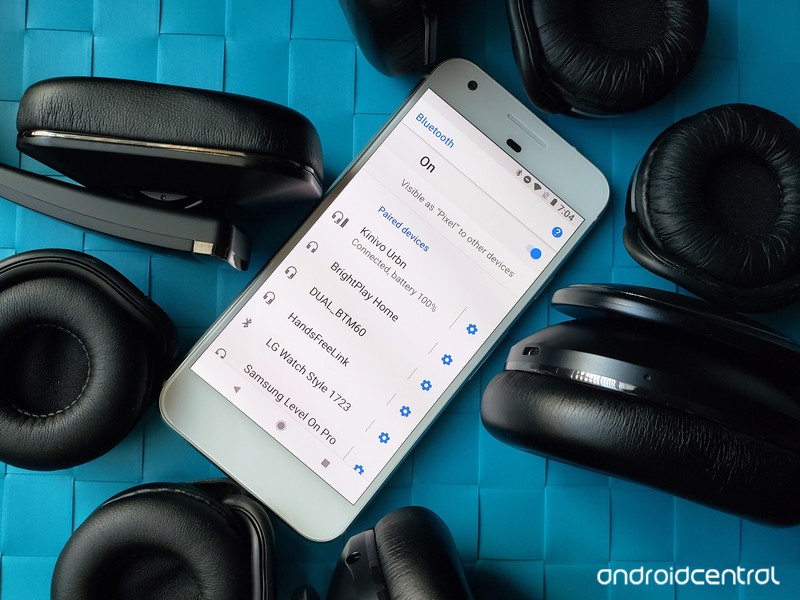
Whether your Bluetooth headphones are $5 or $500, they should all work with your phone the same way.
Phones are slowly ditching headphones jacks in the name of courage or cost-cutting or space, and while you could buy USB-C headphones or use a USB-C to 3.5mm adapter, the easiest solution is to just kiss your wired headphones goodbye and switch to Bluetooth headphones. Wired headphones always seem to get tangled anyways, and going wireless means you can get further away from your phone while you listen.
Bluetooth headphones come in a lot of styles, sizes, colors, and most importantly price points. There are $35 headphones and $350 headphones, and while they will have some differences in sound quality, build quality, and battery life, they all pair, connect, and disconnect the same way.
Need help picking out a pair of headphones? Let us help!
- How to turn on Bluetooth on your phone
- How to pair Bluetooth headphones through Settings
- How to pair Bluetooth headphones via NFC
- How to unpair Bluetooth headphones from your phone
How to turn on Bluetooth on your phone
Before your can use Bluetooth to pair and connect your headphones, you have to turn the Bluetooth on your Android phone on. Thankfully, it’s easy to do.
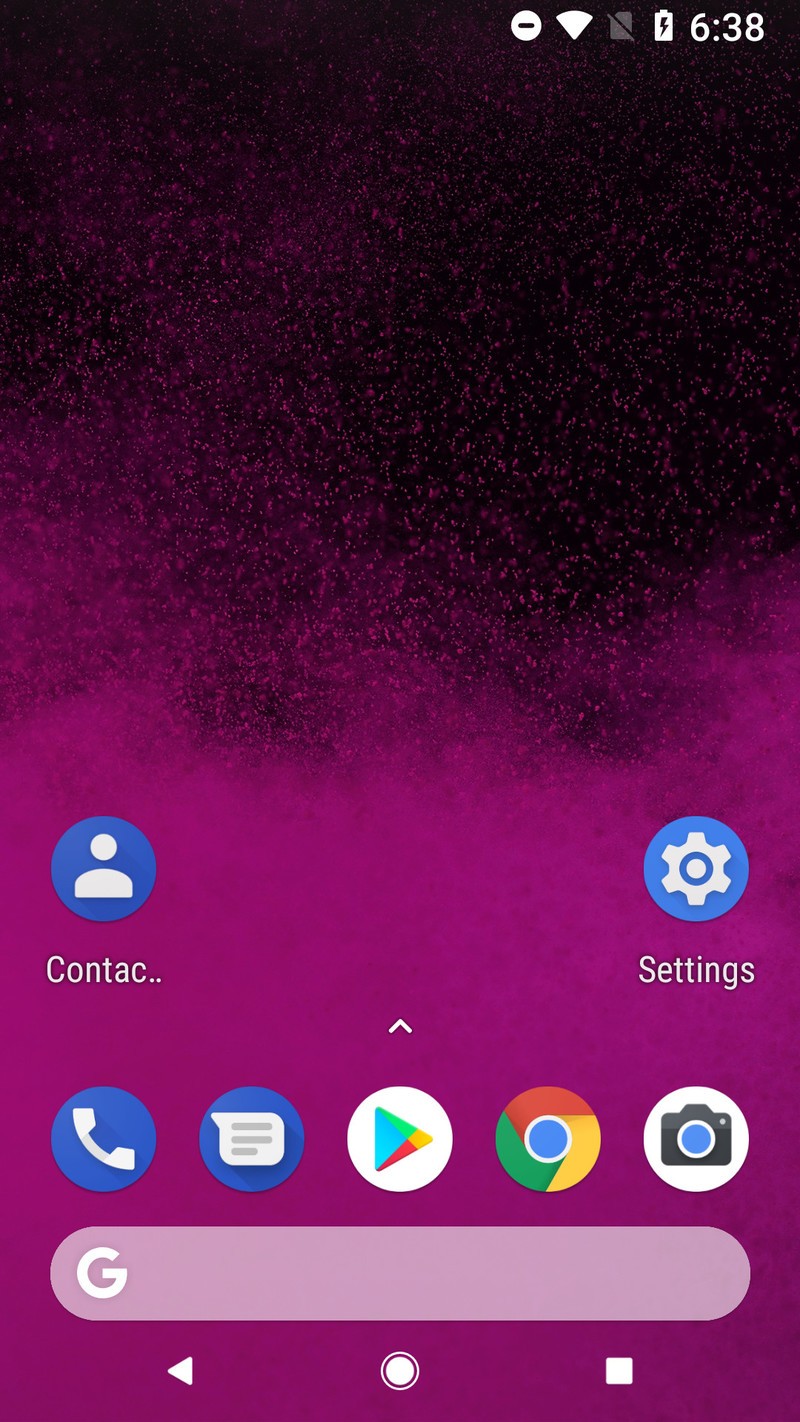
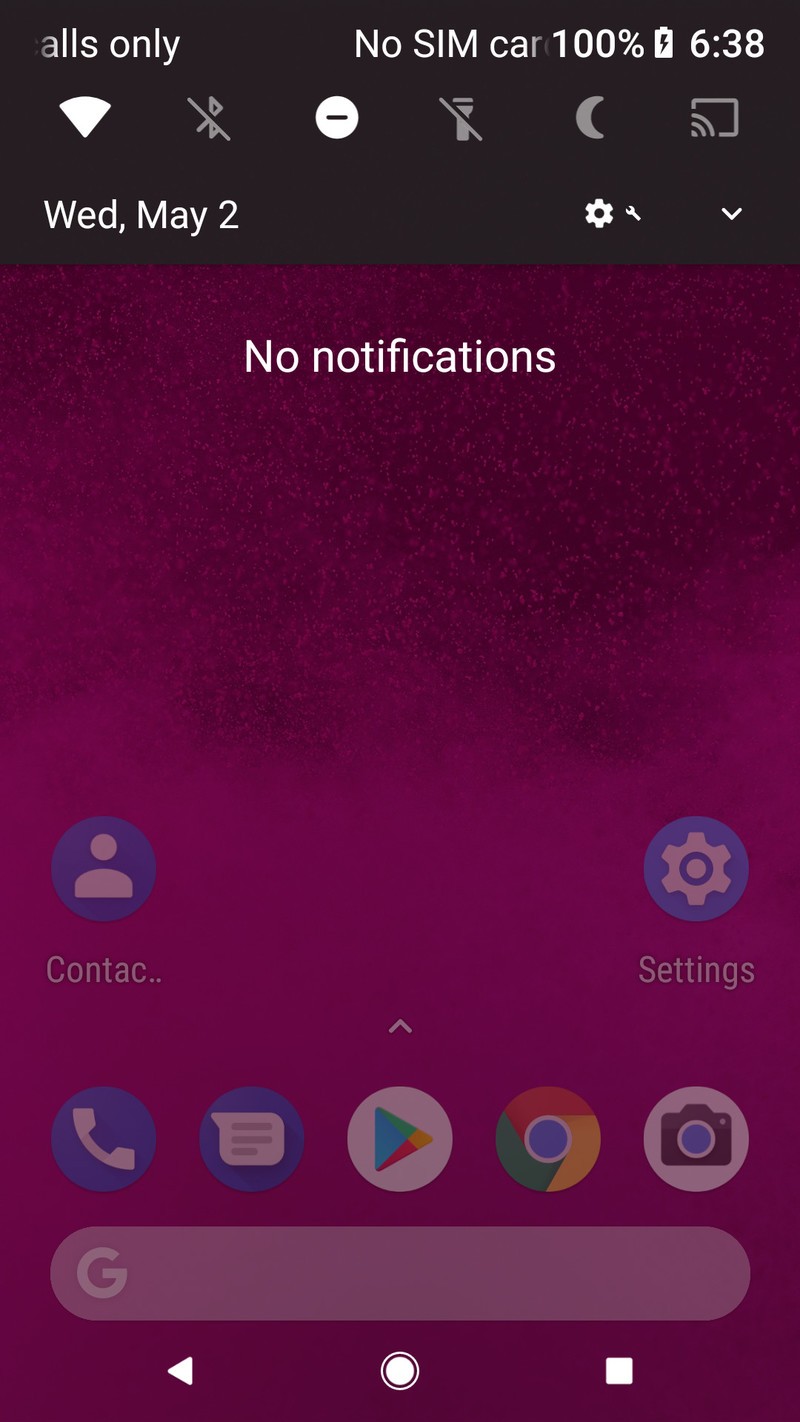
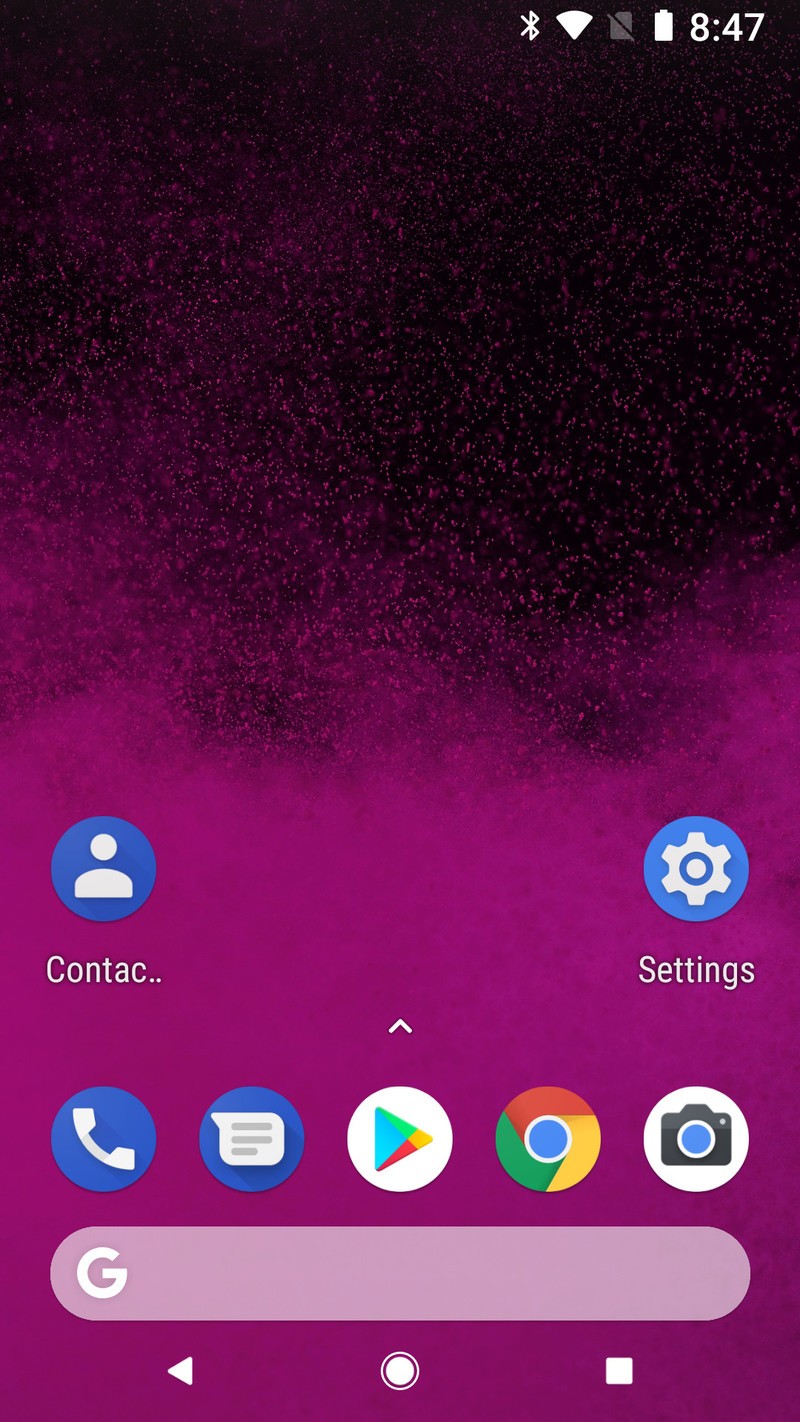
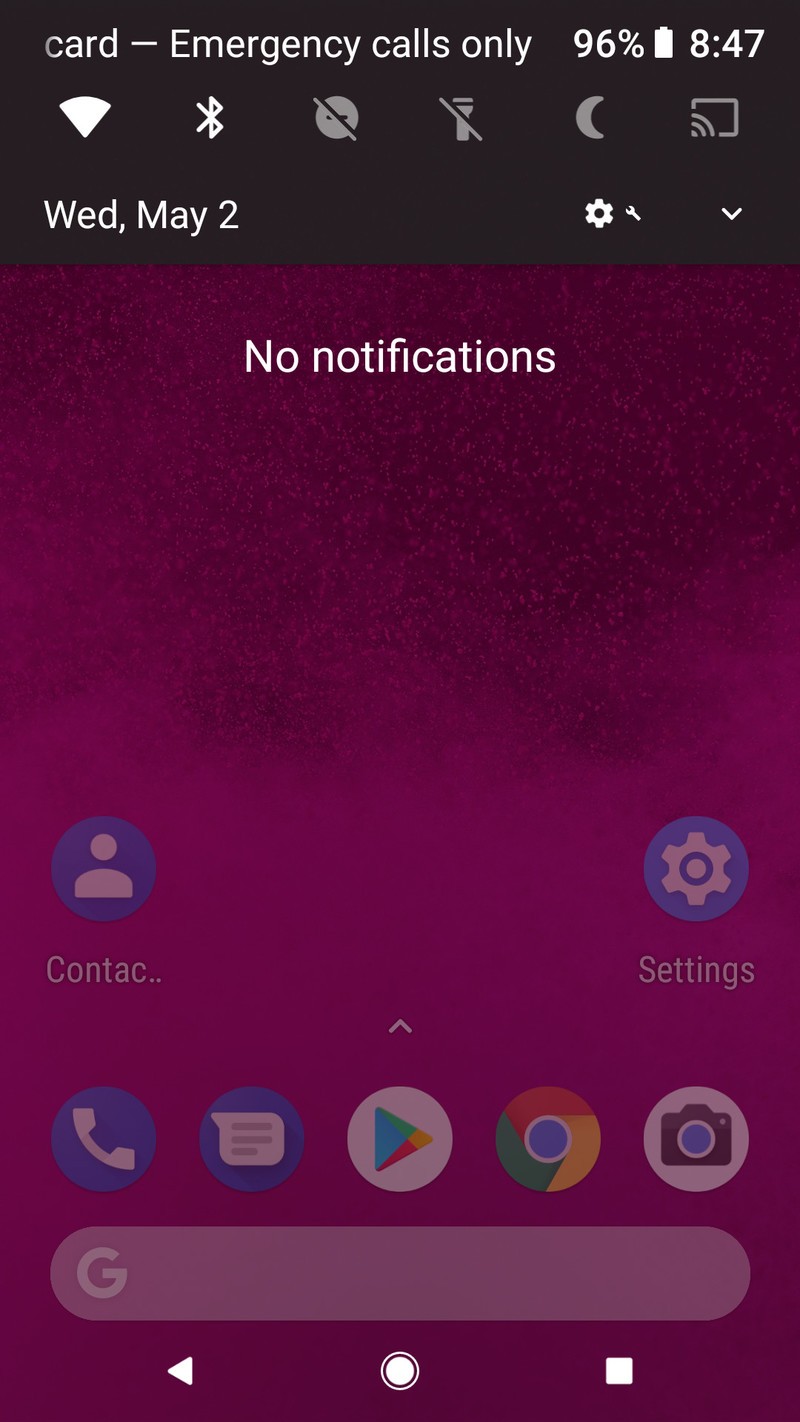
On your phone, swipe down the Notification shade from the top of your screen.
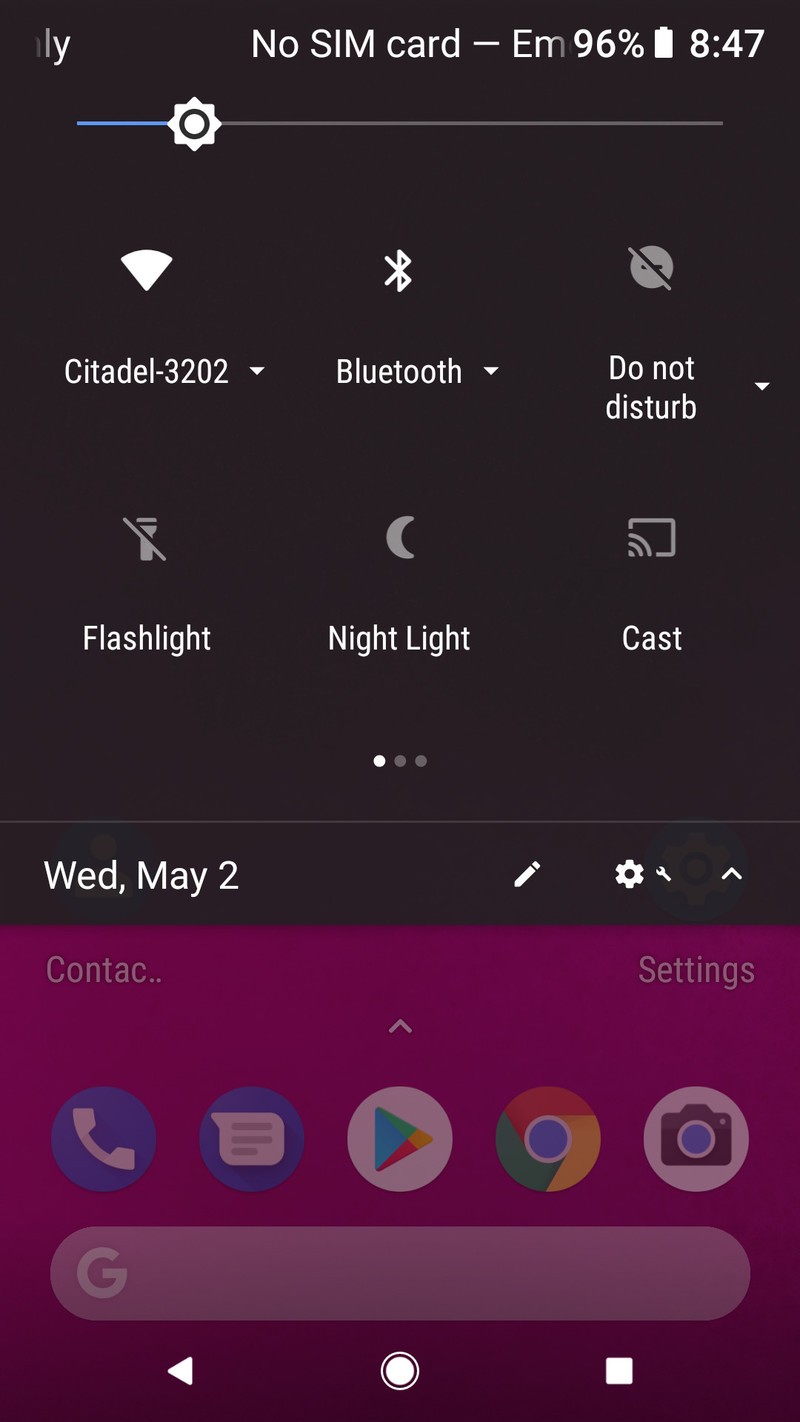
Swipe down the Quick settings panel from the top of the Notification shade.
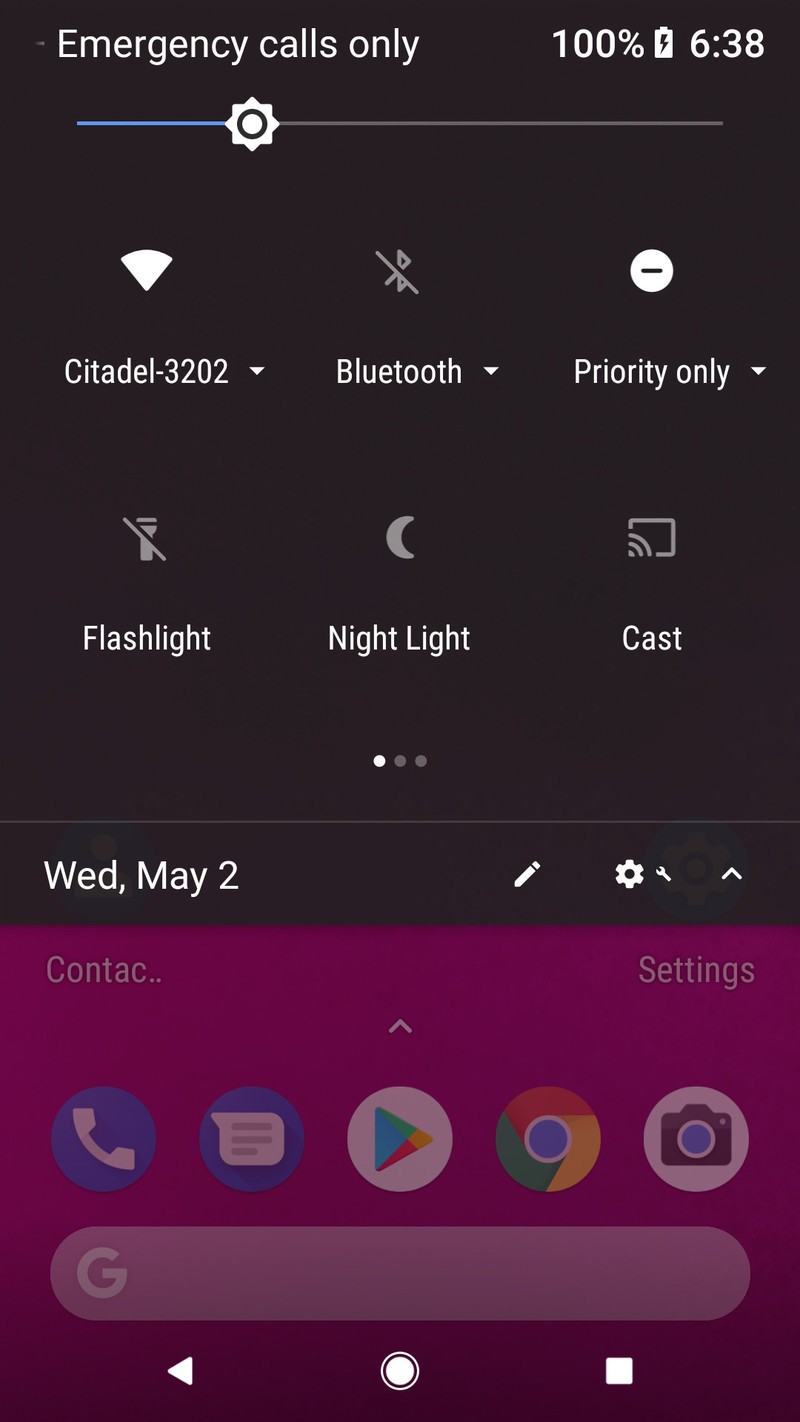
If the Bluetooth icon is not illuminated, tap it to turn Bluetooth on.
If you want to turn off Bluetooth when you’re not using it, you can easily toggle it off again from Quick Settings at any time.
How to pair Bluetooth headphones through Settings
If you just purchased your Bluetooth headphones, you might want to charge them first before attempting to pair them. When you’re ready to pair, turn your Bluetooth headphones on and set them to pairing mode according to the user guide that came with your headphones.
On your phone, swipe down the Notification shade from the top of your screen.
Swipe down the Quick settings panel from the top of the Notification shade.
Press and hold Bluetooth to open Bluetooth settings.
Tap Pair new device. On some devices, Android will begin scanning for devices to pair upon entering Bluetooth settings, and on others, you’ll need to tap Scanning.
Tap the Bluetooth headphones you wish to pair to your phone. If see a series of letter and numbers, some phones will list unpaired devices by their MAC addresses rather than traditional names.
Note: some Bluetooth devices will have a PIN passcode for pairing. This is mostly for stereo head units, but if your Bluetooth headphones require a PIN, it will be printed in the user guide that came with them. If you don’t have the guide, try 1234 or 1111.
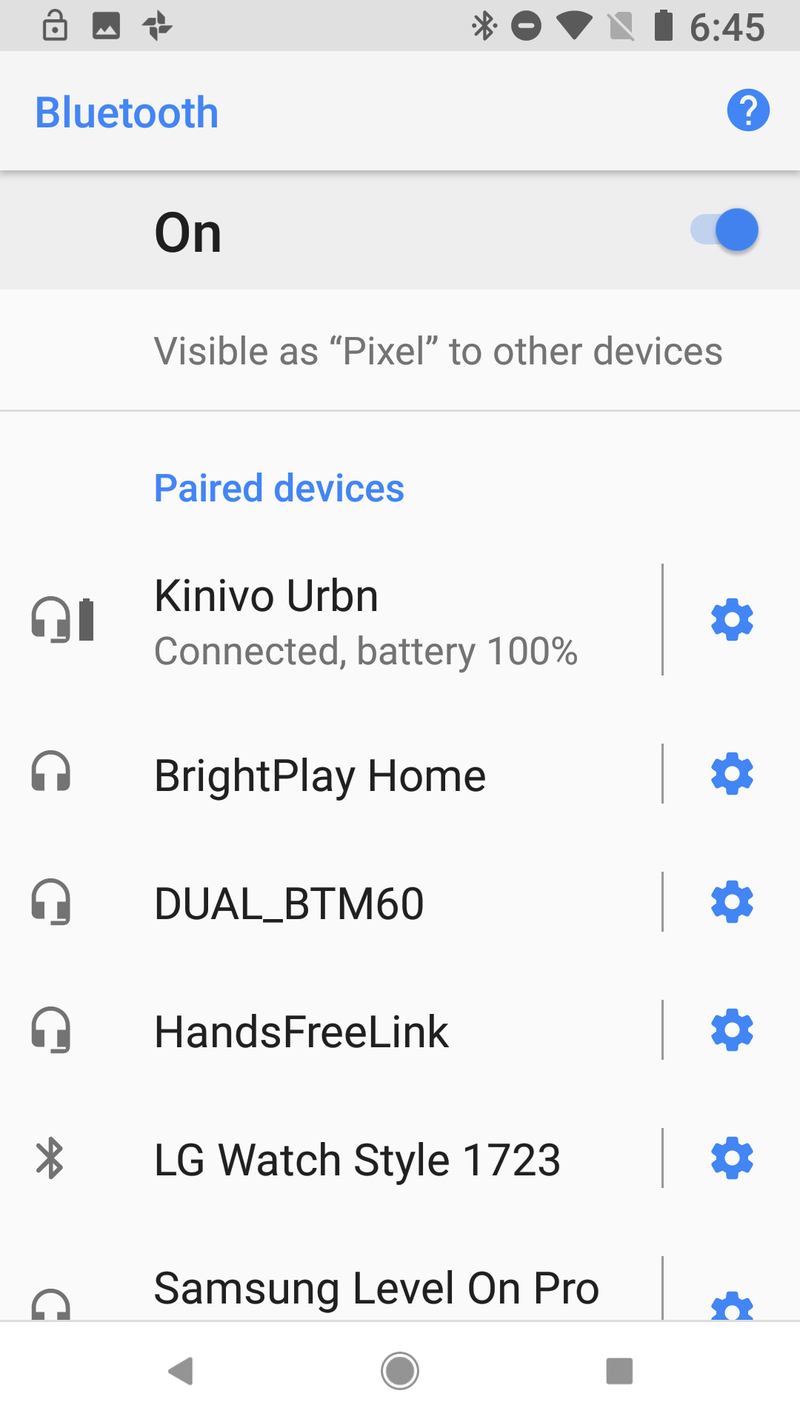
The phone and headphones will connect and attempt to pair. If the pairing is successful, the device will remain connected. A headphone icon may appear next to the newly connected headphones, a battery indicator may appear if your headphones have that capability. Now, each time your Bluetooth headphones turn on, they should automatically connect to your phone.
How to pair Bluetooth headphones via NFC
Now, some headphones come equipped with a nifty little feature to help simplify pairing using NFC — Near-Field Communication, which is also used for things like Google Pay. Bluetooth headset makers implant an NFC tag inside the Bluetooth headphones that stores the device’s device name and initiates a pairing request without having to open your Settings and manually scan.
Pairing NFC-enabled Bluetooth headphones is actually a ridiculously simple process so long as you have NFC turned on:
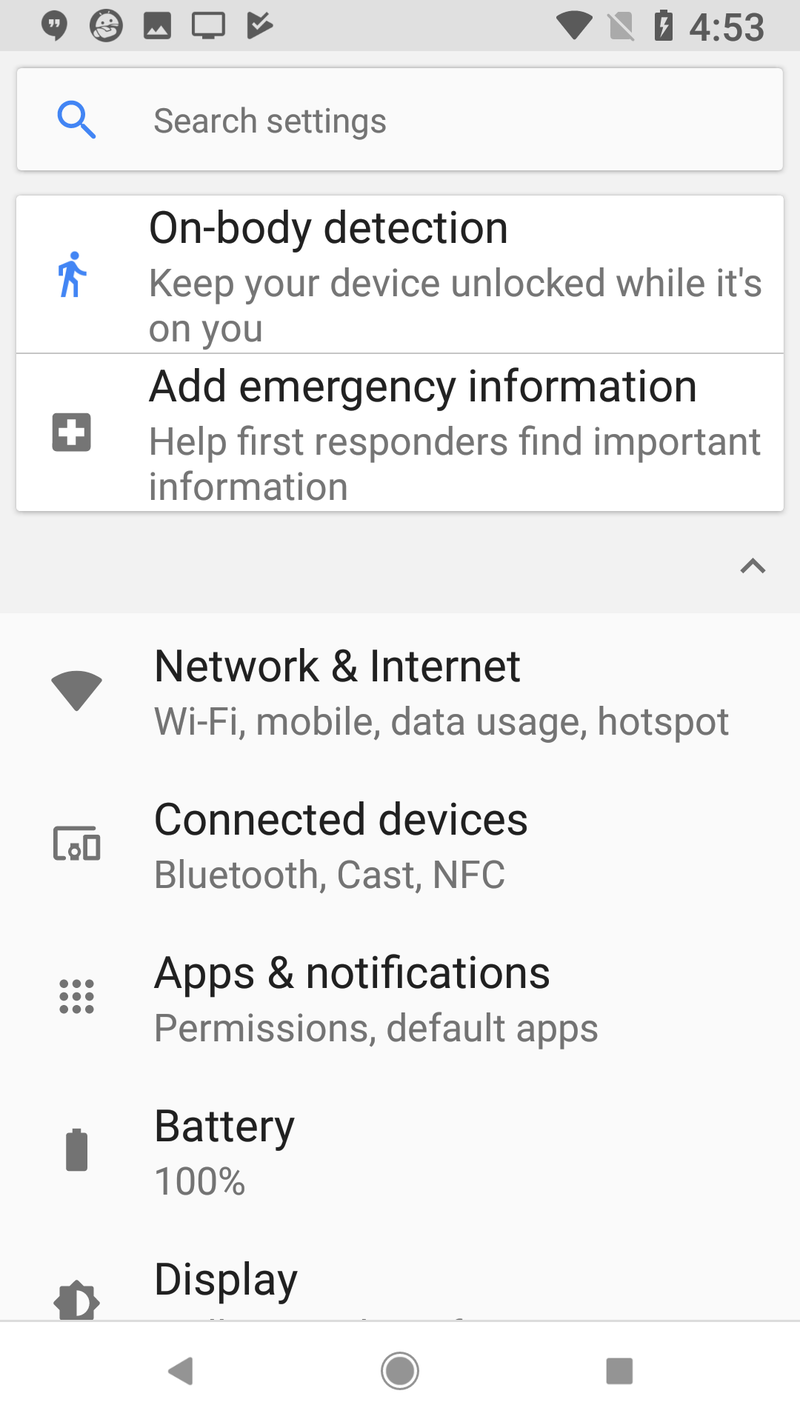
Open Settings.
Tap Connected Devices. If your Settings down have, tap Connections or search NFC if your Settings has a search bar at the top.
Tap **NFC ** if the toggle is not already switched to on.
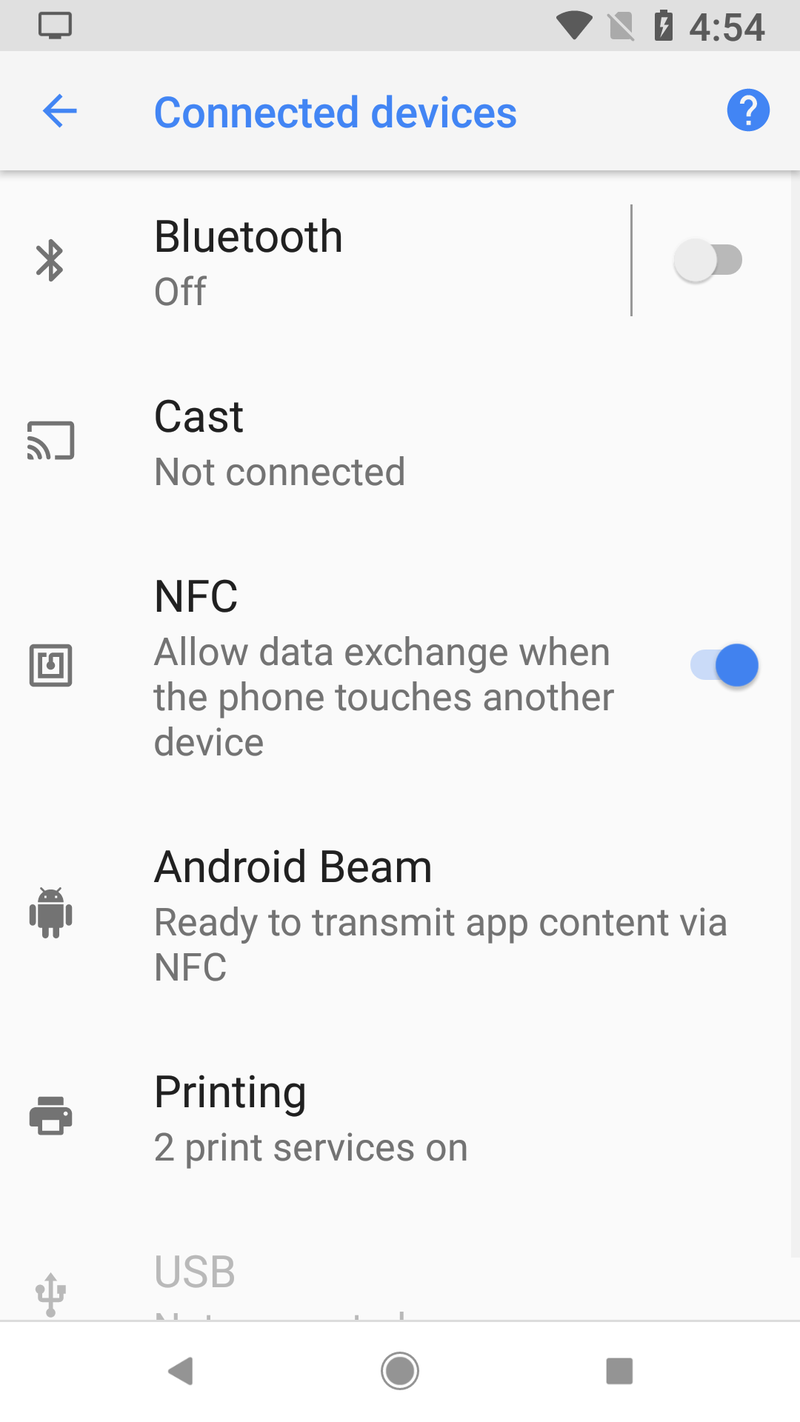
If you do not see NFC in your device’s Settings anywhere, your phone does not have NFC. My apologies, you’ll just have to do it the old-fashioned way
Once NFC is on and Bluetooth is on, pairing NFC-enabled headphones goes like this:
Tap the back of your phone to the NFC icon on your headphones.
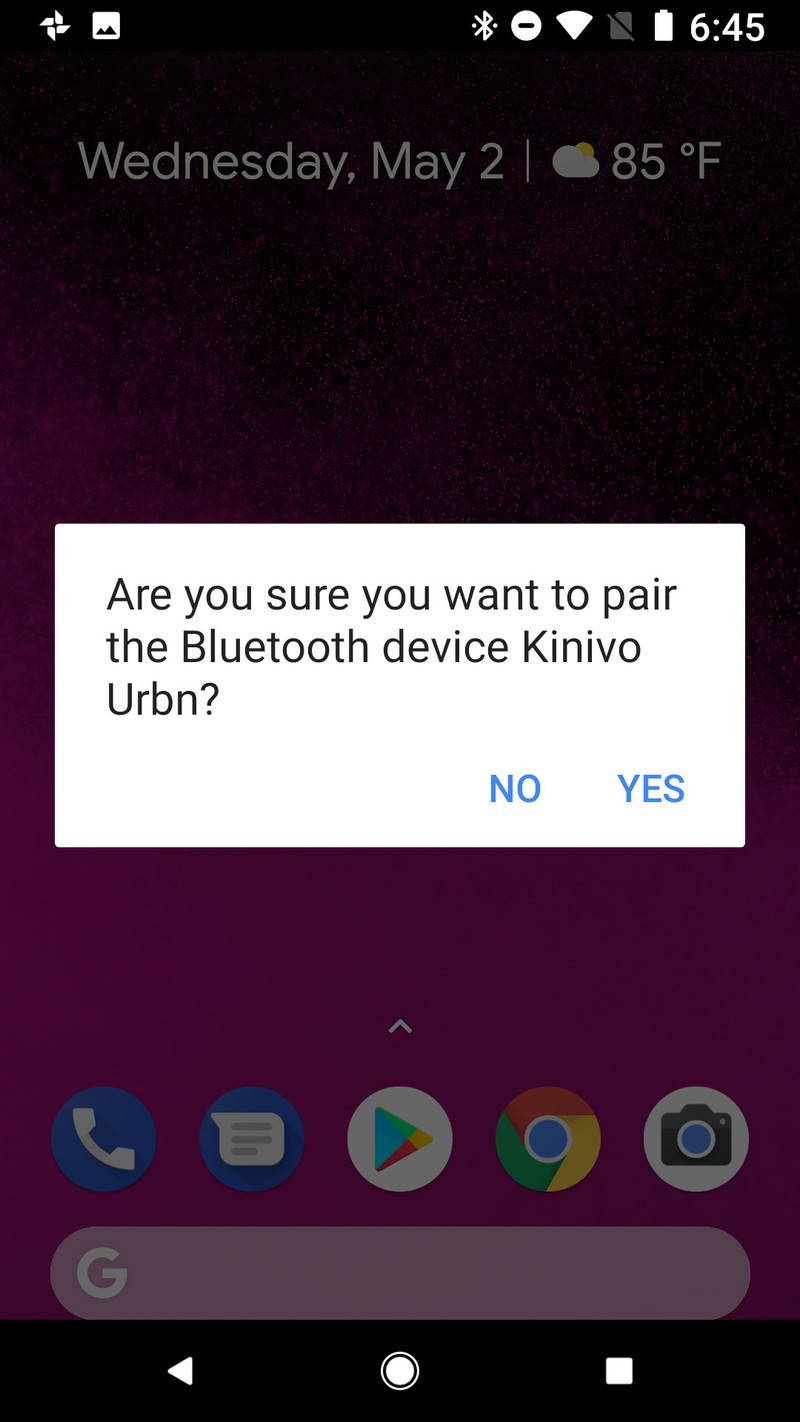
On your phone, tap Yes to agree to pairing your phone to the headphones.
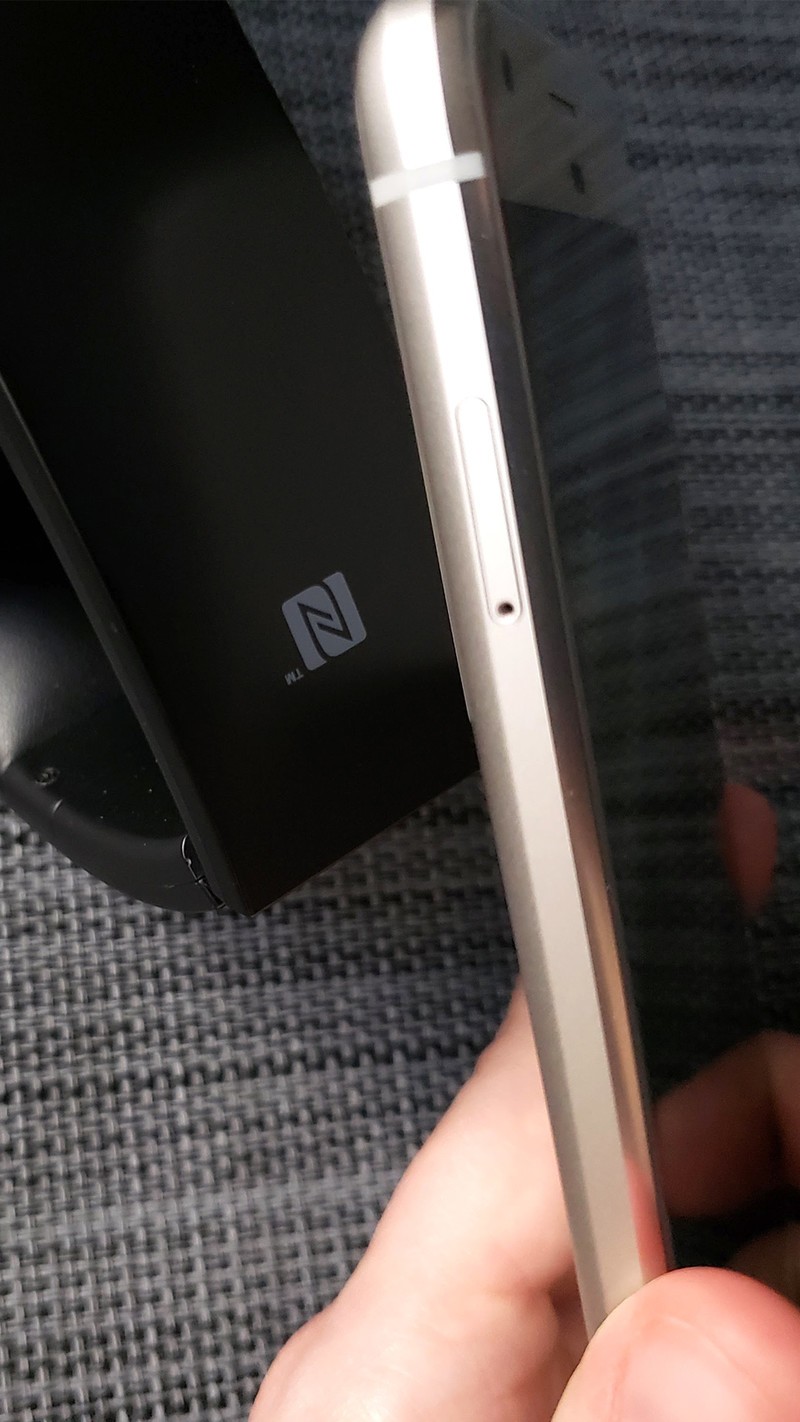
Pretty easy, right? It’s an amazing thing when it works. Coincidentally, NFC has a range of only a few inches, so if you tap your phone to the NFC icon and it doesn’t work, slide your phone around over the target. The NFC sensor is usually near the middle or top of the back of the phone. Thick cases can sometimes block the signal, too.
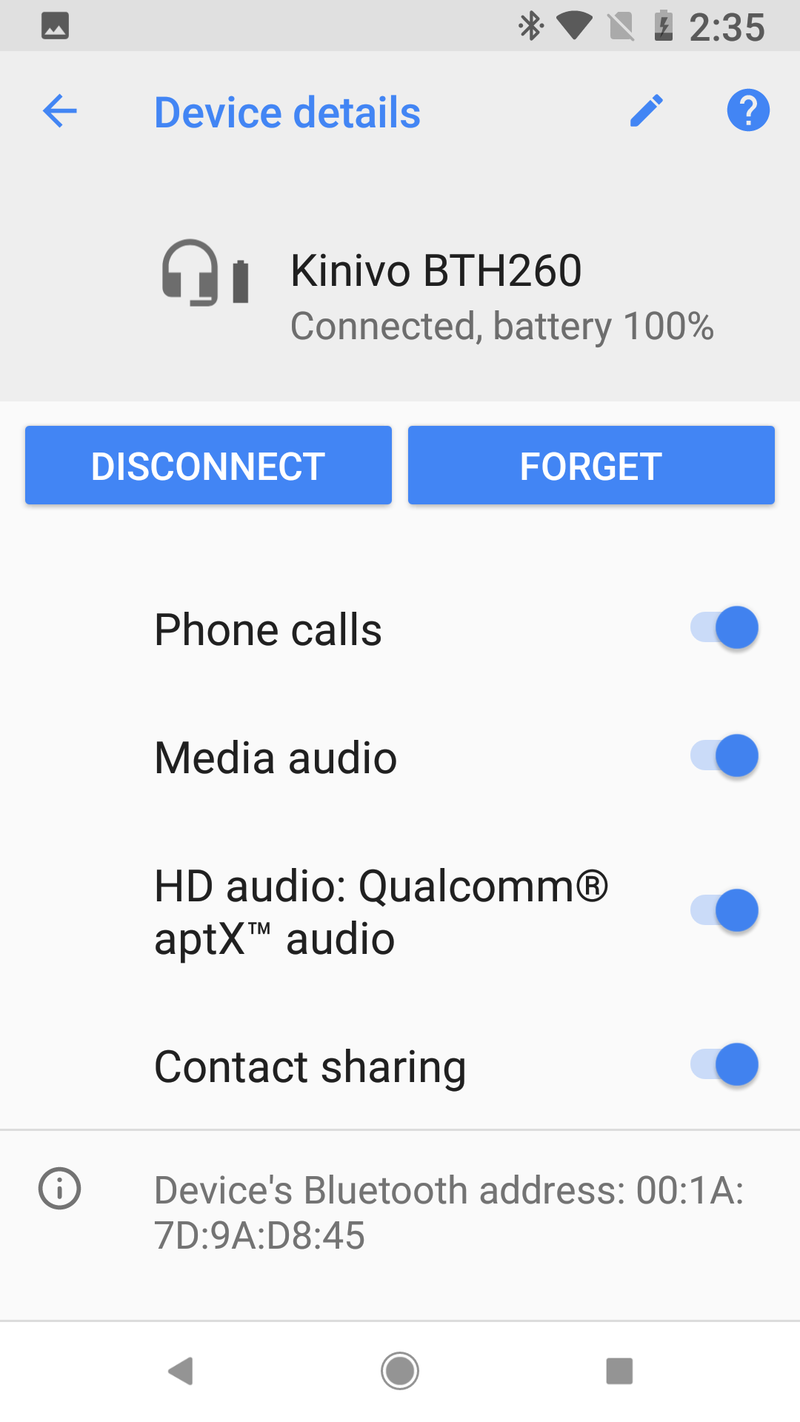
How to unpair Bluetooth headphones from your phone
Say you have a pair of Bluetooth headphones that you want to give to a family member, or that you want to use with a different device? While Bluetooth headphones can be paired to several devices, they can usually only be actively connected to one phone at a time. If you need to unpair your headphones from your phone, whether to use with another device or to go away, here’s how to remove the headphones from your Bluetooth connections list:
On your phone, swipe down the Notification shade from the top of your screen.
Swipe down the Quick settings panel from the top of the Notification shade.
Press and hold Bluetooth to open Bluetooth settings.
Tap the settings gear next to the headphones you want to unpair.
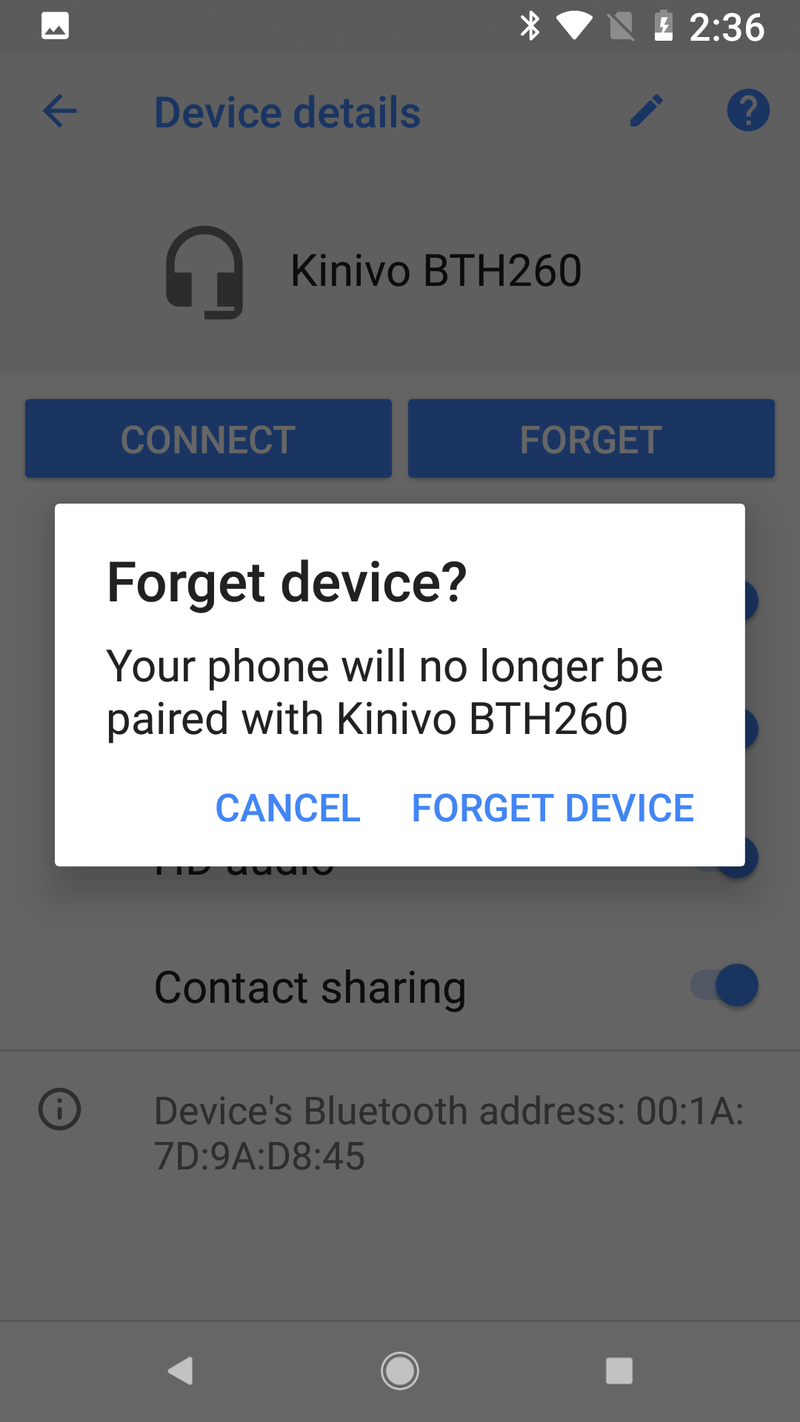
Tap Unpair or Forget.
A popup will appear asking you to confirm your decision to unpair. Tap Forget device, unpair, or Yes.

Your Android phone will forget the pairing and you will have to re-pair the phone before using it to listen to music again.
Updated May 2018: This article has been completely rewritten to reflect new methods of pairing and include the unpairing process.
What we’re hoping to see from Android P at Google I/O
Google I/O 2018 will officially begin tomorrow, May 8.
This yearly developer conference is home to a heap of announcements regarding a variety of Google’s products/services, but one of the main talking points during the opening keynote is always Android.

Android P is this year’s big update for the platform, and while we were first introduced to it in March, we’re anticipating Google to elaborate on what we already know and announce even more goodies that haven’t been shown off quite yet.
Without further ado, here’s what we can expect to see from Android P at I/O.
Developer Preview 2 & first open beta
Shortly after the release of Developer Preview 1, Google published a timeline showcasing the release track for Android P. The next milestone, Developer Preview 2, is currently set to be launched in early May.
 Developer Preview 2 is right around the corner.
Based on this and events from past I/O conferences, it’s very likely that tomorrow is when Google will release this next version of Android P.
Along with new features and bug fixes compared to DP1, this should also be when Android P’s public beta goes live. The second developer preview won’t be as polished as the final build we’ll get in August, but it will allow users to rock the new software without having to worry about game-breaking bugs.
Google says that its Android Beta Program website will be updated when the next beta begins, so be sure to keep an eye on it following the opening keynote for all the details on how to try Android P for yourself ahead of its official release.
Closer look at new UI elements and features
Google’s been making little design tweaks to Android for the past few releases, and the first developer preview shows that trend is continuing.
The notifications/quick settings panel has received a fresh coat of paint, the settings menu is now much more colorful than before, and the home screen dock now has a transparent white box over it.


Many of these visual updates will only be found with Google’s Pixel phones, and at I/O, we’ll get a better idea of how these will work and why Google decided to make some of the changes it did.
Furthermore, there’s a chance Google will unveil all-new UI elements that we still haven’t seen. Developer Preview 1 for Android Oreo featured a gray background for the quick settings tray, but Developer Preview 2 introduced the white background we’ve now become familiar with. Similarly, it wasn’t until Oreo’s second dev preview that we saw Android’s new emoji style and picture-in-picture.
Lots can change between different developer previews, meaning the Android P we know today could be very different in just a few short hours.
Material Design 2
There’s been a fair bit of chatter regarding Material Design 2, and I expect we’ll learn more about it at I/O.
Google first revealed Material Design in 2014 alongside Android Lolipop, and while it still looks and feels great, is due for some sort of refresh.
The current developer preview for Android P and newer apps such as Google Tasks offer a glimpse as to what this new design language holds, but the overall picture is still incomplete. We know that Google’s moving towards rounded corners and lots of white space, but what else is new? At I/O, that question will (hopefully) be answered.
Surprises!
And, of course, what would a Google I/O be without a few welcome surprises?

There have been rumors that Android P will move away from traditional navigation in favor of a gesture-based system similar to the iPhone X, and if this is something Google’s really working on, I’d venture to say we get a closer look at how exactly this works.
It was also reported in early April that Google was building a mid-range Pixel phone. Although we haven’t seen a hardware unveiling in some time, past I/Os have been used to announce things like the Chromecast and LG G Watch.
Anything could happen tomorrow, and that’s part of what makes I/O so exciting.
What are you hoping for?
That’s what I’m expecting to see from I/O 2018, but what about you? What announcements are you the most excited for? Drop a comment below and let me know!
Android P: The best new features so far
