


Make your Huawei Mate 10 Pro’s battery last up to a week with our amazing tips
The Huawei Mate 10 Pro is so good that once you’ve got one, you’ll want to keep using it as much as possible. Read our Huawei Mate 10 Pro review for evidence. To make sure the phone is ready when you want it most, it’s important to make the most out of the battery. It’s already a large, 4,000mAh cell that we’ve found lasts for two days with normal use, but heavier use will see that number drop.
Luckily, there’s quite a lot you can do to maximize the Huawei Mate 10 Pro’s battery life, and we’ve got all the answers on how to do it right here. If you opt for the most extreme battery saving tip, your phone could last a week in standby. If battery life isn’t your concern, check out our other Mate 10 Pro tips here, or if you want a case for the phone, we’ve got recommendations here.
Use Phone Manager
Phone Manager is Huawei’s own system optimization app, and it comes pre-installed on the Mate 10 Pro. It’s a system app, so you can’t accidentally uninstall it. If you can’t spot it immediately, search for it by slowly sliding a finger down the screen to open the recently used app drawer, and enter Phone Manager into the search bar at the top.
Unless the Phone Manager meter shows 100, then the first thing to do is tap the Optimize button. This performs various tasks, one of them being to make sure nothing is unduly draining the battery. For example, it may turn Bluetooth off if it’s on and inactive.
Next, let’s look at the Battery option. It’s in here where you can make the most difference to your phone’s standby time. Tap the icon in the bottom left which also shows the current battery percentage remaining. At the top of the new screen the system informs you approximately how long, based on current use patterns, the battery will last until it’s flat. Tap this to get a more in-depth breakdown of what’s using the most power. It’s usually your mobile signal, GPS, Wi-Fi, and screen that require most energy.
Now let’s start extending the life of your battery. Huawei has two power-saving modes of its own. Both are activated inside the Battery option in the Phone Manager app, or using an option in the pull-down Android notification shade. The least intrusive is Power Saving Mode, which typically adds four or more hours to the standby time by shutting down background apps, stopping email syncing, and reducing visual effects and audio in the operating system.
If that’s not quite enough, then you’ll want to flick the switch on the Ultra Power Saving Mode. This is for the serious battery-saving maniac, and should be considered an extreme option. It limits use of all apps aside from the most important, it shuts down GPS, lowers the screen brightness, and strips away your wallpaper. You can select the apps you still want to use, but anything too power intensive defeats the object. With this mode active, your phone’s battery could last up to a working week in standby. When you’re finished with Ultra Power Saving Mode, look for the door-like icon in the top right of the screen to exit.
Outside of using these options, you can train your Mate 10 Pro to make the best of its battery. Tap Launch under the Battery menu to find a list of apps the Mate 10 Pro is managing and observing power consumption for. Make sure the Manage Automatically switch is active, as this helps the Mate 10 Pro keep an eye on apps that frequently wake the system, or draw more power than others. Tap Battery Usage for more in-depth information on which apps are taking the most power. If one of the power-hogs is an app you don’t use often, consider deleting it.
Finally, tap the Optimise option under the Battery menu. The Mate 10 Pro will go through the same series of actions it did when you opened the Phone Manager app to keep your phone running smoothly, plus it provides a few tips on making the most out of the battery. These include turning off GPS, adjusting alert style, and even disabling screen auto-rotate. Another battery saver under the Battery menu is switching on the Mate 10 Pro’s dark theme, which changes the background in menus to black and the text to white. It looks cool, and helps the screen work more efficiently.
Finally, if the Battery menu in Phone Manager is one you use often, consider putting a shortcut on your home screen. On the main Phone Manager screen, tap the Gear icon in the top right, then Shortcuts, and flip the switch next to Battery.
Be sensible
Huawei’s Phone manager is a very comprehensive and effective way to manage the Mate 10 Pro’s battery. However, there are still things you can do outside of it to manage power. Some of it is common sense. Don’t play games, don’t stream audio over Bluetooth, don’t stream video, and keep open, active apps to a minimum. Close them down using the Android menu key and tapping the little trash can icon at the bottom of the screen. We love the Huawei Mate 10 Pro’s desktop mode, but it won’t do your battery life much good.
If possible, put your phone in Flight mode if you don’t need to be connected, to save more power. Just remember you won’t receive any notifications, emails, messages, or calls in this state. If Flight Mode isn’t an option, and you leave your phone on most of the time, consider setting up a Do Not Disturb time. This silences the phone at specific times, apart from alarms or apps you set as priority. It won’t save masses of battery power, but it does help the phone operate more efficiently, and little savings add up.
This is usually an automatic suggestion at the top of the screen when you tap Settings. If it’s not, find Sound under the Settings menu, then tap Do Not Disturb, and flip the Enable Now switch. Under this you’ll be able to manually adjust the times when the phone enters and leaves Do Not Disturb mode.
Fast charging
If the worst happens and the Mate 10 Pro’s battery percentage remaining is down to single figures, grab the charger that came with the phone. The Mate 10 Pro uses Huawei’s Supercharge fast-charging system, and 50 percent capacity can be reached in just 30 minutes, giving enough juice for a working day. It’s important to remember that Supercharge needs the Huawei charger to operate, and won’t operate with the charger you borrowed from a friend who owns a phone made by a different manufacturer.
Let EMUI help
This is an easy battery life tip, because it doesn’t involve you doing anything at all. Huawei’s EMUI 8.0 user interface, placed over Android 8.0 Oreo on the Mate 10 Pro, intelligently manages many aspects of the operating system all the time. Mostly this is to do with how apps consume system resources and management of RAM and power, and this will have an effect on battery life over time.
When EMUI finds an app that’s pulling more power than expected from the phone, it will send a notification with several options on how to deal with it. It’s good to know you can relax a little while the software takes care of things behind the scenes, even when you’re not actively saving battery power.
Even if you just decide to activate Ultra Power Saving Mode at times when you aren’t using your phone, following just this one tip will extend the time your Huawei Mate 10 Pro’s battery will last by several hours. Follow the rest, and you’ll stretch out its life even further. We’re still enjoying the Mate 10 Pro, and if we find any other battery saving tips we’ll share them with you here.
Editors’ Recommendations
- Huawei Mate 10 Pro tips and tricks to turn you into a professional
- ZTE Axon M review
- Huawei Mate 9 review
- Windows 10 Timeline hands-on
- Samsung Galaxy Note 8 vs. Huawei Mate 10 Pro: Which phablet reigns supreme?
These smart lights work with Amazon Alexa

Control your home’s lighting using Alexa and these smart bulbs.
Amazon offers an affordable way to start building out a voice-activated home automation system for your house or apartment with their Amazon Echo and Echo Dot powered by their A.I. assistant, Alexa. On its own, you can use Alexa to play music and find news, sports and other information. But things get really interesting when you start to connect Alexa up to smart devices, including connected LED bulbs and smart switches, around your house.
There are a number of light options compatible with Alexa. We’ve broken things down based on the different brands and ecosystems that each have their own compatibility with smart lights and smart switches that you’ll ultimately be able to control via Alexa on your Amazon Echo.
- Philips Hue
- Samsung SmartThings
- Insteon Hub
- WeMo switches and outlets
- Lutron dimmers and switches
- LIFX smart bulbs
- GE Link LED Smart Bulb
- TP-Link
Philips Hue

Philips Hue is the leader in smart bulbs, and are downright cool. You can connect up to 50 Philips Hue bulbs, lamps and lighting strips via the Philips Hue Bridge, so chances are you could convert all your home’s lighting over to the Philips Hue system. Whether you’re looking for 60W equivalent white LED bulbs, bulbs that feature 16 million colors, or LED light strips for futuristic accents, there’s a reason why so many people have gone with Philips Hue.
Alexa syncs right up to the Philips Hue Bridge, which means you’ll be able to set up different lighting groups for your rooms and IFTTT recipes on your phone, then also control everything with the sound of your voice via your Amazon Echo. There’s a lot of fun to be had here, as Philips Hue lights can be synced up to your music for epic dance parties, and otherwise customized in countless different ways to suit your lifestyle.
If you’re interested in getting started with Philips Hue, you’re best off getting a starter kit. There are a couple different options to consider:
- Philips Hue Starter Kit w/ two bulbs and one Bridge — $69.99 on Amazon
- Philips Hue Starter Kit w/ two bulbs, one bridge and an Amazon Echo Dot — $99.99 on Amazon
- Philips Hue Starter Kit w/ two A19 bulbs, one Bridge and one Dimmer switch — $125.47 on Amazon
- Philips Hue Starter Kit w/ three White and Color Ambiance bulbs and one Bridge — $142.77 on Amazon
No matter which starter kit you choose, the beautiful part of going with Philips Hue is that it’s super easy to add extra bulbs or other elements to your ecosystem later.
Samsung SmartThings

SmartThings provides a full suite of options for home automation, which includes a few options for smart lights. You’ll need a [SmartThings Hub] to get started, but from there you can connect plug-in smart switches for appliances, lamps and outdoors, and in-wall dimmers which support dimmable LED and CFL technologies along with legacy support for incandescent, halogen, Mark 10, and magnetic lighting loads.
You can also connect smart bulbs from Philips Hue or Osram to your SmartThings Hub, along with a host of other super handy home automation products that all work within the SmartThings ecosystem.
If you’re mainly interested in smart lights, you can get a SmartThings Hub and an Osram bulb bundle. If complete home automation is your ultimate goal, you might be more interested in the SmartThings Home Monitoring Kit, then build your own lighting arsenal from the available SmartThings-compatible lighting options.
Insteon Hub

Insteon’s offerings for smart home lighting mostly include in-wall dimmers and switches and plug-in dimmers. They do offer their own programmable, dimmable LED bulbs, available in two styles: 8W LED bulbs and 12-watt recessed bulbs. You can use the Insteon app to set bulbs into groups for scheduling and creating scenes, then take control via Alexa.
To start building out your Insteon smart lighting ecosystem, you should get the Insteon Starter Kit, which comes with the necessary Hub, and two Dimmer Plugs, perfect for setting up a voice controlled bedside lamp. From there, you’ll need to buy compatible bulbs as you need them.
Insteon’s system is a decent option for those looking for home automation, but overall their lighting options are somewhat lacking.
WeMo switches and outlets
WeMo offers Wi-Fi enabled smart switches and outlets that you can control via Alexa. The WeMo Light Switch can be used to replace any light switch in your home, letting you schedule and control your lights and appliances without the need of a central hub.
This one is better for the DIYers out there who are interested in manually creating their own home automation network with in-wall switches and plug-in adapters to control lamps and other small appliances. Those looking for hassle-free installation and smart bulb options are best looking elsewhere.
Lutron dimmers and switches
Lutron Caseta Wireless products offer a selection of smart dimmers and switches that connect via the Caseta Wireless Smart Bridge. Connect your Smart Bridge to Alexa allows you to control all the dimmers and switches with your voice.
Check out the Lutron Caseta Wireless Smart Lighting In-Wall Dimmer Kit or the Plug-in Dimmer Kit to see what this system is all about. This is another route that’s going to require DIY effort with initial setup and is also lacking branded LED bulb options, but the Hub is compatible with a bunch of other smart devices from leading brands including Ecobee, Nest, Honeywell, Logitech, and Sonos.
LIFX smart bulbs

LIFX offers a range of smart bulb selections for indoor and outdoor usage that are compatible with Alexa. Not only can you turn your LIFX bulbs on and off using only your voice, Alexa can also control and tweak your bulb color or light temperature so you always have complete control over your bulbs.
You can buy them individually or save money by bundling them into multipacks so you can upgrade bulbs around your home and link them all together via Alexa. They also sell bulbs with built-in infrared to enhance your security cam’s vision, as well as LED strips to add some futuristic and colorful accents to your home. Check ’em out!
See at LIFX
GE Link Smart LED Bulb

General Electric has a few smart bulb options available that work with Alexa but require a hub (compatible with SmartThings or Wink Hub 2.
You can get a standard A19 bulb for $29 (great if you already have a compatible smart home hub), or you can opt for the GE starter kit which includes two A19 bulbs and a compact GE Link Hub for just $75.
Other bulb sizes are also available.
See at Amazon
TP-Link
TP-Link offers smart bulbs that connect to your home network via Wi-Fi and do not require a standalone hub. There are four bulb options, from a standard white dimmable bulb to a fully-customizable multi-color bulb.
All of TP-Link’s bulbs are pairable with the Alexa app which allows you to control your lighting with your voice. TP-Link sells other smart home devices such as smart plugs which are also controllable via Alexa, as well as cloud-based cameras which are not.
See at TP-Link
Which should you get?

Thanks to Alexa’s compatibility with a variety of smart light systems, you’ve got several great options for automating and customizing your home. Which system you go with will greatly depending on your current living situation.
If you’re living in an apartment and are just looking to control some funky lighting options via Alexa voice controls, Philips Hue is your best bet. Buying a starter kit is a great investment that you can take with you as you move — and with the lifespan of LED lighting well exceeding a decade, you’ll enjoy the freedom to rearrange, expand and easily move your Philips system wherever you go.
If you’re a homeowner looking to integrate IoT devices throughout your home, you’ll want to buy an Alexa-compatible hub that shares a wide range of compatibility with other brands and products, such as SmartThings or even a Wink Hub 2, then build out your smart bulb and other devices to the exact specifications of your home.
And if you’re in the process of planning a home renovation, it might be worth looking at WeMo, Insteon, and Lutron’s in-wall switches or dimmers to convert your existing home wiring into a smart lighting system that you can then control with your voice. Don’t just update the look of your home — upgrade its functionality, then let Alexa control it all with the power of your own voice.
Updated December 25: Added the GE Link smart bulbs to our list!
Wireless mic Mikme brings high-end sound to mobile videos
There are plenty of portable audio recorders and microphones on the market, but MikMe goes a step beyond all of them. It’s a compact wireless microphone that synchronizes with an iPhone app, allowing you to make quick mobile videos with high-quality sound. The only problem: It costs $500. That puts it out of reach for normal consumers, but it might be worth it for vloggers and people who need to make professional-sounding videos on the fly. And if you really care about audio quality, you’re probably used to paying a premium for specialized gear.
MikMe certainly feels premium, with its sturdy metal case and light weight. Inside its mesh housing, you can see its heart and soul: a 1-inch, gold-plated condenser capsule. That’s in the same territory as expensive large diaphragm microphones, which are typically well suited to recording vocals and instruments. MikMe’s capsule is also contained in spider suspension, which minimizes extra noise while you hold and walk around with it.
Naturally, it also works as a standalone recorder. It can capture up to 24-bit 96Khz audio on its own, but that quality gets bumped down to 44.1Khz when you’re sending it to your phone. That’s still CD quality, though, which makes it ideal for web video. Inside, it houses 16GB of storage and a battery that lets you record for three and a half hours.

MikMe’s interface is relatively simple: Along the back, it has buttons for power and Bluetooth, a micro-USB charging port, a headphone jack for monitoring your recordings, and two buttons to control headphone volume and the microphone’s gain. The big button on the top lets you start and stop recordings, as you’ve probably guessed.
To use MikMe with your iPhone, you first have to connect it as a Bluetooth device. After that, the company’s app will automatically recognize it. From there, you can trigger remote audio recordings on your MikMe or synchronize recordings that’ll go to both your phone and the device. Then there’s the most important feature: You can shoot a video using the MikMe as your source microphone. That’s pretty straightforward. Just hit record and your phone will start capturing a video as usual, and the MikMe will also start recording.
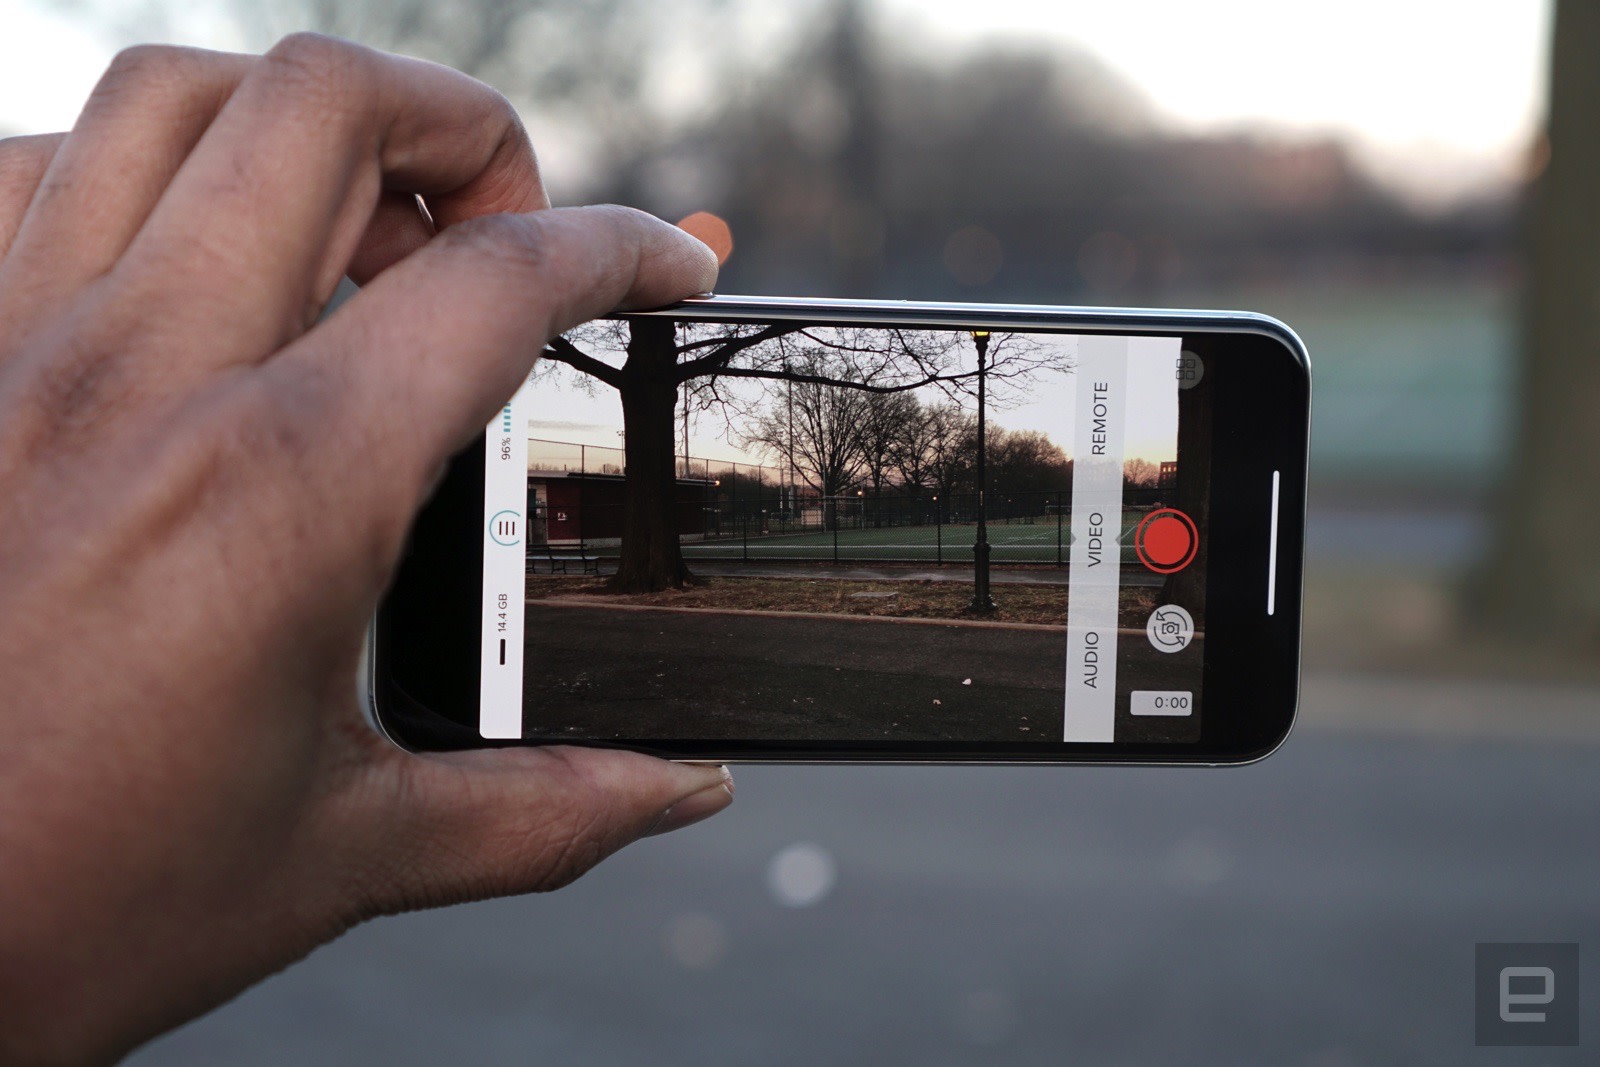
At that point, you’re free to walk around with the microphone, and away from your phone. As long as you’re in Bluetooth range, everything will stay in sync. Once you’re done recording, the app also takes another pass to make sure the video and audio are paired together properly. From there, you can export it to your phone and upload it to your social media platform of choice. In our noisy office kitchen, the MikMe managed to record incredibly clear audio as I walked about, something that my iPhone X could barely manage when I was standing right in front of it.
That, in a nutshell, is MikMe’s main selling point. It allows for more freedom when shooting mobile videos, and sound quality unlike anything you’ll ever get with your phone. Is it really worth $500, though? For a certain type of user, one who spends a lot of time shooting mobile videos, it’s a more convenient option than carrying around an external recorder. Using that method you have to wait until you edit the video on a computer before you upload it. With MikMe, you can get the superior audio track applied instantly.
If you’re more concerned with creating a truly professional video, and you don’t mind waiting a bit, then a more traditional audio recording setup might make more sense. Realistically, though, MikMe was never meant to replace something like that. It’s more focused on giving you quick results without much work. To give us a sense of what’s possible, the company also produced several music videos recorded entirely with MikMe. Most viewers would have a hard time telling that the sound came from a tiny wireless microphone.
While MikMe is certainly expensive, its usefulness could be priceless to some. And if it ever comes down in price, it could be essential for aspiring YouTube stars.
