


Netflix’s ‘Castlevania’ showrunner Adi Shankar on nerddom and season two
It’s easy to draw a line from producer Adi Shankar’s scrappy Bootleg Universe — his slew of short indie films about the Punisher, Power Rangers and other pop culture heroes uploaded on YouTube — to his recent work as showrunner of Netflix’s recently released animated Castlevania series. His approach taps into what made beloved characters resonate with fans and gives those old favorites a mature, modern spin.
 We caught Shankar on his way to Japan for a press tour promoting Castlevania to ask why he jumped at the chance to adapt the well-loved franchise. The first four-episode season dropped weeks ago, beginning a gothic horror saga of three adventurers fighting against Dracula’s army of demons. The series was planned around a script written a decade ago by comics icon Warren Ellis for Frederator Studios (of Adventure Time fame), but Shankar was brought on late in 2015 to make an animated version, which eventually landed on Netflix.
Fans loved the series, Shankar said, and apparently so did Netflix, which ordered a second season of Castlevania and doubled the episodes, though no release date has been announced. On top of returning to the show, Shankar will add another adaptation to his oeuvre, as he was announced showrunner of an Assassin’s Creed anime. While he can’t comment on that series, he had plenty to tell Engadget about bringing his adaptation experience to bear on a beloved video game franchise.
What about Castlevania appealed to you?
I’m a fan of Castlevania. I played most of the games — Symphony of the Night being really the game that brought me back into the franchise from the PlayStation 1 era. But I am genuinely and authentically a fan of it. That’s ultimately what brought me in. Being able to make it was a dream come true.
Your team chose to adopt a prequel, Castlevania III: Dracula’s Curse, instead of the original game. Why?
The story of Castlevania is the story of this family known as the Belmonts. As the various generations of the family struggle with their own challenges, not only fighting monsters but dealing with the issues of the time, it made sense to start early in that family’s history.
What was the process to change it into your vision of the series?
The real issue in adapting Castlevania was the way in which we were gonna do it. We used 2D hand-drawn animation. This is effectively a dead art form. That’s something I was adamant about right from the get-go. It wasn’t so much the story we were gonna tell as much as how we were going to tell it, because we knew we were going to tell an early Belmont story from one of the earlier games. We were designing it for television, but, for instance, we didn’t want to do a ‘Monster of the Week’-style narrative structure. We also wanted each frame of it to look beautiful and use that 2D hand-drawn look.
The first season was only four episodes. Were you planning on more seasons?
I wouldn’t say we were planning on having a second or third season so much as that there was an overarching story we were hoping to tell. And there’s always been a plan for that story in place.
Was it more difficult to adapt a video game rather than characters from other mediums, like comics or television shows?
I wouldn’t say anything was more difficult. It was just that what we had to focus on was different: fleshing out emotions associated with these characters so that the audience connected with them on an emotional level.
Was that different because you were adapting video game characters?
Partially. When you’re developing a character for a video game, effectively — and I’m not saying one art form is more difficult than the other and they both have their own challenges — but when you’re developing for a video game, there are different parameters in place than if one were to develop a character for film or TV. In one version, you are the character in the game; in the narrative version, you are observing the character and have to relate to the character in a different way.
Is it constraining to adapt from source material that came out — in Castlevania III’s case — almost 30 years ago?
There’s nothing about the games that feels constraining. There’s nothing we’re trying to work around. We’re embracing all the elements of the game and adding an emotional arc to them.

Is the process going to be any different for your next project — adapting Assassin’s Creed into an anime-style series?
Well, I can’t really talk about Assassin’s Creed other than to say that I’m a fan; I’ve played every game. I love the mythology, and I love the universe.
But as for Castlevania, season two will be expansive. Not only is it greenlit, Netflix doubled our episode order due to the fan response. Which has been amazing! I mean, we made a show targeted for the fans of the game, and now it has crossed over into the mainstream. It was an amazing thing to have had happen.
Does this feel like a fan-made project?
One-hundred percent. Although this is an official project, it feels in line with the mentality of the Bootleg Universe. It wasn’t trying to get an audience beyond the core fanbase. The fact that it did is wonderful. But we were, are and will continue to be loyal to our core demographic.
How’s the response been?
The fan response, the critical response, has been overwhelming; it’s been humbling. It makes all of us want to work even harder and deliver an even better season two. Season one has teed up season two perfectly.
The reaction was so overwhelmingly positive that I was a little taken aback. I didn’t expect that. I didn’t necessarily expect the show to cross over the way it did, demographically, and into the mainstream.
The audience that grew up loving these games are now the core audience that marketers are going after. And on top of that, we have a whole generation under us — I’m 32 — that are all gamers. There’s no such thing as gamer versus non-gamer. Every single one of us is a gamer on some level, even if it’s just playing iPhone games.
Would you say those marketers appealing to our retro childhoods means nostalgia is a cottage niche inside the gaming industry?
I wouldn’t say it’s nostalgia at all. I would say it’s a language and an art form that has developed across the decades and has supplanted film as the preeminent art form of this millennium that we are living in right now. The innovations that are happening in storytelling are happening in VR, AR and gaming.
Are you interested in VR and AR, possibly in your future adaptations?
Hell, yeah.
Are you waiting for the tech to get better, or are any VR/AR projects on your horizon?
On the horizon. My schedule’s just packed at the moment, but it’s on the horizon.
Apple pulls VPN apps following China crackdown
China might say it isn’t cracking down on personal VPNs, but Apple would likely argue otherwise. ExpressVPN, Star VPN and other developers report that Apple has pulled their apps from the App Store in China for allegedly including “content that is illegal” in the country. Some clients are still on other platforms (including ExpressVPN, for now) while others remain, so it’s not a uniform cull at this point. However, this is still a big blow to attempts to circumvent China’s mounting internet censorship through encrypted communication — not to mention companies that may have been depending on those apps for remote work connections.
Apple has declined to comment, although users have noticed that they can still use affected VPN apps if software came from another country’s App Store. This isn’t a wholesale block, then.
The move isn’t coming out of the blue: China is holding its once-every-5-years Communist Party congress in the fall, and it tends to ramp up online censorship ahead of those gatherings to silence dissent. The government also made Apple pull the New York Times app at the start of 2017. Even so, it emphasizes how easily China can hold the tech industry over a barrel. China knows Apple and others need Chinese customers to thrive, and that means they have to remove apps even when they help protect freedom of speech.
The clampdown also illustrates the pitfalls of disallowing apps from unofficial sources. The iOS App Store is theoretically more secure, since you’re less likely to run across rogue apps hosted on sketchy websites and less-than-vigilant stores. However, it also leaves you with few practical alternatives if censors demand that an app vanishes. You still have options on Android or desktops, even if it involves a lot of effort to track down just the right program.
Via: TechCrunch, Reuters, New York Times
Source: ExpressVPN, Star VPN (Twitter)
Secure your accounts and important login information for only $29!
In today’s online world, you can’t be running around with weak passwords. There are too many people out there trying to get a hold of your personal information for a variety of nefarious reasons and your standard “Passw0rd” password is not going to protect you from ransomware and data dumping. How do you fight back?
Get stronger passwords today! Learn more
A password manager is an excellent way to make sure you’re creating complex and difficult passwords to keep all your data secure; however, plenty of password managers cost a pretty penny. What if you didn’t have to spend a fortune to secure your login information?

Right now, through Android Central Digital Offers, you can get the award-winning password managing service RoboForm today!
RoboForm will not only store your passwords in a secure vault you can access at any time, it will also help you create strong and reliable passwords to use for all the accounts you have!
Just take a look at all the amazing features RoboForm provides:
- Automatically remembers your passwords for every site you enter one and logs you in with a single click.
- Random password generator creates strong and unique passwords for every site.
- Folders and powerful search functionality make organizing hundreds of passwords easy.
- AES 256-bit encryption protects against dictionary, brute force, and other attacks.
- Password auditing ensures you have strong passwords for everything.
If you jump on this offer right now, Android Central Digital Offers will provide you with a 4-year subscription to RoboForm for only $29.95! That’s a savings of 62%!
Stop worrying about your accounts getting broken into and start creating strong and reliable passwords to protect all your sensitive information today!
Prevent your important accounts from being hacked! Learn more
Rangi is an awesome puzzler on Gear VR

Defeat sliding puzzles, warp away from descending spikes and reawaken a world where music has gone missing.
Once the music giants roamed the land, filling the world with music. Unfortunately, time and great evil have stolen them from the land. That’s where you come in. You’ll need to explore ancient ruins, and reconnect portals in order to bring music back to the world. With an African theme intertwined through the game and challenging puzzles there is plenty to do in order to return music to the land.
Read more at VRHeads
Amazon deal trucks may be your last chance at an NES Classic
Are you still pining for the elusive NES Classic Edition a few months after its abrupt discontinuation? If you’re in the right US city and act quickly, you might have a chance. Amazon’s Treasure Trucks in Atlanta, Chicago, Dallas, Houston, Los Angeles and Seattle are offering the retro console at its original $60 price as part of a one-day sale on July 29th. You just have to order from the Amazon app and pick one of the trucks as your pickup point. The offer is only available from 11AM to 5PM local time, and only while stocks last, but this may be your best (and possibly last) opportunity to get the Classic without being gouged by a third-party reseller or online auction. And if you miss out? Well, there’s always the SNES Classic.
Big news! #TreasureTruck is now in 6 cities, and today’s offer is one you won’t want to miss! Get in on the fun—find us in the Amazon app. pic.twitter.com/G9Z60tHMre
— Treasure Truck (@treasuretruck) July 29, 2017
Source: CNET, Amazon, Twitter
HTC U11 review: More than just gimmicks
Even die-hard fans have been ready to write off HTC for years now, and I can’t blame them. The company’s phones have fluctuated between greatness and mediocrity while its competitors have improved by leaps and bounds. So, what’s a company in a kind of existential peril supposed to do? Well, making a phone like the new U11, for starters. It’s shiny, laden with gimmicks, and — spoiler alert — the whole thing falls short of perfect for a few reasons. Even so, HTC has gotten enough right in this ostentatious package that you should definitely start (or re-start) paying attention.
Hardware and design

Chris Velazco/Engadget
With the U Ultra, HTC overhauled the design of its high-end smartphones. Forget those sturdy metal unibodies: from now on, it’s all about lots of sparkly, pretty glass.
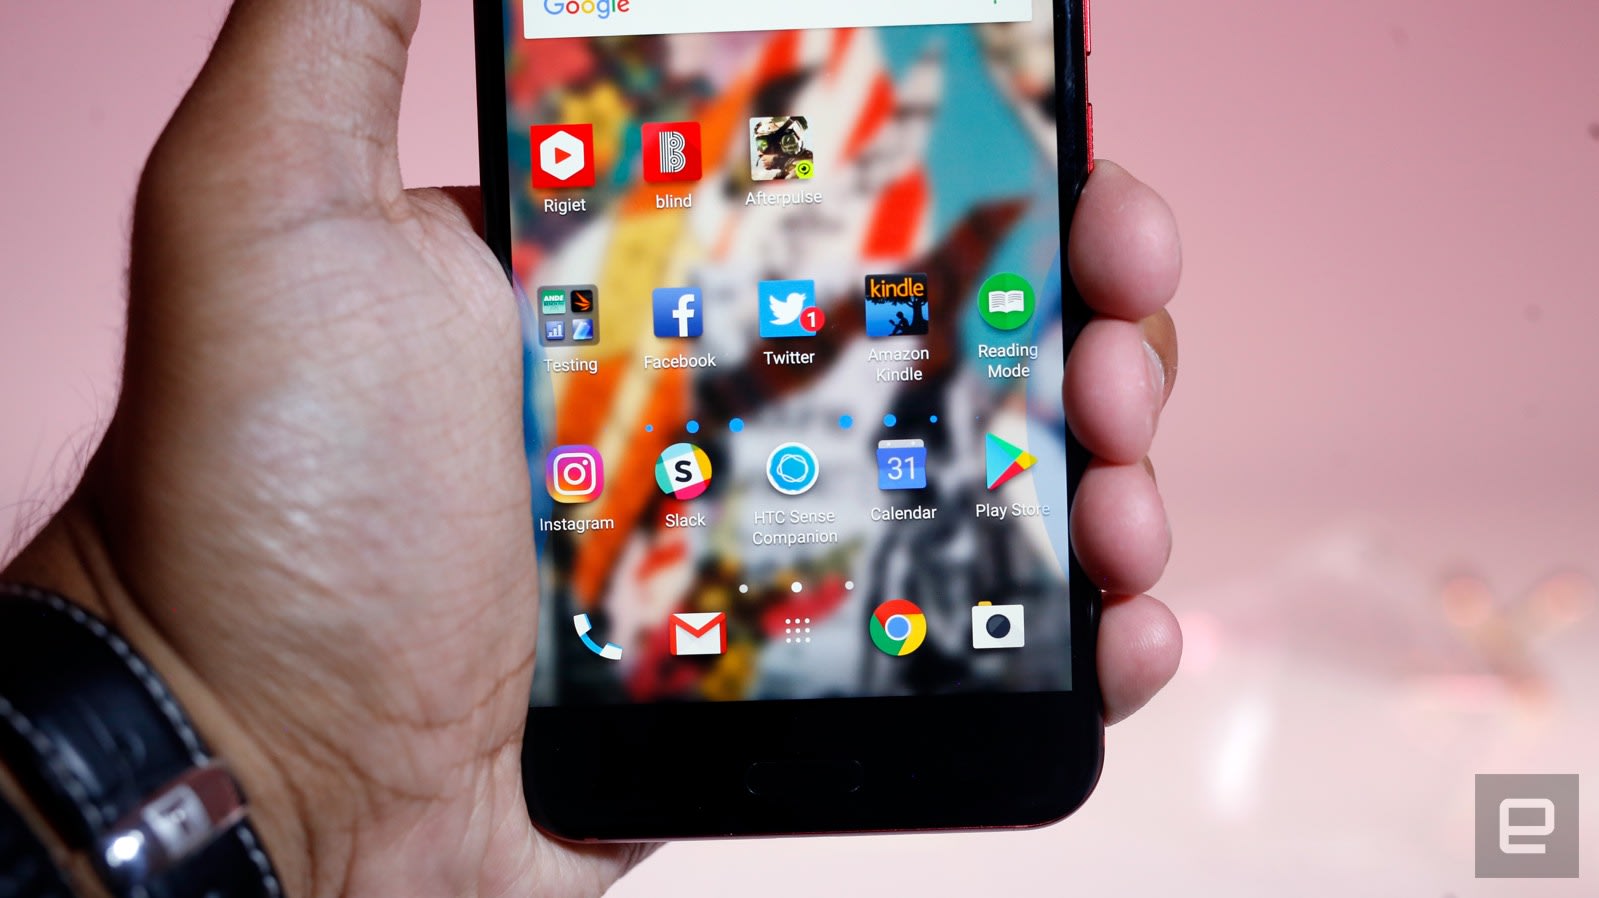
The back of the U11, in particular, is sure to grab attention — HTC calls the finish “3D liquid glass” and it was crafted to catch light in unexpected ways. The Solar Red model is only really “red” sometimes. Under the right light, the phone turns bright gold and it’s pretty trippy. Even better, all of the edges just sort of melt into each other — no rough seams in sight. This shock of color is enough to make the phone’s face, with its 5.5-inch Super LCD5 screen and big black bezels a little underwhelming.
Phones swathed in glass can be tricky, though. I couldn’t put the U11 down on the arm of my couch without it skittering to the floor. You can forget about taking calls with your phone wedged between your neck and shoulder, too, unless you’ve got sandpaper shoulder pads. Glass also cracks more easily than metal. While we were shooting our review video, the U11 tipped over from its standing position and smacked into our glass studio table. Countless phones have done this over the years and they were never worse for it — the U11 is the first that cracked.
There’s a fast, accurate fingerprint sensor below the screen, wedged between two capacitive navigation keys. The headphone jack is over, so you’ll use the USB C port on the bottom for charging and audio playback. In the SIM tray, you’ll find a spot for a MicroSD card to supplement the 64GB of onboard storage.
You can’t see them, but the U11 also has multiple pressure sensors baked into its sides. We’ll dig into Edge Sense a little later, but you can squeeze the phone to trigger predefined actions like launching the camera. Plus the whole thing is IP67 water resistant, which means it’ll handle dips in up to 1 meter of water for around 30 minutes.
Display and sound

Chris Velazco/Engadget
The U11’s screen is good, but pretty standard. We’re working with a 5.5-inch Super LCD 5 at Quad HD. That works out to a density of about 534 pixels per inch. Colors aren’t quite as vivid as on an AMOLED display, but solid clarity and color reproduction put it in the same ballpark as its rivals. I only wish the screen was a little brighter. It’s a little dimmer than the Galaxy S8 and iPhone 7 Plus, making it tougher to read under harsh daylight.
The U11’s speakers, on the other hand, are very, very good. It’s been a long time since HTC’s BoomSound heyday, but the U11 is louder and clearer than any other smartphone I’ve tested recently. In fact, while I was testing the speakers at the office, I had to deal with more than the usual amount of stink-eye from non-Engadgeteers because of the volume. (To my knowledge, no HR claims have been filed.) You’ll need more oomph for, a party, but the U11’s built-in sound system is good enough for gathering people around a YouTube video.
Without a headphone jack, you’ll need to use Bluetooth cans or HTC’s pack-in USonic Type-C earbuds. They’re a little too heavy on the bass for me, but they’re comfortable and offer a more welcome surprise: active noise cancellation. Even better, they don’t need batteries since the earbuds draw power from the phone. While handy, these pack-ins are nowhere as good as isolating noise as, say, a pair of Bose QC35s. The U11 can also tailor the way the phone plays audio through those earbuds. Each audio profile is specifically tuned for your ears, and mine made my music sound noticeably crisper and brighter — good stuff.
Software
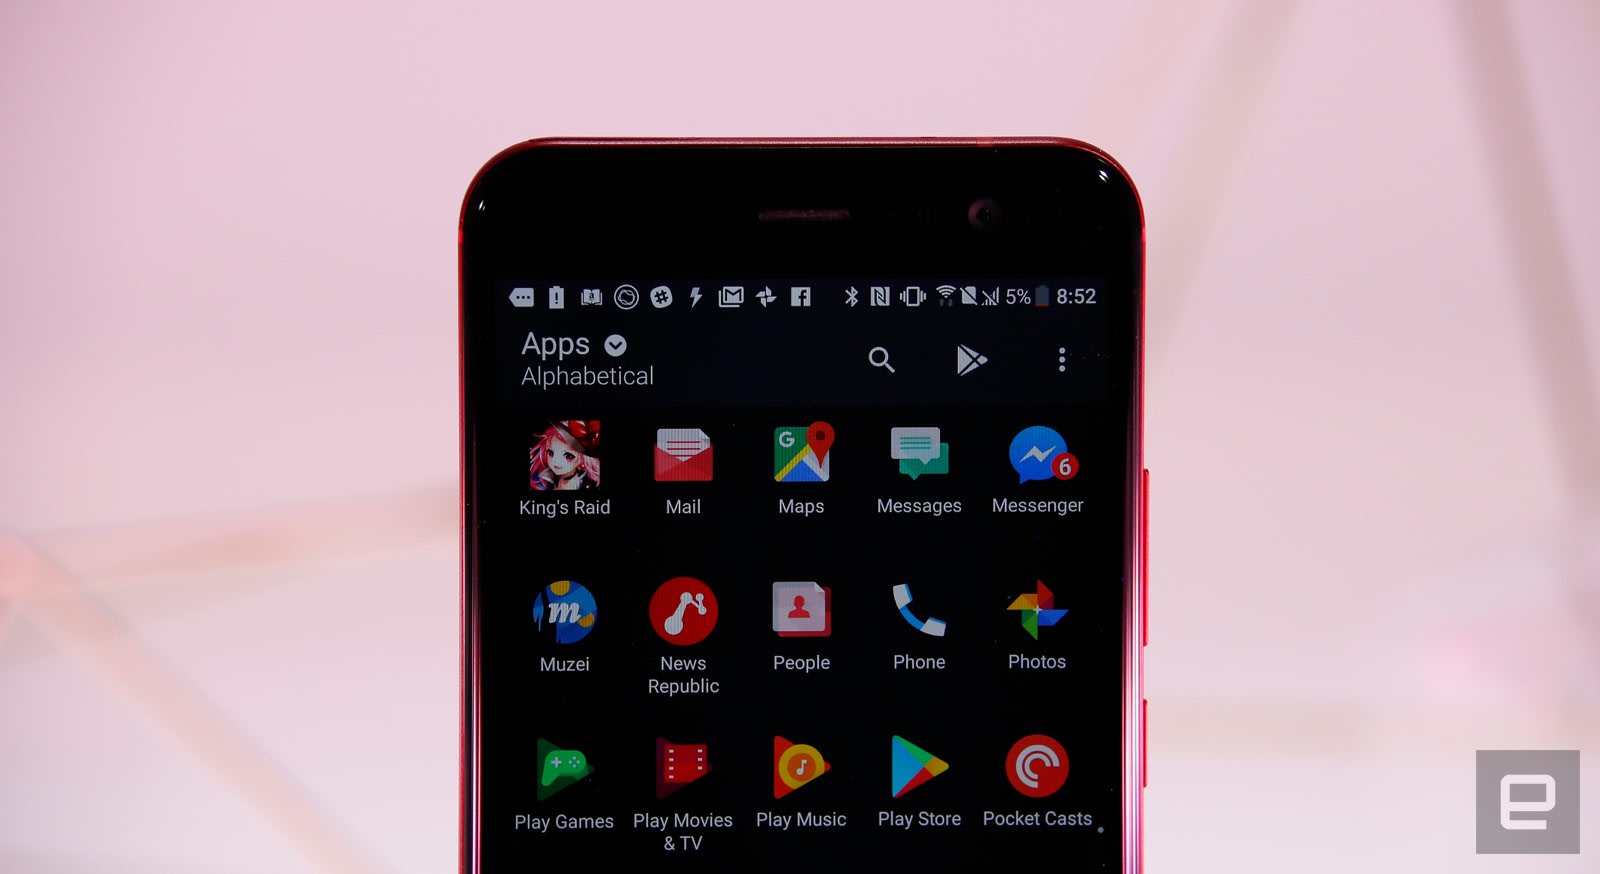
When the company launched the 10, it also revealed an approach to Android that felt cleaner and fresher than before — Sense UI’s visual noise was dialed down and extraneous apps were killed in favor of Google’s own. These were steps in a positive direction and led to a mostly uncluttered version of Android 7.1 Nougat for the U11. In general, it runs very, very well, but it feels a little stale when compared to updated interfaces from rivals like Samsung.
Rather than revamp the interface, HTC focused its efforts elsewhere. The U11 comes with support for three — three! — virtual assistants right out of the box, which is a little insane. Most of you are probably familiar with Google Assistant, and it works the way it always does: either long-press the Home button or get its attention with “OK, Google,” then fire off a request.
HTC’s Sense Companion is much less vocal, offering up notifications and reminders based on what it knows about you and your environment instead. Is it going to rain? It will suggest you pack an umbrella. Once it gets late in the day, it’ll tell you how many steps you’ve taken and even remind you to charge your phone when it knows you have plans later. Essentially, HTC’s assistant tries to stay subtle while being proactive — it’s meant to slide into your life when you need it and disappear when you don’t. In general Sense Companion plays it safe by only occasionally surfacing notifications. I would’ve preferred it to be a little more in-my-face and but there isn’t a way to make the Companion offer handy tips more regularly.
Then there’s the newcomer, Alexa. Amazon’s voice interface is available on a few smartphones right now, but the U11 is the first to give it a proper home. You just say “Alexa” and she’ll spring to life. The U11 lacks the Echo’s far-field voice recognition, so it occasionally takes a couple tries to rouse it. Other than that, it’s the same solid performer you expect. Alexa has access to all the skills I’ve enabled on my home Echo, and the U11’s great speakers mean audiobooks and music from Amazon come through loud and clear. In fact, Alexa’s only true failing is that when she can’t tell what you’re saying, the app window and screen stay active until you dismiss the app or try again. If you’re not paying close attention, a failed Alexa conversation could leave the U11’s display lit up, burning precious battery.
Edge Sense
Don’t forget that you can squeeze this phone to make it do things. For all the hype, Edge Sense is very simple. The best way to think of it is as an invisible convenience key with two settings: a squeeze performs one action, and a squeeze-and-hold performs another.
Getting Edge Sense up is simple: just clench your way through a demo. You’ll have to enable the advanced mode to get access to the squeeze-and-hold gesture, though, for reasons beyond comprehension. By default, the squeeze action is set to launch the camera, with a second squeeze snapping a photo once everything is in position. Thankfully, none of those actions are set in stone. Rather than launching the camera, you can set a squeeze to launch an app, take a screenshot, toggle the flashlight and even fire up the mobile hotspot.
Frankly, I kind of hated it at first because I couldn’t consistently get my squeeze pressure right. Things changed once I dialed down the amount of pressure needed — lighter grips meant less time wondering why things weren’t working properly. (This also means Edge Sense is easier to trigger by accident, but I don’t mind.) Now I instinctively squeeze the U11 every time I need to grab a quick photo and get a little frustrated when other phones don’t work the same way. Granted, Edge Sense doesn’t do anything that a dedicated button couldn’t, and it’s easily disabled for anyone who doesn’t want it. It’s handy, but it’s no game-changer.
Camera

Chris Velazco/Engadget
When I reviewed the U Ultra earlier this year, I was let down by its camera. Not because it was bad, mind you, but HTC’s cameras still hadn’t caught up to the competition. Well, this year is different: the U11’s 12-megapixel camera is a highly capable all-around shooter, with image quality in the same league as Samsung’s. My test shots consistently came through with lots of detail and accurate colors, save for a few cases where outdoor shots where the green looked a touch bluer than expected.
Other than the occasional color temperature issues, the U11 has been an excellent everyday shooter. It’s fast to focus thanks to an SLR-style dual-pixel system, and the near-instantaneous HDR Auto turned multiple shots into a single vibrant photo with ease. This kind of algorithmic enhancement helped Google’s Pixel capture excellent photos, and it’s doing great work here too. There’s a hint of shutter lag after you snap a photo though, so keep that in mind when you’re trying to capture subjects in motion.
The U11’s camera is also surprisingly good in low light thanks to its wide aperture (f/1.7) and improved 5-axis optical image stabilization. Before taking the camera through its paces, I was a little concerned because the pixels on the 12-megapixel sensor are smaller than in HTC’s other UltraPixel cameras. I shouldn’t have been: dark photos came through crisper than expected, though you’ll still find your share of grain. That said, I still think the S8s have a slight edge over the U11.
Videos shot with the U11’s main camera were similarly impressive, especially at 4K. There’s hardly any distortion and the level of clarity puts the U11 right up there with the best of them. Given the phone’s attention to sound quality, the inclusion of a 3D audio recording mode makes sense. It’s meant to make videos sounds more immersive, and it does to an extent — just make sure you’re wearing headphones or all nuance is lost.
Meanwhile, the front-facing camera actually shoots at a higher 16MP resolution, and with a wide-angle lens, it’s capable of some seriously nice selfies. The relatively wide f/2.0 aperture also means the sensor gets to suck up more light — I only needed the screen flash in near-pitch black situations.
Performance and battery

Chris Velazco/Engadget
The U11 uses Qualcomm’s Snapdragon 835 chipsets paired with 4GB of RAM and the Adreno 540 GPU. You know, just like basically everyone else. Still, there’s no denying that the 835 delivers some serious horsepower The U11 feels fast whether you’re jumping between multiple apps or plowing through beautiful games like Afterpulse and Telltale’s Guardians of the Galaxy. Hardly anything I threw at the U11 over the course of a week gave it pause. There’s a rare stutter, but the U11 is one of the most consistently snappy smartphones I’ve tested this year.
Battery life, however, was just average. Like the U Ultra before it, the U11 packs a 3,000mAh battery. But, this time it’s paired with a more powerful processor and a smaller screen. This balancing act of components worked out better than expected. In our video rundown test, the U11 looped an HD clip for just north of 13 hours before it finally needed a recharge. That’s much better than the U Ultra’s 11-odd hours, and in line with the Galaxy S8. The S8 Plus and the OnePlus 5 are still the phones to beat, though: they both lasted for a little over 15 hours before giving up the ghost.
When it comes actual use, expect to get just over a day on a single charge, and closer to a day and a half if you actually put your phone down once in a while. Again, this is average for this year’s flagships. People’s charging habits seem to be changing though, so the inclusion of Qualcomm’s QuickCharge 3 tech is handy (if not quite as fast as the newer QuickCharge 4 stuff). Using the included power adapter and cable, the U11 went from bone-dry to 90 percent full in a little over an hour.
The competition

The U11 is a very strong option for smartphone shoppers, but don’t forget about all the other great devices released this year. Samsung’s Galaxy S8 and S8 Plus are arguably at the top of the pack — they both have gorgeous “Infinity” displays, not to mention excellent cameras and similarly impressive performance. The S8 Plus is the better choice thanks to its significantly bigger battery, and its larger size is mitigated by Samsung’s brilliant, bezel-less design. That said, you’ll have to deal with a highly customized software experience.
If you’re looking for pure horsepower on a budget, the OnePlus 5 is also worth looking at. It uses the same Snapdragon 835 chipset as other 2017 flagships, but pairs it with 6GB of RAM for truly stunning performance. Despite being slightly smaller and lighter than the U11, the OnePlus also contains a bigger, 3,300mAh battery which lasted noticeably longer in our rundown tests. Then again, the U11 has a much better camera and offers more in terms of software creature comforts than the mostly-stock OnePlus 5.
Wrap-up

HTC didn’t get everything right with the U11, but it nailed a whole lot more than I ever expected it to. That’s a big deal. After the mess that was the U Ultra, I was honestly unsure whether the company would ever drag itself out of its doldrums. The U11 is proof that, yes, there is still hope for this company. While gimmicks like Edge Sense and the stylishly fragile glass back make the U11 seem too eager to be different, underneath all that is a very good, very fast phone that’s worthy of your attention.
Learn how to install Linux on a Chromebook with our simple guide
If you’re a tinkerer and like to really squeeze efficiency from your machines, you can get a lot of mileage from installing Linux on a Chromebook. It provides greater control over your system and access to an array of useful applications that aren’t available in Chrome OS yet. Thankfully, we’ve done the hard work of learning how to install Linux on a Chromebook, and broken it down into the steps below.
Note: Switching your Chromebook over to developer mode may void your software or hardware warranty, so make sure to check with your manufacturer before getting started. A restored image will take your system back to a brand-new state, but you never know what the manufacturer might see if you have to send it in for repairs.
If that isn’t an appealing option, or you aren’t feeling adventurous, you can also install Android apps on your Chromebook to add functionality without upsetting the manufacturer. Those with more ambition can even install Windows on a Chromebook, but the process is far more complicated. Either way, read on for further details.
Step 1: Back up your junk!
One of the best features of Chrome OS is that a lot of your data is saved to Google Drive, rather than locally. It’s especially convenient for you right now, because step two is going to erase all of the local data on your Chromebook. If you have any files you don’t want to lose, back them up to the cloud, or to another computer, for the time being. Zipping up groups of files can help you put them back where they’re meant to be after the installation.
You’ll also want to be prepared with a recovery image, just in case something goes wrong. You can download software directly from Google that makes this process easy, and then all you need is a flash drive or SD card, depending on your Chromebook’s connectivity.
Step 2: Developers, developers, developers
Now that you backed up all of your data and are ready to wipe your system completely and start over — don’t worry, it will automatically install Chrome OS — you can put your system into developer mode. There used to be a complicated series of hidden switches for this, but it’s now part of the Chrome OS firmware and it couldn’t be easier.
With your device on, hold down the Escape and Refresh keys, then press the power button. When your Chromebook turns back on, you’ll be in recovery mode, with the screen telling you to insert a recovery disc. You’ll come back here if something goes wrong, but for now, hold CTRL and press the “D” key to bring up the OS verification menu.
You have two options here, the first being that you can hit the spacebar to wuss out, remove yourself from the menu, and pretend you never wanted Linux to begin with. The second option is to hit the Enter key, which will delete all of the local data on your Chromebook and boot you into developer mode. After a few moments, it will let you know that you’re now in developer mode, and then reboot the system to a fresh install of Chrome OS. Fill out all of your information like you normally would, and continue until you’re looking at the Chrome OS desktop.
Step 3: Don’t eat this Crouton
Dealing with Linux kernels and shell scripts can be intimidating and messy if you aren’t familiar with Unix, but that’s OK because David Schneider, a hardware engineer at Google, has made it relatively painless. Through a bundle of scripts he calls Crouton — an acronym for ChRomium Os Universal chrooT envirONment… sort of — all you have to do is use one command with a few parameters to get Linux up and running. The Crouton GitHub page features a download link for the software, as well as detailed instructions, troubleshooting tips, and forums that discuss issues and tricks for making everything run smoothly.
Download the Crouton file, which should automatically save to your Downloads folder. If you want some added functionality, like a unified clipboard between Chrome OS and Linux, you can also install the Crouton Clipboard extension, but it isn’t necessary.
Step 4: Roll your sleeves up and pull on a root
You might not know it, but Chrome actually has a terminal of its own, called crosh (ChRome OS developer Shell), that gives you access to settings that aren’t normally available, and lets you control files and programs in much the same way you would a Linux shell.
The easiest way to access the terminal is to hold the CTRL and ALT keys, then press “T,” which will open a Chrome window or tab with some text and a place to enter commands. Once you have this window open, type in “shell” without quotation marks to enter the true UNIX command line, where we’ll access the core at the center of your Chromebook and Chrome OS.
It’s from this command line that we’ll run Crouton, the program that will download and install any of a number of Linux distributions. For this guide we chose XFCE, namely because it’s lightweight and functional, which is perfect for preserving the long battery life and portability of a Chromebook.
Step 5: Where’d my icons go?
Paste the following command into your command line: “sudo sh ~/Downloads/crouton -t xfce”. If you installed the aforementioned Chrome extension, you’ll also want to change the command so it says “xfce,extension” at the end.
Hit Enter and wait as your system pulls the necessary information and begins setting up your chroot. Don’t be surprised if this takes a bit of time, or if you see lots of text on the command line. More importantly, don’t interfere with this process.
Step 6: Babysitting the process
If you’ve ever installed an operating system before, you know that it needs time to itself to unpack data and configure system files, but it needs your input from time to time. A Linux installation is no different, so you’ll have to respond to a few prompts during the setup process.
If you used the most basic installation option, it will just ask you for a username (lowercase letters, numbers, and dashes) and a password. Before you go and type in the same password as your Gmail account or the one you use for every other site, it’s important to note that your whole system, not just the Linux half, is protected by that password, so if someone guesses it and gets into the Linux shell, they have the potential to access your Google account and its data. You should choose a strong password regardless. Type it in again to confirm — Note: The cursor doesn’t move when you enter a password in Unix — and hit Enter to finish installation.
Step 7: It’s in the computer
Your secondary operating system is now installed! To access it, simply return to the shell — where it should have deposited you after install — and enter the following command: “sudo enter-chroot startxfce4”.
The screen will then go black for a minute and boot into the Linux desktop. If you aren’t familiar with Linux, keep in mind that it takes a bit more effort than Windows or MacOS, especially the first time you boot it up.
Step 8: Live free
There are lots of advantages to installing Linux on your system, but there are a few that are particularly relevant to Chrome OS users. The following programs provide functionality that your Chromebook can handle but don’t fall within the Chrome OS ecosystem, or provide functionality you wouldn’t have if you were using your Chromebook offline.
Steam: Valve’s digital storefront and its surrounding community are awesome, and, thankfully, you can use your Chromebook to play whatever games in your library natively support Linux. If you have a desktop machine somewhere in your house that you usually use to play games, you can also play those games on your Chromebook. Simply log into Steam with the same account on both your Chromebook and your desktop to set up the connection, which will render games and stream the video output over your local network.
VLC: When it comes to media players it’s hard to beat VideoLAN Client, which supports dozens of audio and video formats, as well as a bevy of useful features for network streaming and playback. It couldn’t be easier to install — it even comes packaged with some larger distributions — and is open-source, if you want to try your hand at compiling the software yourself.
GIMP: Chromebooks don’t have a real version of Photoshop to run, though, browser-based options like Pixlr serve as basic alternatives. If you need something a little more robust, the Gnu Image Manipulation Project (GIMP) is a free piece of image-editing software that provides a large number of tools typically reserved for competing software. Moreover, the active user base is constantly working to help solve problems and develop new tools and features.
Skype: Because Chromebooks are easy to take with you on the go, Skype is a great choice for staying in touch. Most modern laptops have webcams and microphones built in, too, so you can videochat from anywhere you have an internet connection. If you can’t convince your friends to switch to Google Hangouts, at least you’ll have another option for managing your long-distance relationships and web friends.
Updated 7/28/2017: Minor edits to copy.
Here’s how to use Do Not Disturb mode in Android
Our smartphones command our attention several times every day. Some people even check their phones in the middle of the night. Why do we allow this endless torrent of incoming notifications, which are often unimportant, or worse, email spam, to interrupt us? If you can’t resist that blinking LED or that buzzing in your pocket, then you need to get to grips with the Do Not Disturb mode in Android.
Don’t let your smartphone addiction win. Set some ground rules with your phone and ensure that it doesn’t bother you in meetings, at the cinema, or when you’re catching forty winks. Let’s look at how to use Android’s Do Not Disturb mode.
Note: You might find some slight differences in the menu options from phone to phone, depending on the manufacturer, but Do Not Disturb mode is baked into stock Android now, so it should be present on every Android handset.
How to use Do Not Disturb Mode in Android
The fastest way to turn on Do Not Disturb mode is to swipe down from the top of your screen to open the notification shade and tap on the Do Not Disturb icon. On most phones running Android 6.0 Marshmallow or later, you’ll get a menu with three options:
- Total silence: Nothing will interrupt you.
- Alarms only: Any alarms you have set can disturb you.
- Priority only: Alarms can get through, but you can customize exactly what else should and shouldn’t disturb you.
Underneath that, you will see the option to specify how long Do Not Disturb mode should be active. You can set it to an hour to cover a meeting you’re going into, specify a time when it should turn off, or tell it stay on until you turn it off again yourself.
Setting Priority Notifications in Do Not Disturb
If you want to use the Priority only option, then you must define what a priority notification is.
- Go to Settings > Sound & notification > Do not disturb and tap Priority only allows. If you have a Samsung Galaxy phone, then it’s Settings > Sounds and vibration > Do not disturb > Allow exceptions > Custom.
- You can choose Reminders, Events, approved contacts, messages or calls from specific contacts, or repeat callers who call twice within 15 minutes.
Setting Automatic rules in Do Not Disturb
You can have Do Not Disturb mode turn on automatically, based on an event or time, by setting some rules.
- Go to Settings > Sound & notification > Do not disturb and tap Automatic rules. If you have a Samsung Galaxy phone, then it’s Settings > Sounds and vibration > Do not disturb > Enable as scheduled.
- Tap on Add rule, and decide whether you want it to be triggered by a specific time, or by an event.
- Pick a name for the rule and then specify the triggers.
- For time based rules, you can choose days of the week, and specify start and end times. This means you can set one bedtime rule for during the week and another for the weekend.
- For event based rules you’ll need to specify a calendar to link up and then you can have Do Not Disturb turn on automatically when you have an event, like a meeting. You can even specify that it only works for meetings you’ve replied Yes to. Note: Unfortunately, event based rules are not offered on Samsung Galaxy phones.
Please stop playing Pokémon Go in cemeteries

Imagine for a moment you are out visiting a family member who has recently passed.
You smile for a moment as a cherished memory flutters by. A tear falls from your face as the hole this person has left in your life swells a little larger than usual. Just as you go to kneel down and straighten the floral arrangement next to the tombstone, this peaceful resting place is interrupted by the last thing you imagine hearing right now.
HELL yes. I caught the Lugia!
Turning and facing the interruption, you see 18 adults with a handful of children next to over a dozen cars. These people are playing a game in the cemetery, standing in a cluster right next to a row of someone else’s family members. A minute or two passes, and this caravan of noisy people roll out together in hunt of the next place to play the game.
Unfortunately, this isn’t a hypothetical. It’s happening all over right now, and in my personal opinion, it’s something that should stop.
We do not consider playing “Pokemon Go” to be appropriate decorum on the grounds of ANC. We ask all visitors to refrain from such activity.
— Arlington Cemetery (@ArlingtonNatl) July 12, 2016
Niantic is no stranger to this particular topic. People have been playing in “off limits” places since the first day of Ingress, including someone getting caught setting up a portal on the 50-yard line of a big football stadium. We’ve seen warning messages about playing these games where there are rules prohibiting you being there, but a cemetery during the day is frequently not on that list. The gates are open, the Gyms are lit, and occasionally there are raid events that randomly appear in these locations.
Over this last weekend, I saw upwards of 80 people playing at the same time.
Why is this all of a sudden such a big problem? Coupled with the the Year 2 update with Raids, the folks who attended Pokémon Go Fest unlocked the new Legendary Pokémon. These creatures are bigger than the other raid events by far, and they’re much harder to catch. This means people are gathering in large groups again for the first time since the start of the game last year. The launch of these elite Pokémon includes a warning to play with at least 19 other people when attempting the Raid, and in many areas multiple groups are running at the same time. Over this last weekend, I saw upwards of 80 people playing at the same time in areas that really weren’t built to hold that many people or that many vehicles.
It’s not hard to understand why this is a problem for cemeteries. Not only is it widely considered disrespectful to be playing a video game where others are in mourning, but the insane increase in vehicle traffic actually interferes with people coming to the cemetery for its intended purpose. If the Pokemon Gym is in an area far away from the parking lot, you frequently see massive lines of cars on the roads of the cemetery, which are frequently not wide enough to really do that while normal cemetery operations are underway.

While this irritates me personally, especially when the local Facebook groups for Pokémon Go in my area try to avoid the conversation by only giving an address instead of the name of the Gym when trying to rally people to a Raid, there are some who suggest this behavior is the natural evolution of how people have always used cemeteries. From Keith Eggener speaking with The Atlantic:
They were quite important spaces for recreation as well. Keep in mind, the great rural cemeteries were built at a time when there weren’t public parks, or art museums, or botanical gardens in American cities. You suddenly had large pieces of ground, filled with beautiful sculptures and horticultural art. People flocked to cemeteries for picnics, for hunting and shooting and carriage racing. These places became so popular that not only were guidebooks issued to guide visitors, but also all kinds of rules were posted.
Its fantastic that so many people are outside, interacting with new people, and getting exercise with this game as a foil. The only problem I have with this mentality is how much extra work it puts on cemetery operators, which is an extension of a larger issue in general with the way Niantic is able to shirk responsibility for the way its users behave when playing this game. There’s a tool for unregistering your business or landmark as a PokeStop or Gym, but it’s not an instant process and puts all of the onus on the people who didn’t ask for this in the first place. The same could be said for creating new rules and putting them on new signs and then enforcing these rules inside a cemetery. It’s not that the idea is without merit, it’s just a lot to ask of people who probably have no idea what a Pokémon is to begin with.
In my opinion, Niantic should exempt cemeteries from these Raid events with an opt-in option for maintainers of these facilities. Until something like that happens, it’s up to you as the players of this game to take up a little personal responsibility and go hunting for your Legendary Pokémon elsewhere.
Pokémon Go
- Pokémon Go Game Guide!
- Pokémon Go Gen 2 FAQ
- Pokémon Go tips and tricks
- How to deal with GPS errors in-game
- How to play without killing your battery
- Join our Pokémon Go forums!
Best Car Mounts for Google Pixel

What’s the best car mount for Google Pixel?
The Google Pixel and Pixel XL are gorgeous and you’re going to want to hold onto them all the time, but that’s just plain unsafe when you’re driving — and depending where you live, it’s often illegal! You need to pick up a great car mount, and we have some favorites to share with you!
- Spigen Air Vent Magnetic Car Mount
- Nite Ize Steelie
- Anker CD Slot Magnetic Universal Phone Holder
- Kenu Airframe Plus Portable Car Mount
- Ram mount
- Spigen Style Ring
Spigen Air Vent Magnetic Car Mount

Spigen makes a lot of really ingeniously designed smartphone accessories, and their Air Vent Magnetic Car Mount is as convenient as it gets. The mount itself quickly and securely clips onto an air vent on the dash.
As the name suggests, this mount secures using magnets. That will require you to attach a metal plate to the back of your phone, or better yet to your Pixel’s case. Once installed, all you have to do is hold your phone close to the mount and it pops right on. With no clips or holsters to deal with, you can easily grab your phone with one hand as you leave the car. You can also take the Spigen clip with you and use it as a portable kickstand which holds your phone at the perfect angle for hands-free viewing.
But for all the positives, there are some drawbacks to this design. Adhering the metal plate on the back of your phone may interfere with the way you grip your phone, or leave scratches on the metal. If keeping your Pixel in pristine condition is important to you, you may want to look elsewhere, or slap the metal plate on the inside of a thin case so you can quickly pop your phone out.
Snag it for around $8.
See at Amazon
Nite Ize Steelie

This is definitely the coolest mount on this list. The Steelie is a two-piece mounting system wherein a circular magnet adheres to the back of your Pixel and a spherical magnetic base adheres to your car’s dashboard or console.
Hop in the car, and your phone mounts in a snap. This is about as minimalist as it gets in terms of car mounts. Making sharp turns and hitting potholes? No worries: The magnet is super strong and the magnetic ball moves with your phone to prevent it from falling off.
If you want a mounting system that nigh unnoticeable, the Nite Ize Steelie is your slick solution for around $20.
See at Amazon
Kenu Airframe Plus Portable Car Mount+

Minimalism and simplicity are important features for a lot of people. The Kenu Airframe Plus+ is a simple car mount that’s slim enough to comfortably fit in your pocket, but still secures your phone by clipping to an air vent.
There’s really not too much to this one — no suction cups, adhesives or adjustable arms — so there’s less places for this mount to break or fail. The clip is able to mount to any vent type, whether they be horizontal, vertical, angled or circular. It’s so portable that you can take it with you and also use it as a kickstand. Simply slip a business card or something of a similar size in the clip on the back and it will stand on its own.
Versatile, simple and portable — what more could you want? Grab it for around $30.
See at Amazon
Ram Mount

The Ram Mount is an adjustable crade-style mount that holds onto your Pixel or Pixel XL with four arms. It adheres to your dashboard or console via a suction cup and is adjustable via its ball socket, which allows you to orient your phone any way you want it.
The holder is spring-loaded, so you can just slide your Pixel in and away you go. It’s made of a high-strength composite, aluminum, and stainless steel, so it’s durable and strong, sturdily securing your phone. It’s a little on the expensive side, at $50, but it’s worth it.
See at Amazon
Spigen Style Ring

The Spigen Style Ring is one of those accessories that seems a bit weird when you’re looking at it in the box, but is a true game changer once you’ve become accustomed to all the ways it makes using your phone easier — and that includes its function as a car mount.
The Style Ring sticks to the back of your phone or a case with adhesive (don’t worry, it won’t leave marks or residue on your phone) with a 360-degree swiveling ring that’s the star of the show. Slip a finger through it and you no longer need to death grip your phone while walking down the street or when reading your phone in bed, or set it up as a kickstand for hands-free viewing.
But back to the car mount feature. Arguably the most convenient feature is the little black hook that comes with the Style Ring, which simply attaches anywhere on your dash and allows you to seamlessly attach your phone with the Style Ring so you can use your phone for navigation, playing music, place hands-free phone calls and more. When you arrive at your destination, simply pop the phone off the mount hook and you’re on your way! There’s no complex rig to install and the hook mount is barely noticeable on your dash.
Our very own CrackBerry Kevin is a huge fan of the Style Ring, so check out his video if you need more convincing. It’s available in five different color options so you should be able to find that matches your phone’s color. You can pick one up for $14.
See at Amazon
How do you drive with your Pixel?
Did we miss your favorite car mount on our list? Leave us a comment below!
Updated July 2017: Removed Anker’s discontinued CD slot mount.
Google Pixel + Pixel XL
- Google Pixel and Pixel XL review
- Google Pixel XL review: A U.S. perspective
- Google Pixel FAQ: Should you upgrade?
- Pixel + Pixel XL specs
- Understanding Android 7.1 Nougat
- Join the discussion in the forums!
Google Store
Verizon
