


Brother’s Entire Lineup of Mobile Printers Now Certified by Apple’s Made for iPhone Program
Brother today announced that every series in its mobile printer lineup now features at least one model certified by Apple’s MFi Program.
MFi-certified printers are fully compatible with iPhone, iPad, and iPod touch, enabling users to print instantly from an iOS device via Bluetooth, without the need to download special drivers. That’s in addition to existing AirPrint support on select Brother printers for wireless printing from an iOS device over a Wi-Fi network.
Brother’s MFi-certified models include the RuggedJet RJ-2050, RJ-2150, RJ-3050Ai, RJ-3150Ai, RJ-4030Ai, PocketJet 763MFi, and M-Print MW145MFi and MW260MFi. Look for the “Made for iPhone, iPad, and iPod” logo on the box.
Brother has a wide variety of mobile printers available to purchase on its website, with some models costing upwards of $1,000.
Tags: MFi Program, Brother
Discuss this article in our forums
SCOBY yourself: How to make kombucha from scratch
So you’ve ditched your home-brewed beer, are too impatient for homemade wine, and are justifiably wary of making bathtub gin. But you’re also tired of paying thirty bucks a case for kombucha, a drink that has been made by people from virtually nothing for centuries. Making kombucha from scratch has to be easier than some of these farm-to-table recipes, right? Not only is it a breeze, but it’s also a labor you’ll love.
What is kombucha, anyway?
If you’re still reading, you’re probably either a fan of kombucha, or have at least sampled a commercially produced version. For the newbies, kombucha is a zesty, fermented, lightly effervescent drink made by adding bacteria and yeast to sugar and tea (black or green), and then letting the process of fermentation do its work. Science, yeah!
Make no mistake: Kombucha is a funky drink, and it’s often an acquired taste. It’s sometimes referred to as “mushroom tea,” because it has an earthy, savory aroma with hints of alcohol and vinegar. That’s why aficionados often add juice to the base brew to make the tea taste better.
The drink is fermented in three stages, which we’ll discuss below. Kombucha is high in acid and contains sugar, vinegar, B vitamins, antioxidants, trace amounts of alcohol due to the fermentation process, and a few other trace chemical compounds. An eight-ounce mug of kombucha contains about 60 calories. By comparison, an eight-ounce café latte from Starbucks contains about 100 calories.
Kombucha is produced by fermenting tea using a SCOBY (this one’s important, so remember it for the test, kids). The acronym stands for “symbiotic colony of bacteria and yeast,” and while it sounds like some kind of scary mutant, this chemical cocktail is a crucial tool in creating a truly unique drink.
Home-brewers either buy a “kombucha mother” starter, or use a starter sample from an existing culture to grow a new starter that ferments in a jar for a couple of weeks.

A Brief History of Kombucha
No one really knows where kombucha originated, but here’s what we think we know.
The common wisdom is that kombucha originated in what is now Manchuria around 220 BCE and was largely limited to that region for over a century. It is apocryphally reported that the drink and its recipe was imported to Japan in 404 CE by Kombu, a Korean physician called upon to treat the Japanese Emperor Ingyo using a special tea. The Chinese referred to kombucha as the Tea of Immortality and the Elixir of Life, so the drink’s unproven health benefits have a long history.
The first recorded mention of kombucha comes from Russia and the Ukraine late in the 19th century. Spread via Russian and German POWs after World War I, kombucha began to reach new countries quickly, according to The Atlantic. By the 1920s, the drink was brewed throughout Germany as a home and folk remedy. It was also sold in pharmacies under a variety of names.
The word itself has a murky history as well. Dictionaries suggest it probably originates with the Japanese word kombucha, meaning tea made from kombu, the Japanese word for kelp. Kombucha was sometimes confused with a kelp-based infusion due to the thick, gelatinous nature of the drink’s base culture.
SoundCloud Introduces Daily Personalized Music Curation With ‘The Upload’
SoundCloud today launched a new feature called “The Upload,” which will act similarly to Apple Music’s My New Music Mix and Spotify’s Discover Weekly playlists by curating a list of new songs specifically personalized to each user’s listening habits.
The company said that The Upload will make it much easier to filter through SoundCloud’s ever-expanding library of music, which sees new tracks and artists added to the service every day. To find The Upload, users can navigate to the Search tab on iOS and Android, and the Discover tab on the web.
Once SoundCloud has an indication of what a user likes, The Upload will begin curating songs daily.
The Upload is all about surfacing more of what you’re into, or what you might be, and is the go-to destination for a regularly updated, bespoke playlist of new music relevant to you.
With the largest and most diverse music catalog around, we want to make discovery on SoundCloud even easier and we’re utilizing machine learning to offer new ways for you to find more music. This new feature is another opportunity for creators on SoundCloud to get their music heard by our global community and a great way for listeners to be on the pulse of what’s next, now.
The new feature gathers and recommends music that has been uploaded to SoundCloud “within the last few days,” and takes into account what each user has listened to as well as what they have liked. As the comparable features work on Apple Music and Spotify, the more users listen on SoundCloud, the better The Upload’s recommendations become.
In February, SoundCloud introduced a streaming music plan with a cheaper price tag, called SoundCloud Go, which users can subscribe to for $5.99/month. A top-tier SoundCloud Go+ option is also available for $12.99/month, including access to an expanded catalogue of music. SoundCloud has around 175 million users, but the company has never detailed specific numbers in relation to how many people subscribe to its paid streaming service.
SoundCloud is available to download on the iOS App Store for free. [Direct Link]
Tag: SoundCloud
Discuss this article in our forums
Renovate with caution: These add-ons might not be worth the investment
Smart-home products and renovations tend to vary widely in terms of cost. A smart bulb can cost about $20, while more expensive renovations — namely those which require a company to install tech throughout a home — check in at several thousand dollars.
Before long, a growing number of homeowners may opt for investments in smart features, especially those capable of reducing monthly expenses. If you want an idea of how mainstream smart-home products are becoming, just look at Ikea’s lineup.
But is it worth it to install smart-home renovations throughout your house? It might depend on whether you’re hoping to make your life easier or get a return on that investment. Transforming your home to suit your needs, tastes, and hobbies is fine, but you probably don’t want to look at these changes as investments. While some features may help increase the resale potential of a home by reducing expenses or adding a “wow” factor, others probably don’t justify the money. To help, we’ve compiled a few home renovations that might not pay off.
Overly smart kitchen

Remodeling a kitchen can consist of refinishing cabinets, adding backsplash, painting walls, and buying a few bar stools for the countertop. Or it can be a major endeavor when you decide to replace everything down to the studs.
As of 2017, a major kitchen remodel costs roughly $62,158 to complete (on average) and at resale time, the average recuperation of such costs is around $40,560. This means homeowners typically get about 65 percent of their money back, according to Remodeling Magazine’s 2017 Cost vs. Value Report. A minor remodel costs an average of $20,830 to complete, with homeowners recouping roughly $16,700 of those costs, meaning a minor remodel recuperates more of its cost — about 80 percent — at resale.
If you fill a kitchen with the latest tech during a remodel, you might end up over-remodeling to the point where it’s impossible to recuperate the initial investment. If you purchase all the latest smart appliances, for instance, you’re looking at a cost of around $4,000 for a refrigerator, $4,000 for an oven, and another $1,000 for a dishwasher. You’ll still need a range hood, a wine cooler, and small appliances, before even adding the cost of the essentials — cabinets, flooring, labor, etc.
At the moment, you probably don’t need a dishwasher that reorders its own detergent. In some ways, buying connected appliances makes sense when it comes to future-proofing. Manufacturers can deliver updates that add helpful or fun new features. Just keep in mind that your Samsung oven isn’t going to make small talk with your Whirlpool dishwasher. That might not be a big deal right now, but imagine how cool it would be if your oven knew it had a heavily soiled lasagna pan after tonight’s dinner, and the dishwasher could adjust its settings accordingly.
How to password protect a Microsoft Excel document
If you use a computer, you probably have some Microsoft Excel documents on your Mac or PC that you wouldn’t want other people to find and read. After all, Excel is used by both regular consumers, businesses, government institutions, and millions of other folks all over the world.
Thankfully, it’s easy to secure an Excel 2016 document with a password. In this guide, we’ll show you how to do just that. In future updates, we’ll add instructions on how to secure Word and Word-compatible documents in other Word-like programs, like OpenOffice, and others.
How to password protect an Excel document
First, open the Excel document that you want to secure with a password. Then, click File, Info, and hit Protect Workbook underneath Info.

From there, click Encrypt with Password.

Excel will then prompt you to type in a password. Pick one out, but keep in mind that if you forget what it is, you’ll lose access to that document.

Remember, this only protects the single target document. Each Excel document you want to protect with a password must be done so on an individual basis, and you can check on whether or not a document is protected in the Info tab.

Microsoft Excel will prompt you to type it in each time you want to open a protected doc.

And…that’s it! Were you hoping for more steps? Well, sorry to disappoint — but it really is that easy to password protect an Excel document.
However, if you want to password protect an entire folder, things can get trickier. The easiest way to protect a large number of files is to encrypt them. Luckily, encryption programs are not hard to find. Several freeware options exist, and Windows 10 Professional users have a built-in encryption utility called Bitlocker. Check out our introduction to encryption if you want to learn more.
Apple CEO Tim Cook to Speak With Jim Cramer on CNBC’s Mad Money Tonight
Apple CEO Tim Cook will appear on CNBC’s Mad Money this evening, where he will speak with host Jim Cramer. According to a tweet from the Mad Money Twitter account, Cook will talk about the future of Apple while on the show.
.@jimcramer speaks with @Apple CEO @tim_cook about the future of this iconic company tonight! pic.twitter.com/j5N9lNpOpG
— Mad Money On CNBC (@MadMoneyOnCNBC) May 3, 2017
Cook has made an interview with Jim Cramer an annual affair, having appeared on the show in March of 2015 and May of 2016. Last year, Cook spoke about Apple’s revenue decline, acquisitions, the company’s future plans, and China.
Mad Money will air at 6:00 p.m. Eastern Time or 3:00 p.m. Pacific Time.
Tags: Tim Cook, CNBC
Discuss this article in our forums
Brookfield Residential Announces Plans to Offer HomeKit Standard in New Homes
Homebuilding company Brookfield Residential today announced plans to offer Apple HomeKit as standard in new communities where it builds homes.
The Delano neighborhood in the Eastwood Village of Irvine, California will be the first to feature all connected homes that are able to interface with HomeKit and will be equipped with HomeKit-compatible accessories like lights, thermostats, locks, and more.
“In our new neighborhoods, the future comes standard: As with other consumer innovations such as keyless autos, what is novel today will soon be pervasive,” said Foley. “And Apple Home is the most innovative yet easy-to-use system for smart homes, giving homebuyers connected living at their fingertips – or at the command of their voices, using Siri. This makes their appliances work for them, providing joy, ease, security and privacy.”
Specific HomeKit accessories that will come standard in all homes include Lutron Caseta lighting, the Honeywell Lyric T6 Smart WiFi Thermostat, Schlage Sense Smart Deadbolts, and Ubiquiti Wireless Access Points for “peak WiFi performance throughout the home.”
Along with new homes in Irvine, Brookfield also has plans to build HomeKit-compatible homes in many other areas of Southern California including Playa Vista, Chula Vista, San Marcos, Azusa, and Ontario Ranch.
There are multiple homebuilding companies that have announced plans to support Apple’s HomeKit platform, including KB Home, Lennar, Weberhaus in Germany, and R&F properties in China.
Tag: HomeKit
Discuss this article in our forums
Professional home stager Taylor Spellman picks her favorite interior design apps
Why it matters to you
It’s easier than ever to virtually
If you’ve been using a slew of apps to help with your home remodel, fear not: The pros use them, too. Taylor Spellman, star of Bravo’s Yours, Mine, or Ours and owner of an eponymous interior design and staging firm, likes being able to show her clients what she’s envisioning before the shopping, painting, and arranging starts. Some of her favorite apps are below.
Home Design 3D Gold ($10)
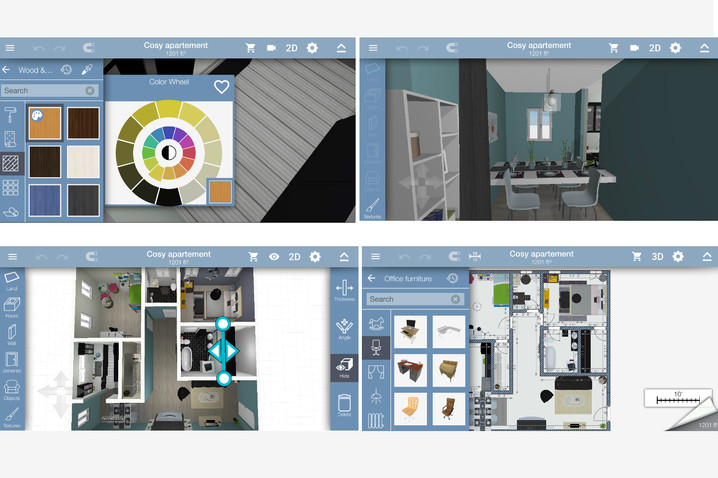
There’s both a free and paid version of Home Design 3D (iOS, Android), both of which let you see 2D and 3D renderings of floor plans. You can add and subtract walls, put in a new door, and make other structural changes. If you’re not looking to tear down anything, you can play with new furnishings, flooring, and paint. “I love this app, as it really gives the user the opportunity to create the visual of their wildest design dreams,” Spellman told Digital Trends. “Oftentimes it can be hard to envision what removing a wall or adding an island looks like, and this is a one stop shop to designing creative spaces.”
Curate (Free, Android and iOS)

“I must confess that I often get lost for hours on Curate searching the for perfect piece of art,” said Spellman. The app lets you upload pictures of your walls, then scroll through galleries of artwork to see what they’d look like in your home. You can also snap a picture you see hanging elsewhere and virtually test it out on your wall. “It is a great way to determine the depth and scope of the art you want for a space without creating so many holes in the wall,” she added. “Plus, the search engine to explore so many artists is a great for inspiration.”
MyPantone ($5 month/$30 year, iOS)

Even if colors look fairly similar on their own, they will take on different hues and casts depending on what else is in the room with them. Pantone put its color collection into an app that can also identify colors in pictures and create palettes around them. “I make a living on choosing the perfect color palette and MyPantone never disappoints,” said Spellman. With the app, she says it’s much easier for her to explain the difference between sage and moss to her clients.
Houzz (Free, iOS, Android, Windows)

Spellman calls Houzz the “Library of Congress of design apps.” Its database has millions of photos that you can filter in countless ways to find inspiration. From there, you can save pictures, hire professionals, or buy furniture. If you’re having a “Design Dilemma,” you can submit to the community for feedback and advice. “The options are endless and you can explore to your heart’s, or phone battery’s, content,” said Spellman.
3 things you can do to step up your selfie game
Taking a self portrait might seem like a straightforward process, but the truth is, getting the lighting, composition, and mood just right can be a challenge, as is the case with any photograph.
To ensure your Snapchat post is up to snuff or your Tinder photo is as smooth as your pickup line (which will inevitably fail after you match with someone), we’re here to offer a few tips to improve your selfie game.
There are three components to any self-portrait: lighting, composition/framing, and stance. Each of these aspects intertwine with one another to ultimately determine what the resulting image will look like. Below, we’ll dive into each to help you better understand how to make the most of the selfie trinity.
Lighting
Lighting plays the most important role in the overall quality of your selfie. After all, the word photography literally means “painting with light.”
More often than not, you’ll want a soft, even light for selfies. Harsh light can accentuate unwanted features and overall tends to yield a less attractive aesthetic, although, as with anything in the world of photography, there are exceptions to this rule.
The easiest way to achieve soft, even lighting is to capture your selfie by a window during the day. Depending on what direction the window is facing, you might need to adjust where it is you’re standing. But overall, natural light is far more likely to yield a better image than the usual artificial lighting you’ll find in your house or while out and about. Below is an example selfie, taken by model Tess Holliday, showing the benefits of soft, even light from a window.

In the event you’re outside and there’s no shade to take cover under, your best bet is to shoot with the sun at your back and expose the image for your face. Better yet, use your body or head to block out the sun in the frame to minimize flares. This should yield a far more usable image than shooting with the sun at your face – not to mention it’ll save you from squinting your entire way through the selfie-shooting process.
If natural light isn’t a possibility, try to find an area that offers a large, diffused source of light, preferably a light source that isn’t facing straight down from the ceiling either, as it will cast unnatural and unappealing shadows, most notably under your eyes and nose. Play around with fill flash, which helps to illuminate the face in backlit situations.
Want to record your iPhone or iPad screen? Here’s how to do it on Mac and Windows
So you want to record your iPad or iPhone screen? Well, there’s good news and bad news. The good news is that there are programs available that allow you to do this. The bad news is that there are no iOS apps that can record your iOS device’s screen. Apple does not allow screen recording apps in the App Store, so you’ll have to find a program that can do this for you. But don’t worry, because we’re here to help.
Mac users will have the easiest time recording their iPhone or iPad screens because they can use Quicktime, while Windows users will have to rely on third-party programs. Some of these third-party programs are more feature rich than Quicktime, so in some circumstances Mac users can also benefit from going this route.
Record your iPhone or iPad on a Mac with Quicktime
The easiest way to record your iOS device’s screen on a Mac is simply to plug it in, open Quicktime, and record from there. Apple has ended support for Quicktime on Windows, and you won’t be able to do this on a Windows computer anyway. We’ve already had a warning from the Department of Homeland Security to uninstall Quicktime from Windows, so installing this program on a Windows computer is not something we would recommend. This iPhone screen recording method is the easiest, but it is only for Mac users.
QuickTime for Mac

Step 1: Plug in your iOS device to your Mac and open Quicktime.
Step 2: Go to File > New Movie Recording.
Step 3: Click the arrow  next to the Record button.
Step 4: Choose the device that you want to record.
Step 5: Click the Record button to start recording your iOS device’s screen.
That’s all there is to recording an iPad or iPhone screen with Quicktime on a Mac. It will detect whether you have your device in portrait mode or landscape and record the screen accordingly.
