


Keep five of your devices charged up with this Quick Charge 3.0 charging station for just $20!
Aukey is currently offering its five port USB desktop charging station for just $20 with coupon code AUKUSBC5, a savings of $5. Don’t get stuck looking for multiple outlets to charge up your gadgets, and instead just use one to get them all charged. This hub has 4 regular USB ports, along with one USB-C port for easy charging on just about anything you have around. Being Quick Charge 3.0 it will charge compatible devices up to four times faster, and it is still completely safe to use on anything that doesn’t support QC 3.0.

Remember, you will need to use coupon code AUKUSBC5 for the $5 savings here. If you’ve got a bunch of devices to charge up, this is definitely the easiest and best way to do it.
See at Amazon
Google Calendar now integrates with Google Fit to track your workout goals
It’s good to have goals.
New Year’s means New Year’s Resolutions, and everyone wants to help you lose weight, exercise more, eat better, or whatever else you drunkenly decided to do over the holidays. Even us. Google Calendar wants to help you with them, with their Goals on Google Calendar.

Goals on Google Calendar allows you to set goals and the frequency with which you want to meet them, such as getting on the treadmill twice a week. It’ll also help you find the time to meet those goals by automatically scheduling and rescheduling times depending on your calendar appointments.
The feature’s been around since April, but for all the new fitness goals being set this month, Google has added integration with Google Fit and Apple Health to help you mark your progress. When you do an activity, they can tell Google Calendar you met your goals. These health tracking apps can also help quantify your progress so you can see how you’re doing right in the Google Calendar appointments. (There’s also Apple Health integration if you use Calendar on an iPhone.)
Are your resolutions already broken? Maybe Goals on Google Calendar can help get you back on track? Doing well with yours? Well, good for you, maybe Goals on Google Calendar can help you kick yours up a notch.
How to install Kodi on a Raspberry Pi

Kodi and a Raspberry Pi makes for one of the easiest and best media centers you can make yourself.
Kodi is a great way to make your TV smart. It’s the continuation of XBMC, a free and open-source application that is a great media player and complete replacement for just about any other media-centric software. It’s not a streaming server or DVR. It’s the software you use to watch video content and listen to music through any screen with an HDMI connection.
Because it’s open-source, Kodi runs on just about every platform known to man — Windows, Android, iOS, macOS and a gazillion different flavors of BSD and Linux.
Several of those operating system platforms also work really well on the Raspberry Pi. A marriage of the two makes for a cheap media center that’s easy to set up and has all the features you’ll find on expensive alternatives. It’s a DIY project that anyone can do and the results are incredible.
Getting started

You’ll need to buy a few things:
- Raspberry Pi 3
- A case of some sort
- A power supply
- A microSD card with an adapter to plug it into your computer
You can run Kodi on an earlier model of Raspberry Pi (and plenty of folks do) but the better hardware in the third revision makes a big difference. The power supply needs to provide 5 volts at 2 amps through a Micro-USB port. Any microSD card will work, but faster cards are better — try to get something Class 10 or higher. You’ll also want one at least 8GB in size.
The case needs to have decent airflow because things can get hot. It should also stay together if the cat or a roaming infant gets behind things and pulls on cords. And you’ll need a cable that can take HDMI with audio from the Raspberry Pi to the screen you want to see your stuff on.
The easy way is to buy a kit that has all this stuff in it. You’ll save a couple dollars and a lot of time. I went with this kit from CanaKit and it has everything you need to get started and it’s decent quality stuff.
See CanaKit at Amazon

You’ll also want to have a keyboard and mouse you can use directly with your Kodi box. Almost any keyboard and mouse will work, but after trying a whole bunch of them through the years on various small electronic projects I have to recommend the Logitech K400. It’s bigger than many others, but it works on everything without any setup or hassle — even the PlayStation 4 which can be finicky and hates peripherals.
I have like three of them around the office and they’ve held up just fine.
See Logitech K400 keyboard at Amazon
Putting things together

Gather up your handful of parts and find a nice flat spot to put them together on. I’m going to recommend you find a static-free place to work because everyone recommends it. I have a big static mat that covers half my desk that I leave there and use as a mouse pad. If you don’t have a static mat, just be really careful.
Also, round up any tools you might need to put your case together. You might need a screwdriver or a small socket driver. The packaging it comes in or any instructions will tell you. The one I bought for this just snaps together and I’ll never go back to one that needs to be screwed or bolted together again. Follow the directions and get your Raspberry Pi placed in the case and then make sure all the various ports and holes aren’t obstructed and that your wires and SD card will fit easily.
Find a spot to put it when you’re finished where the cords aren’t bent at an extreme angle and nobody will trip over it. If you’re going to use a remote (either a USB receiver type or a more DIY LIRC IR style) make sure the signal will be able to hit the receiver. Once installed, you’ll not need to touch any of the hardware for a long time, so take a minute or two and find the right place for it.
Install the software

I recommend you use OSMC (Open Source Media Center) as the operating system unless you know what you’re doing when it comes to Linux. OSMC is Linux (Debian stable) but the front end and all admin is done through the simple OSMC skin for Kodi. And it’s simple to install. You download an installer for Windows, Mac or Linux, plug your SD card into your computer and follow a couple of simple steps to configure your network. Tell it where your SD card is and press a button.
To get started, point your web browser to OSMC.tv’s download page and pick the right version for your computer. Download it, run it and follow the super-simple instructions. Take some time to read a bit more about the project and see if you want to donate to this 100% volunteer project. Building an open source media center is fun for a lot of people, but servers on the internet cost money. Lots of it.

Once you have everything on your SD card, plug it into your Raspberry Pi. Put it where it’s going to live, plug in the keyboard and HDMI cable (and Ethernet cable if you want a more robust wired network) then plug in the power. If everything worked (and it should have) you can turn on your TV and keyboard and go through the setup. It’s simple — you need to let the software know what language to use, what time zone you’re in and what your new Kodi box should be named. Then you’re finished. Kodi is set up and running on your Raspberry Pi and you can do the same things with it that you can if it were running on a PC or Android TV or anything else.
Next steps

There are some things you’ll want to do to get started watching video content and listening to music through your new Kodi box. You might need to buy licenses for MPEG-2 and VC1 hardware decoding. They’re cheap and easy to buy over the internet. I think you should spend the few bucks to buy them instead of finding other ways to acquire them.
You might also want to set up Plex and the PleXMBC add-on to decode and stream video to your new Kodi box. Kodi is a player that can attach to your storage or countless streaming servers via the internet. If you have a large media library of your own, Plex is an easy-to-set up media server that works great with Kodi to watch and listen to everything you have.
You can also install support for your own DVR backend or an HDHomeRun tuner or set things up to watch recorded PlayOn streams. Look at the Add-ons settings for all the legal and Kodi project approved ways to get content from the internet to your screen. Of course, there are plenty of places on the internet to get more information about services you can add to Kodi, but we’ll let you find those on your own.
OSMC is a skinned version of Kodi that’s easy to install. That means you can use any Android Kodi remote app to control things. I like Kore but there are plenty to try, Just search Kodi remote in the Play store.
The next step is to lean back and enjoy it.
Questions? Problems?
We’re here to help! If you have problems getting Kodi to work on a Raspberry Pi, leave a comment down below and we’ll try to answer it!
Common HTC 10 problems and how to fix them
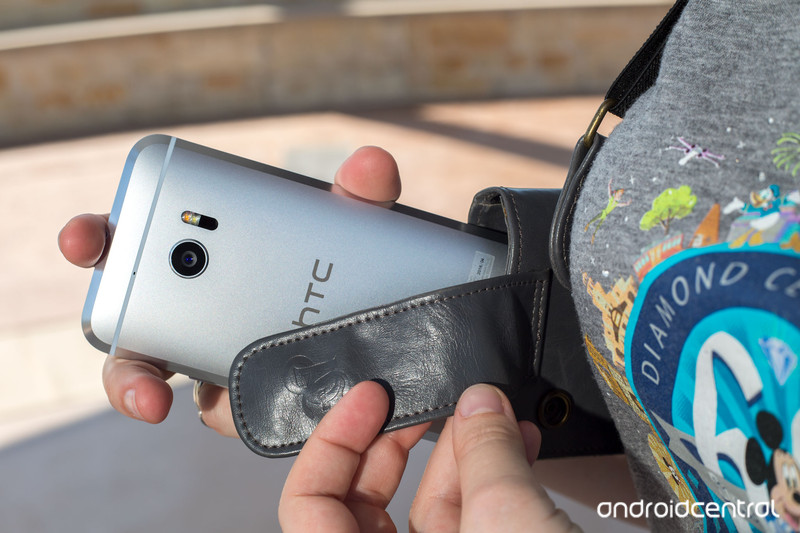
Having problems with your HTC 10? Here are the most common ones, and how to fix them.
The HTC 10 is a beautiful device that’s a good size with plenty of power and lots of features. However, like all phones, it can run into problems every now and then. Here are some of the problems users have encountered most, and how to deal with them.
A pink hue on the display
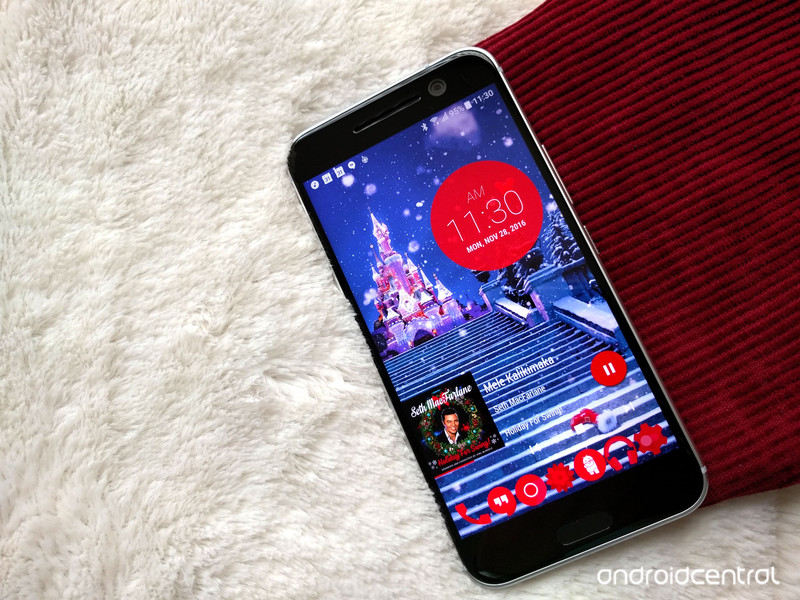
The LCD displays on some HTC 10 units have a slight pink hue out of the box, especially towards the bottom on the screen. But don’t worry! For most users, as the device gets broken in the pink hue goes away.
If you’re still seeing it after a few weeks, and it’s still bugging you, contact HTC support. You might have a digitizer from a bad batch.
SD card errors
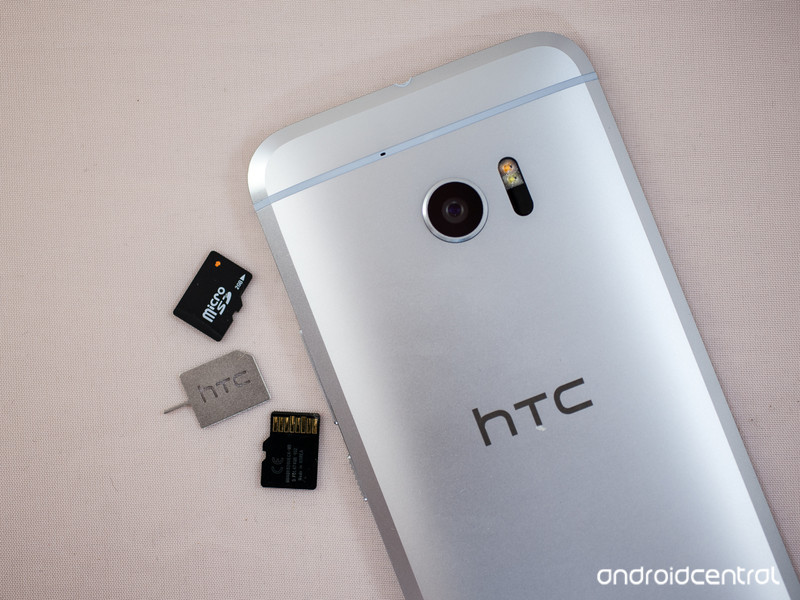
The HTC 10 has a microSD card slot so that you can expand the standard 32GB of storage to something a bit more manageable. If you’re having issues with the card ejecting itself suddenly, or complaining of a bad connection, there’s a few things to do.
First thing to do is to turn off your phone and open the microSD tray using a SIM tray tool. If your microSD card is loose in the tray or even slightly crooked, the connection can be disrupted, causing the card to eject or corrupt. If the card is inserted properly, try reformatting it in the Settings app.
Formatting it in the phone rather than in the computer can help make sure the card works properly in your phone.
Wi-Fi connection dropping

Turn it off and on again before you do anything else. No, I’m not joking. Turn Wi-Fi off and on. Turn the whole phone off and on. Still having issues? Okay, let’s continue.
5 GHz signals can be weaker than 2.4 GHz signals once you get a room or two away from your router, and the HTC 10 doesn’t always kick over to a stronger signal when the primary gets weak. If you’re having trouble staying connected to a 5 GHz network, try to stick to 2.4 GHz ones.
Battery problems
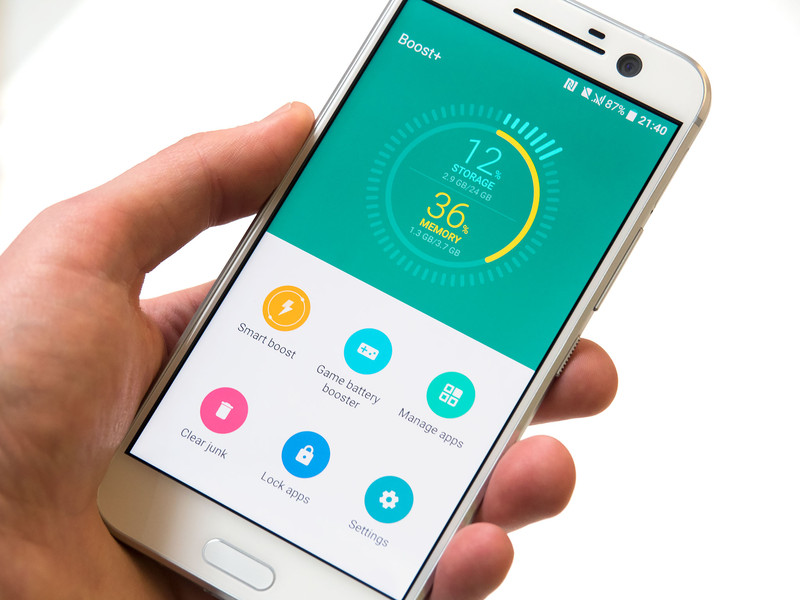
This may sound counter-intuitive, but disable Boost+. App-killers are unneeded on newer versions of Android and can cause more battery drain than they prevent. You might also want to keep an eye out for apps that might be keeping your phone awake unnecessarily.
Doze can help stretch your battery further when you’re not using it, and HTC’s Adaptive Brightness works quite well, so turn it on so your phone can dim itself in darker environments and crank itself up when you go out into the light. If you know you’re going to be away from Wi-FI networks you trust for a few hours, toggle off your Wi-Fi so it won’t waste battery scanning for networks to use.
Bluetooth
Bluetooth issues are fairly common on any device, and the HTC 10 is certainly no exception. For the most common issue such as inability to pair or connect with a desired device, you should “forget it” and re-attempt to pair it. If you’re still having problems, it may be with the other product. Make sure it’s charged and not paired to something else before continuing to troubleshoot your phone.
Another common issue is the device randomly disconnecting from Bluetooth headphones while streaming or during calls. If it happens repeatedly, forget the pairing and re-pair the headphones with your HTC 10. If these steps fail, trying clearing the cache partition before re-pairing with the headphones, as it can help clear out any potentially corrupted files that might interfere with your Bluetooth.
If all else fails, you can contact HTC about your Bluetooth possibly being defective. My own HTC 10 is being sent for repairs to try and remedy my Bluetooth issues.
Have you run into any more problems on your HTC 10? Have you found the solutions on your own? If not, ask about them in our HTC 10 forums. If you have, share your solutions in our forums so other users can benefit from them!
HTC 10
- HTC 10 review
- HTC 10 specs
- All HTC 10 news
- These are the HTC 10 colors
- Join our HTC 10 forums
HTC
Best Buy
Verizon
Sprint
Google’s Amit Singh on what it takes to certify a phone for Daydream

There’s more to a phone than individual specs.
If you’re looking to make sure your next phone can handle Google Daydream, you may have a list of things to expect from a phone. Google’s documentation for Daydream is complex, but the essentials boil down to being able to handle a pair of 60fps streams and a very low latency and persistence rate. This means the phone can display VR without jittery images, without motion blur that could potentially disorient you.
Not all of these rules are set in stone, especially when it comes to things like display technology and processor architecture. With the latest batch of Daydream-ready phones, Google VR created exceptions for the Kirin processors as well as displays that appear to meet the bare minimum of what it takes for a quality Daydream experience. We sat down with Amit Singh, the VP of Business and Operations for Google VR, to learn a little more about what it takes to make a phone Daydream-Ready.
Read more at VR Heads!
Everything you need to know about Qualcomm Quick Charge

Being able to charge your phone or tablet faster at home — and more importantly when you’re on the go — may be one of the biggest improvement we’ve seen in mobile tech in some time.
And while one of the many cool things about living in 2017 is not necessarily needing to understand how a lot of the tech around you works, if you take the time to better understand what you are using there’s a good chance you’ll get more out of it. A perfect simple example is the power supply you use for your smartphone.
If you’ve purchased a new phone recently, there’s a good chance the power supply in the box is capable of charging your phone significantly faster than any of the other chargers you have in the house. This little slice of magic is called Quick Charge from Qualcomm, and it’s a two-step process that promises to safely charge your phone faster than any other tech out there right now.
Quick Charge 4.0
Starting with the Snapdragon 835, Quick Charge 4.0 promises even faster charging that’s safer than ever before.
Quick Charge 4.0 has three key improvements: It’s 20% faster and 30% more efficient than Quick Charge 3 and runs about five degrees Celsius cooler. Additional “battery saver” features will prolong the life of the battery in your phone, and QC 4.0 is said to be fully USB-C USB-PD (Power Delivery) compliant.
We all love faster charging and batteries that live longer. But the last feature in our list is perhaps the most important. The latest Android Compatibility Definition Document, Google has strongly recommended manufacturers move away from non-standard USB-C charging solutions like Quick Charge and adhere to the USB-PD spec. With QC 4.0, you’ll not only be able to extend your phone usage by up to five hours with just five minutes of charging, but won’t have to worry as much about matching the charger to the thing being charged.
QC 4.0 also includes the latest iteration of Qualcomm’s custom power management algorithm, Intelligent Negotiation for Optimum Voltage (INOV). Additions include real-time thermal management which will regulate the temperature during power delivery to keep things safer and more efficient. New power management ICs are also part of the picture and will come with QC 4-ready devices.
Expect to see devices with Quick Charge 4.0 starting in the first half of 2017.
Quick Charge 3.0
In late 2015, Qualcomm released Quick Charge 3.0. Using the same basic science and technology as they did with Quick Charge 2.0, you’ll be able to charge phones using QC 3.0 compatible equipment even faster.
In laboratory tests using a 2750mAh battery, a Quick Charge 3.0 enabled device went from 0% to 80% charge in 35 minutes, while a device without Quick Charge 3.0 using a conventional (5 volt, 1 amp) charger achieved just a 12% gain in the same 30 minutes.
It works using what Qualcomm is calling Intelligent Negotiation for Optimum Voltage (INOV). This is a new computational algorithm that allows the device being charged to determine the power level it needs at any point in time, which means it’s always working with the most efficient and optimized power transfer rate. Support for a wider range of voltage options — 200mV increments from 3.6V to 20V — means your phone can dynamically target one of dozens of charging levels.
Quick Charge 3.0 is implemented the same way previous versions were, and all QC 3.0 equipment is fully backwards compatible with Quick Charge 2.0 and Quick Charge 1.0 devices. QC 3.0 supports USB Type-A, USB Type-C and micro USB, as well as proprietary connections. It’s easy for manufacturers to use QC 3.0 on a wide variety of chargers and devices.
Quick Charge 2.0
Quick Charge 2.0 is a Qualcomm-made platform, which the company describes as a “comprehensive suite of battery management technologies” for charging your device using any ordinary Micro-USB cable. The two requirements for Quick Charge 2.0 are a Snapdragon-based smartphone or tablet and a Quick Charge 2.0-certified power supply. Because this is a proprietary mechanism, both the power supply and the phone or tablet have be licensed and certified by Qualcomm in order to function properly. Since nearly every new smartphone that offers Quick Charge 2.0 comes with a compatible power supply, you almost always have what you need to take advantage of this technology out of the box. (Some 2014 phones, like the Moto X and HTC One M8 had the capability but shipped before the wall chargers were ready.)
You will find Snapdragon-based devices where the manufacturer has opted out of paying for a license to use Quick Charge 2.0, for example the OnePlus One, so be sure to check the specs on your next device to be absolutely sure you’re getting this feature if you want it.

Most of the heavy lifting for this technology is done through the power supply — the part you plug into the wall or into your car. Most power supply bricks that come with phones today offer at least 5 volts at 1 amp of power. In some cases you’ll see as high as 5V at 2.1A output on your power supply brick, which will charge most smartphones and tablets noticeably faster. Qualcomm’s Quick Charge tech allows for multiple options to be used in charging a device, and they come in several shapes and sizes. For example the power brick in the Droid Turbo offers 5V at 1.6A, 9V at 1.6A, and 12V at 1.2A output. Quick Charge 2.0 is designed to support greater power outputs than what is offered by the Droid Turbo, but we’ll likely only see that if the manufacturer licensing the technology determines it necessary — and safe.
Quick Charge 2.0 is built to charge your device quickly, but there are specific power outputs that apply to the current state of your battery. In other words, it won’t juice up faster unless it needs to.
The tech works by knowing the current condition of your battery and intelligently regulating the power your device is receiving. As a result, your phone will not charge from 70 percent to 100 percent nearly as fast as it will from 0 percent to 60 percent. This is why you see almost every Quick Charge ad brag about the ability to go from “dead” to over “half-charged” in as little as 30 minutes. As you can see from the power options offered by the Droid Turbo charger, topping off the battery uses the more common charging mode of 5V at 1.6A output. This isn’t a bad thing. In fact it’s a vital safety measure to keep your phone from exploding, and it is also something to keep in mind if you’re the type to keep your phone topped off any chance you get.

More: Check out our Futurology series for more on the the science of the battery in your phone
The biggest question to come from the existence of this technology is almost always about battery life, specifically whether or not this technology is damaging the total life expectancy of the battery in your device. As a general rule, slower charging keeps your battery functioning as intended for longer than rapidly charging the battery. (A side-effect of the higher charge rate is heat. And heat, generally speaking, is the enemy of electronics.) That said, there’s no evidence to support the notion that users would notice any negative effects associated with constantly using Quick Charge over the average life span of a smartphone, which is a little over two years. As long as we’re all still using lithium-ion batteries in smartphones, the potential for anything negative to happen with your battery is no different with Quick Charge than it is through any other charger, which is to say next to zero as long as the battery isn’t being abused.
Here’s what Qualcomm had to say on the subject when we asked them:
Quick Charge 2.0 does not change the way battery charging takes place today. The level of the current going into the battery is controlled by the OEM and depends on battery capacity, battery type and other factors. Quick Charge 2.0 allows device manufacturers to achieve the full rated capability of the batteries they choose while still meeting the performance and safety standards set by the battery manufacturer. With Quick Charge 2.0, the life of large-format batteries (2000mAh and above) will be in line with that of smaller format batteries charging from traditional USB chargers.
There’s a lot of discussion surrounding the practical applications of Quick Charge 2.0, and whether or not the tech is worth investing in as a user. Quick Charge is widely seen as a workaround, so manufacturers can continue to put batteries in their devices that either aren’t large enough to get a resource-intensive user through an entire day or continue to make it so batteries are not removable. While everyone should want to live in a world where smartphones can survive whatever we throw at them and still have plenty of battery life remaining at the end of the day, reality just hasn’t caught up yet.

If anything, Quick Charge is a way to use your phone without having to rely on things that cripple your usage like Ultra Power Save Mode. Being able to plug your phone in for a couple of minutes and have the necessary juice to survive the evening is significantly nicer than making your phone barely worth using, and so long as the battery in your phone is designed to handle Quick Charge 2.0 it’s a welcomed addition to the ecosystem.
This article was originally published in 2014. It was recently updated in January 2017 with information about Quick Charge 4.0.
Amber’s sensors aim to save farmers’ grain from spoilage
CES is most known as a show for computers, cars and seriously strange stuff, but there’s no shortage of people here trying to solve big problems the rest of us have never heard of. Take Amber Agriculture for instance: run by students at the University of Illinois, the startup as developed a finger-sized sensor meant to be stuck inside silos to help farmers monitor the quality of their stored grain. What’s more, Amber’s approach falls in line with other big trends at the show. You’ve heard of the smart home. Now the Amber team is trying to help build the smart farm.
The idea is simple enough. The sensors monitor temperature and humidity, along with the volatile compounds that signal how moist a farmer’s grain is. Since this is 2017, those farmers will be able to monitor that key data from their smartphones, and that sort of easy access should help them figure out the ideal time to sell and ship their crop.
But there’s more to this idea than just helping the world’s farmers demand the best possible prices. Amber co-founder Lucas Frye also believes that some serious long-term good could be possible if the company could work with farmers in countries where grain spoilage has been a pressing issue. Frye, a competent, low-key pitchman, said the startup’s vision is on some level about protecting our food supply. That said, smart moisture management won’t be able to fix every grain spoilage problem around the world. Consider India: Spoilage and grain rot are a recurring problem there, but that’s thanks in large part to logistical issues like finding places to actually store those huge crop hauls.
For now, though, global problems are taking a back seat while Amber makes sure everything works the way it’s supposed to. There’s no firm word on pricing yet, but that’s to be expected: After finalizing some design elements and striking some deals, the startup’s leaders are gearing up for its first set of field trials in early 2017.
Click here to catch up on the latest news from CES 2017.
FTC drags D-Link into court for lax router and camera security
When you buy a router or other internet-connected device from a company as well known as D-Link, you expect a high standard of security. Many of D-Link’s products are advertised with these kind of claims, which is part of the reason the US Federal Trade Commission is suing the company in a California court. In legal action launched yesterday, the FTC has accused D-Link of putting consumers at risk with its lax approach to hardware security.
“Defendants have failed to take reasonable steps to protect their routers and IP cameras from widely known and reasonably foreseeable risks of unauthorized access, including by failing to protect against flaws which the Open Web Application Security Project has ranked among the most critical and widespread web application vulnerabilities since at least 2007,” the official complaint reads.
Getting into specifics, the FTC notes D-Link leaking its own private code-signing key in 2015. This was plainly visible in the company’s open-source firmware for months, and could’ve been used by baddies to make malware appear like official software issued by D-Link. Then there are the hard-coded login credentials for D-Link cameras that could allow anyone to view the feed. Also mentioned is the company failing to use readily available tools to protect sign-in credentials on its mobile apps, instead storing these in plain text on users’ smartphones. To add insult to injury, D-Link often makes device security a part of its product pitches, which the FTC believes is clear misrepresentation.
Though this legal action has come more or less out of the blue, it’s not in the least surprising. The FTC has warned the makers of internet-connected devices — and what isn’t internet-connected these days? — that security is of primary importance. And last year ASUS submitted to regular audits to settle a similar case, after the FTC took issue with the security (or lack thereof) of its routers.
These days, you can barely see out a month before a new report from security researchers focuses on or at least features D-Link and vulnerabilities in its hardware. Recently, D-Link routers were identified as some of many agents used in mammoth Mirai botnet attacks that plagued the internet late last year and highlighted the power countless compromised internet of things devices working together can have.
In a press release regarding the FTC complaint, D-Link calls the charges “unwarranted and baseless,” with the company’s chief information security officer William Brown adding: “We will vigorously defend the security and integrity of our routers and IP cameras and are fully prepared to contest the complaint.”
Via: Ars Technica
Source: FTC (1), (2), D-Link
A first look at Hulu’s radical redesign for live TV
Last May, Hulu announced plans to start streaming live TV, much like Dish’s Sling TV and Sony’s PlayStation Vue services — but the company hasn’t offered up much details on how this would all tie into the existing Hulu on demand service. That’s changing today, as Hulu is now showing off an entirely redesigned user experience that’ll debut alongside its live TV service later this year.
Surprisingly enough, even though one service is now managing two different video functions, everything looks a lot simpler than the current Hulu experience. Hulu’s Ben Smith said that the goal with the redesign was to focus on getting viewers the specific show they were looking for, regardless of whether it’s on live TV or in Hulu’s on-demand library.
The start of the new Hulu experience consists of an onboarding process that asks you what types of shows you’re interested in, serving up tons of categories like medical dramas, edgy sitcoms, superheroes and so on. From there, you can pick specific shows and networks you’re interested in. It wasn’t clear if existing users would get this new onboarding process, but the ultimate goal is to make sure the service isn’t guessing about what you might want to watch — you’re telling it explicitly.

Once you’re set up, you’ll be dropped into the dramatically minimized Hulu interface. It’s pretty jarring compared to the rather complicated interface that the service used to sport, but fortunately it’s all pretty self-explanatory. The first area you’ll see Hulu calls the “lineup,” an area that collects live content you might want to watch alongside on-demand things you’ve been watching and recommendations for things that are similar to what you’ve told the service you like.
From there, scrolling to the right will show you the standard Hulu categories like TV, movies, Hulu originals, networks and so on. There’s also a tab showing you what’ll expire from the service so you can watch it before it goes away. These are all features you’ll find in Hulu currently, but the interface is far less cluttered than it used to be despite it managing both on-demand and live shows.
When you’re watching live TV, you have the option to jump back to the start of a program if you’re coming in late. (But not for every show, because the networks still like to make things needlessly complicated when it comes to replay rights.) You can also pull up a program guide showing you everything that’s live at a given moment as well as what’s on the schedule for the network you’re currently watching.

A TV UI makes a lot more sense to see than describe, but my initial impression of the new Hulu UI is that they’ve figured out how to add Live TV to the service without making things more confusing or complicated for the user, and that’s a big win. It feels more like an evolved and simplified version of Hulu than something resembling the more complex cable box UIs that we all fight with. It’s program centric, with Smith saying that Hulu wanted to make it easy for you to both find things you want to watch now and save things you want to watch later. It’s an obvious goal, but it’s also easier said than done.
Another big part of the new service is making sure Hulu users don’t miss programming they care about — so the company is adding notifications to its mobile app. Fortunately, Smith says they’re “starting slowly with just two notification scenarios focused on live sports.” In addition to telling Hulu what shows you like, you can tell it what specific sports teams you may care about. You’ll then get notifications when a game starts, and you can either start watching immediately or save the game to your cloud DVR to watch later. And if you tell Hulu you’re a fan of specific sports, it’ll alert you when something noteworthy is happening regardless of team — say a potential no-hitter or a close basketball game going into overtime.
Smith acknowledges that Hulu’s going to have a lot of work to do to get its live TV implementation right, but he thinks they’re on the right track. “We have millions of subscribers and eight years of experience in on-demand content, but we have zero years of experience and zero million live TV subscribers,” he says somewhat cheekily. “But TV is now a landscape littered with broken relationships. People don’t love how they get TV… we needed to build an experience that people will want to use right now and that will last for the next three to five years.”
We’re still a ways out from this new experience launching, but Smith seemed confident that the new Hulu will launch this spring, with a price of under $40 (the existing on-demand plans will remain as well). And there’s a good lineup of channels on board, including all Turner networks, all Disney networks (including ABC and ESPN), Fox, the recently-announced CBS and more. NBC isn’t on board yet, but Smith says Hulu’s having “good conversations” and that NBC “should be on board by launch.” If Huu can deliver all that, plus its existing on-demand experience for under $40, the company could become the best option out there for cord-cutters.
Click here to catch up on the latest news from CES 2017.
HTC Vive Tracker preview: Turns baseball bats, guns and more into VR controllers
2016 might not have been the year of virtual reality everybody had previously predicted, but it set the stall for future innovations. And unlike failed attempts in the past, this time it does seem that VR is here to stay.
One of the best headsets available is the HTC Vive, the incredibly immersive, fully-tracked device co-developed by Valve and HTC. The only issue is, at around £750, it’s a heck of an investment – one that’s probably out of the reach of many. And even if you do own one in a household, it’s highly unlikely you’ll own two. Local multiplayer games, therefore, are a no-no.
Or, at least, they used to be.
Thanks to a new accessory unveiled at the CES 2017 consumer electronics trade show in Las Vegas, some third-party developers are creating ways and means of getting more than the headset wearer involved in VR worlds.
Pocket-lint
The HTC Vive Tracker is a small, puck-like device that can be attached to an object or external accessory but will be tracked like the motion controllers that come with the headset. That means it can effectively turn a Bluetooth gun into a fully-tracked controller, or a baseball bat, or even a fire hose.
- CES 2017: All the announcements that matter
- HTC Vive review: An experience that’s out of this world
Developers are then free to integrated it into their games and experiences, giving more potential for interaction and, in the case of Master of Shapes and its room scale VR demo, to introduce another way for additional players to join in the fun.
Its demo in the HTC Vive rooms at CES featured a proof-of-concept shoot-em-up where the main Vive user can blast enemies using a normal Vive controller, while another player could use a gun accessory with an Android phone playing the same game.
Pocket-lint
In fact, up to four additional players can currently take part, all roaming around in the same physical and virtual areas.
It solves the problem of others sitting around staring blankly at the person playing a VR game. Now they can join in.
It is early days for Master of Shapes and its software, but there is great potential in its ideas.
Another excellent demo we undertook was with TrinityVR and its DiamondFX baseball simulator. The version we played was also early in development, but we got the idea for sure.
It’s a genuine sports simulator and can be quite brutal as you face virtual pitches from some of the world’s best pitchers. And we have to admit that we were pants at it, being both British and not having even played softball for about 30 years, but the feeling of swinging a real bat at practice throws (there’s no way we’d hit a full pitch) showed great potential for both DiamondFX and the HTV Vive Tracker.
Pocket-lint
Having a tangible object in your hand, the shape and weight of the one in the experience is a literal game-changer. It certainly helps with immersion, even though we were also a little concerned we might clock someone with the bat as we could see our real-world surroundings.
Trinity VR also told us that it could adapt the concept to cricket, licences pending, and when we asked about golf, we were told, “Watch this space!”
Also demonstrated in the Vive rooms were other games and experiences with other Tracker uses, such as the aforementioned firehose, a boxing game using actual gloves with Trackers stuck to them and more.
We didn’t get to try those out due to time constraints but we have no doubt that we’ll start to see these third-party accessories appear on the market later this year. We can’t wait.
