


Google adds commenting capabilities to shared albums in Photos
Google is rolling out two new features for its Photos service: the ability to comment on shared images and albums, and a tool that suggests photos to add to specific albums. The commenting ability allows users to leave messages on albums and pictures that have been shared with them — without leaving the app. Google Photos isn’t a social networking service on its own, but the new functionality takes cues from sites like Facebook that allow commenting on images.
The second new service offers “smart suggestions” for shared albums. Google Photos will analyze your uploaded images by time and location, and then determine which ones might belong in an album that’s been shared with you. This should streamline the process for grouping together pictures from multiple people taken during weddings, birthdays, road trips, school projects and other events.
Google Photos doesn’t use facial recognition to make these suggestions, TechCrunch notes. That’s probably a good call, since Facebook is currently in hot water over its own facial recognition systems, particularly those used in Moments.
Source: Google
Original Siri Team Member Leaves Apple for General Electric
Darren Haas, one of the last remaining members of the original team that developed Siri, has left Apple to work at General Electric, reports The Information. Haas worked on Siri before it was purchased by Apple in 2010 and has been at Apple since then working on cloud engineering services.
Haas’s departure follows the departure of Steve D’Aurora and comes amid rumors that Apple’s efforts to move its cloud infrastructure in-house has been slowed by “political infighting” between the iCloud and Siri engineering teams.
Political infighting has engulfed Apple’s engineering ranks after the company decided to extend the software platform built by Siri’s team to Apple’s other Internet services such as iCloud and iTunes. At GE, Messrs. Haas and D’Aurora are working on a similar cloud software platform.
Earlier this week, other members of the original Siri team, including co-founders Dag Kittlaus and Adam Cheyer, debuted Viv, a next-generation AI bot able to carry out complex tasks by mimicking the “spontaneity and knowledge base” of a human assistant.
In a demonstration at TechCrunch Disrupt, Viv was shown to be far more advanced than Siri with improved contextual awareness and an ability to craft in-depth responses to complicated questions on the fly. Viv’s creators plan to build it into a range of products from cars to smart refrigerators.
Tag: Siri
Discuss this article in our forums
Apple Aiming to End iTunes Music Downloads in Two Years
Apple allegedly has an aggressive plan to “terminate” music downloads from iTunes within two years, reports Digital Music News citing sources with “close and active business relationships” with Apple.
Apple is also rumored to be considering a three to four year timeline for the shutdown of iTunes downloads, but overall discussions with Apple executives are said to focus on “not on if, but when” the company should retire music downloads. Termination of music downloads could be staggered by country based on the popularity of streaming content in different regions.
Back to the story, the sources indicated that a range of shutdown timetables are being considered by Apple, though one executive noted that “keeping [iTunes music downloads] running forever isn’t really on the table anymore.” Also under discussion is a plan to “ride the [iTunes music download offering] out for the next 3-4 years, maybe longer,” when paid music downloads are likely to be an afterthought in a streaming-dominated industry. […]
According to one source, an initial shutdown could take place in ‘tier 1’ countries like the United States, UK, and leading countries in Europe and Asia, with ‘tier 2’ and ‘tier 3’ countries experiencing a staggered shutdown in subsequent years.
The timeline is unclear because Apple’s iTunes business continues to bring in hundreds of millions of dollars each year, but it is on the decline due to the rise of streaming music services. According to music industry Mark Mulligan, iTunes music downloads will be worth $600 million in 2019, down from $3.9 billion in 2012. Mulligan believes Apple’s download business could be 10 times smaller than its streaming music business by 2020.
Apple is also said to be considering ending music downloads due to the confusion it causes with Apple Music, mixing downloaded music purchases with Apple Music content.
Late last month, Apple CEO Tim Cook announced that Apple Music now has 13 million paying subscribers, up from 11 million users in February. Apple Music originally launched on June 30, 2015 in more than 100 countries and at its current growth rate, Apple is on track to have 15 million subscribers at its one-year anniversary.
Tags: iTunes, Apple Music
Discuss this article in our forums
MoonWalker: Simple and Fun (Review)

Overview
Help UV fight through 90 fun-filled levels all to find his fellow Moonwalkers. During his journey, he must find the Legendary Shroom of Power to guide him as he takes on Lazy Monsters, M1 M1s, One-Eyed Crab Bros, and more.
Developer: Vibhav Chitale
Cost: Free (ad-supported)
Gameplay
Moonwalker is a game with simple controls. You tilt the phone left and right to go forward or backward, and tap the screen to jump. It’s really that simple. There is the option to use on-screen buttons, but they aren’t efficiently placed. The game’s concept is simple enough: you dodge or kill enemies and collect stars and power-ups to make it to the exit.
 Store Menu
You may need help getting through the levels, so there are four different power-ups you can purchase with stars collected during your journey. You can skip the level, kill all the monsters, stay purple, or remove roots. Don’t spend all you stars, though, as they are also needed to unlock the next level. If you do run out you can always go back to easy levels and gather some.
Review
This is an easy-to-learn/play game and it’s another game I refer to as a “Doctor’s Office Game” that you can pull out anywhere. The only difference is that there’s an ultimate goal. What makes this game enjoyable is the story that goes along with it. The developer didn’t take the game too seriously and it showed.
Now the bitter-sweet deal: ads. At the end of every four levels, you are offered the chance to double the stars you collected in those levels by watching an ad. It’s really not too bad.
Conclusion
This game is one of the most fun games I have played in a while. It’s easy enough to play and win, yet there are some challenging parts that keep you coming back. The developer made good use of the phone’s sensors for controls and the graphics are well done. It reminds me of the joy I had playing Sonic the Hedgehog. I haven’t finished the game, but I do hope they add more levels or make a sequel to the game.
Download and install Moonwalker from the Google Play Store.
1 of 9


Google Translate can now work its magic from any app with just a tap

Google is rolling out a new update for its Translate app for Android. Among other things, it adds a way to translate words from any app with just a tap.
Google says:
First, say hello to Tap to Translate on Android. We know millions of you painstakingly copy-paste text between Google Translate and other apps. Now, you can just copy the text of a chat, comment, song lyric, etc. in whichever app you’re using, and a translation will pop up right there—no need to switch apps.
In addition, the Word Lens feature, which lets users take a picture of printed text and then translates it, now supports Simplified and Traditional Chinese. Finally, the the language packs used for Translate’s Offline Mode have been reduced in size by 90%.
Verizon vs. Sprint: Best family plan
Comparing data, to minutes, to cost, to perks, which carrier is right for your family?
When you’re shopping between Verizon and Sprint, it’s important to know how much data you need, how many devices will be on your account, and how much data you expect to use.
- What sharing plans are available?
- How many devices are allowed on a shared plan?
- How does data work on a shared plan
- How do talk and text work on a shared plan?
- What perks come with share plans?
- Which carrier’s shared plan is right for my family?
What sharing plans are available from Verizon and Sprint?
Sharing plans allow you to purchase one big chunk of data and divvy it up between all the phones and devices on your account.
The Verizon Plan lets you choose between plans sized from S-XXL depending on how much data you need. From there you add the number of devices you want to share the data with.
Sprint used to offer something called the Family Share Pack, but have now eliminated that program in favor of a more simplified plan for individuals and families called the Better Choice plans, which allow you to share data between multiple devices, just like a familiy plan.
How many devices are allowed on a shared plan?
With both Verizon and Sprint you are charged for each device on your plan. Adding smartphones to your plan costs more than adding tablets or wearables, so knowing how many devices you want to share data with will impact your total bill each month.
Verizon cost per device
On Verizon, you pay a flat rate per device, regardless of the size of your plan; however, the rate varies depending on what kind of device you’re using. At least one of the devices on your plan must be a smartphone in order to share data.
- $20/month/smartphone
- $10/tablet/month
- $10/mobile hotspot/month
- $5/device/month
Sprint cost per device
With Sprint, the price per device depends on whether you lease your phone or pay in monthly installments, or if you’re on a two-year service agreement.
- $20/month/smartphone for non-discounted phones
- $40/month/smartphone on a two-year service agreement
- $10/month/tablet (at least one activated phone required)
- $10/month/mobile broadband device (at least one activated phone required)
Remember, if you’re not bringing your own phone, your carrier will also charge you a monthly fee to purchase one of their phones. Costs vary, but if you want the most up-to-date phone, you’ll be looking at about $25-$30 per month until the device is paid off.
How does data work on a shared plan with Verizon and Sprint?
Both Verizon and Sprint give you a pool of data to share with everyone in your family. The size and cost of this data is where the differences come in.
Verizon monthly data rates
Verizon groups their data plans in sizes of Small to XXL.
- 1 GB $30
- 3 GB $45
- 6 GB $60
- 12 GB $80
- 18 GB $100
Overage Charges: If you go over your data limit, Verizon charges $15 per GB (rounded up). This means if you have a 6 GB plan and use 6.1 GB, Verizon rounds up and charges you an additional $15 overage fee that month.
Rollover Data: Verizon does not let you carry unused data into the next month. If you don’t binge through all your data in one billing cycle, it’s gone.
Sprint monthly data rates
- 1 GB $20
- 3 GB $30
- 6 GB $45
- 12 GB $60
- 24 GB $80
- 40 GB $100
Sprint also offers an unlimited plan but the pricing structure is a little different than other plans. You pay $75/month for unlimited data and a decreasing amount for each line you want to add bottoming out after your fifth phone at $30 for each additional line added. Your data speed will be reduced after 23 GB are used in one month.
Overage Charges: All Sprint plans come with unlimited 2G data after you have used up your high speed allotment for the month. This means you will not be charged overage fees, but your data speed will slow way down if you go over your allotment.
Rollover Data: Sprint does not let you rollover your high speed data into the next billing cycle.
How do talk and text work on a shared plan on Verizon and Sprint?
Both Verizon and Sprint include unlimited talk and text with their shared plans.
Verizon doesn’t include talk with countries outside the U.S. but it can be added to your plan. However, you will be able to send an unlimited number of text and multimedia messages internationally from any device on the shared plan as long as you’re in the US when you send them.
Sprint offers free calling to Mexico and Canada when you’re in the U.S. Additionally, you can add the Open World plan to your account for free. This gives you unlimited calling and text while travelling in Mexico and Canada (as well as a few other countries) plus you get 1 GB of high-speed data while roaming.
What perks come with share plans from Verizon and Sprint?
Sometimes it’s tough to decide between one carrier or another, so each provider will offer something to sweeten the pot and hopefully make you choose them over someone else.
Verizon will let you bundle services together which could be helpful if you’re also interested in having a home phone, and/or TV hookup. They also offer a loyalty program called Verizon My Rewards + which allows you to earn points when you pay your cell bill or order products from their shop or third-party services. You can use these points to put toward gift cards at restaurants, receive discounts on products, or use them for travel rewards program.
Sprint doesn’t have any perks comparable to Verizon, but if you have family living outside of the U.S. their above-mentioned Open World plan has some advantages.
Which carrier’s shared plan is right for my family?
Both Verizon and Sprint have a lot of room to customize their services based on the needs and budget of your household. For comparison purposes, we will look at share plans that have two phones and two tablets on them.
If you want the absolute cheapest plan, that can be built with Sprint, but you would have a very small amount of data (1GB) to share between devices.
If you want the most high speed data you can get that with Sprint, gives you way more high speed data at a better price.
If you want the best value for your data Sprint data rates are a better value and won’t charge you overage fees if you exceed your monthly allotment.
If you have many devices Verizon and Sprint have the same monthly device fees; however, if your’e on a two-year agreement with Sprint, their access fee is double Verizon’s, so in this case Verizon is a better deal.
If you want to avoid overage fees then Sprint is a clear winner since they only slow down your data if you go over your limit instead of charging you per GB of data.
If you’re primarily concerned with talk and text from your provider, Verizon and Sprint are equal. The only difference is if you frequently talk or text with people in Mexico or Canada, Sprint will let you add their free Open World](https://www.sprint.com/landings/openworld/index.html) plan which allows you to talk or roam in these countries for free, including 1 GB of roaming data.
If you already pay for TV service in your home you might find more value with Verizon if you choose to use their Fios TV service.
Keep calm and carrier on!
Ultimately choosing a shared plan for your family comes down to how many people are in your home, what devices they use, and what they use them for. Verizon and Sprint have slight advantages between each other depending on which category you look at.
Overall Sprint’s plans offer a lot of value for the price of their data and their lack of overage fees make their shared plans a really appealing option for data-hungry households.
You can give an audiobook to a friend for free with Audible’s new recommendation feature

Amazon-based Audible has added a new feature that allows users of the audiobook store and service to send titles from their personal library to friends and family via their Android, iOS or Windows 10 app. Each person can receive their first audiobook for free.

Audible stated:
Whether an Audible title owner is a book club member who wants to share an audiobook with an entire group, a teacher recommending a title to a class, or an enthusiastic listener giving to a friend, this new feature is designed to be easy to use. Simply tap on the ‘Send this Book’ icon in your My Library, and the audiobook you give will be sent free to as many people as a customer wants to include (and it remains in your library). If it is a recipient’s first time accepting an audiobook via this feature the recipient does not need to sign up for a free trial or use a credit card to redeem the title.
Logitech ZeroTouch review: A pretty good way to go hands-free in your car

If you just want to safely do the basics in your car, hands-free, ZeroTouch is mostly aces.
One of the most important things you can do with your smartphone is to not use it in your car while you’re driving. You’re going to ignore that advice, of course. We all have. So the trick is to use your phone as safely as possible. And that means keeping it out of your hands.
There are myriad ways to do this. Android Auto is a good one. (And I’ve been using it for more than a year.) Various car docks are available, too, so you only have to touch the phone when you need it to do something — or let you use your phone’s built-in hands-free options.
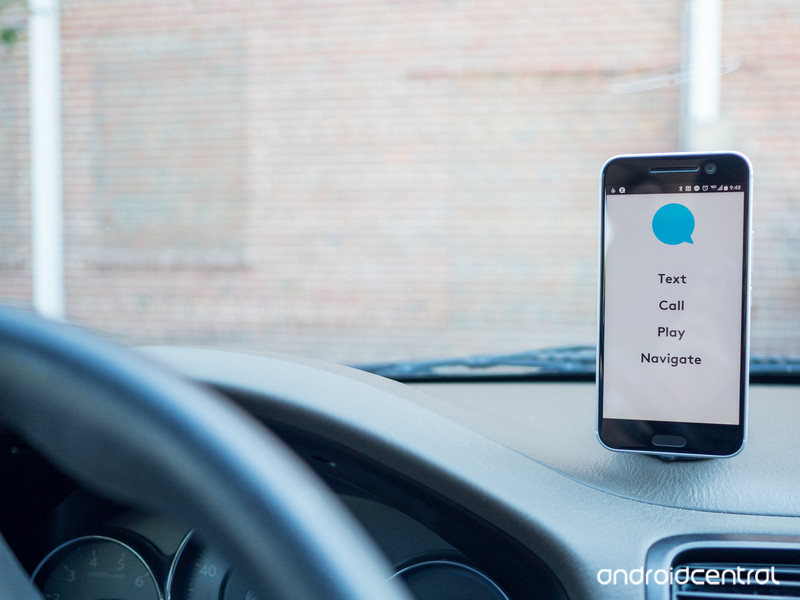
Logi (née Logitech) has just unveiled its own option. Dubbed ZeroTouch, it’s an excellent system for safely doing four basic things while driving. Let’s take a look.

Eyes on the road
What is Logi ZeroTouch?
There are two parts to ZeroTouch. There’s the app on the phone that does things — you can find it in Google Play here — and there are a couple of ways to mount your phone in your car. The mount triggers the app thanks to a metal tab that you affix to the back of your phone, and you’re off and running.
Answer: A mount and an app for more safely using your phone in the car.
The ZeroTouch air vent mount that (wait for it) mounts your phone to your car’s air vent. That’s not a particularly new phenomenon (Logitech has had that sort of accessory before). But now it works in conjunction with the app. It runs $59.99.
There’s also a dash mount that’s a bit more beefy but works very well, with a sticky suction cup on the bottom and an articulating head that lets you adjust the angle of your phone between 0 and 90 degrees. The dash mount is $79.99.
Neither of those prices is what we’d call inexpensive. But considering that you’re getting the app and the service along with it — and, ya know, a better chance at not killing yourself or someone else because you were previously being really dumb and holding your phone while driving — the price makes a little more sense.
And then there’s the metal tab that you stick to your phone. I’m never crazy about this sort of setup. It’s ugly. Really ugly. It makes the phone feel funny. It makes me resent whatever reason I had to put it on in the first place. (There’s a disc that you can slip inside a case, too, if that works better.) But it is necessary, using low-power Bluetooth to tell your phone it’s time to use ZeroTouch — otherwise the hands-free service would be running all the time.
The metal tab scares me, frankly — especially when it comes time to take it off. But I was able to remove the tab from the HTC 10 without too much trouble after slipping a razor blade under it. And I wouldn’t use anything else to do that job — unless you want to scratch your phone.
One of the best we’ve seen
Logi ZeroTouch setup process
The setup process is probably the most important part of mobile accessories. They can get complicated, and they can kill an experience before it ever gets started.
ZeroTouch had one of the best setup processes we’ve seen.
Logi nailed it on the ZeroTouch. A woman’s voice walks you through waking the phone with a “high five” in front of the earpiece, triggering the phone’s proximity sensor. She then walks you through the voice commands.
And my favorite part? Setting expectations. “I’m not perfect, and won’t always get everything right,” ZeroTouch says during the setup process. “But it’s easy to change or cancel.” Nearly every voice-activated device I’ve ever used in the car had to have something repeated to it at one time or another. Logi addresses this up front, and in a friendly, human way. That’s smart.
After that you’ll get to see a whole bunch of warnings about how doing any of this is inherently distracting and dangerous and might actually be illegal where you are so it’s up to you to not kill someone in the process of doing all this even though it is really good.
Some things never change, right?


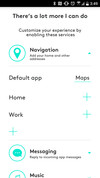


Setup continues with you choosing default apps for three of the four things ZeroTouch tackles — navigation, messaging and music. (Making calls is handled by your phone app, of course.) You can set home and work locations (so you can tell it to navigate to “home” or “work”) more easily, though it’ll do some basic search as well.
And that’s it. After that you’re good to go.
So how’s it work?
Using Logi ZeroTouch
So what’s all this like to use? It very much depends on where you’ve mounted your phone. I’m usually against using vent mounts — because I live in Florida and don’t want anything to come between me and my air conditioning. But my dashboard is too rounded to mount the phone in a place that’s comfortable to reach to do the “high-five” wake gesture.
The vent mount, though, was just about perfect.
Wave, speak, confirm. That’s it. And it couldn’t be much simpler.
One other alternative for me was on my center console, just in front of the gear shift. (Yes, I’m that old. I still drive stick.) It’s not as easy to glance at, but it was easy to gesture at.
From there, Logi’s hands-free UI was excellent. It did a great job of hearing and understanding my commands. Occasionally I did have to repeat myself. But, again, because I was warned about that during the setup process, it wasn’t that big a shock.
One other thing that will control your experience a good deal is the apps you generally use. ZeroTouch is great with Google Maps, which is what I use, so no real problems there.
Text messages worked pretty well, too. I’m a bad use case for that sort of thing, being a card-carrying member of Project Fi and a Hangouts user. ZeroTouch has options to reply via WhatsApp, Facebook Manager and Hangouts. But I also ended up with messages being routed through the Messages app. Again, not surprising given my setup. (If you’re like most folks and just use one phone and one SIM and one phone number, you should be just fine.)
The music options in settings only show me Spotify and Deezer — with big install buttons for both. I don’t use either of those, but ZeroTouch was able to control Google Play Music just fine.
And, finally, you can tell ZeroTouch to “Share my location with [insert your favorite person here] …” ZeroTouch will fire off a temporary Glympse link via SMS. And it’s pretty brilliant, showing the recipient where you are, when you were are, and how fast you’re moving.
And while that’s the gist of it, it’s also just the tip of the iceberg. There are a bunch of options for ZeroTouch, including the ability to use your Bluetooth to output audio, use a wave instead of a high-five gesture, and you can set up automatic replies, if you wish.

The bottom line
Should you buy it? Sure
The big question: Is this the best way to safely use your phone in your car? If you don’t have something like Android Auto — or a really good Bluetooth-enabled system (and let’s face it, so many of those suck) — then Logi’s ZeroTouch is a pretty good option.
Again, $60 or $80 seems like a lot of money to throw at a way to stick your phone to your air vent or dash. And it is. But you get a really good hands-free system along with it. Then again you’ve also got to put a pretty ugly metal tab on the back of your phone.
Or do you? If I were a smart man I’d get myself a simple TPU case for a couple bucks — the kind that you can easily take on and off — and then put the metal tap on that, and not on my phone. The Bluetooth setup means that direct contact between the tab and your phone doesn’t matter — it just has to touch the base holder. And the magnetic bond between the tab and the holder is easily strong enough to hold all that together.
All in all, this is a really good product from Logi — and one that’s going to make your ride a little easier, and a lot safer.
Nest releases OpenThread, an open source version of its networking protocol
In a bid to give the connected home space a boost, Google-owned Nest has now released an open source version of its Thread networking protocol. Called OpenThread, the protocol can be implemented by anyone, allowing smart home products like lights and smoke detectors easily communicate with one another.

From OpenThread on GitHub:
OpenThread is an open-source implementation of the Thread networking protocol. With OpenThread, Nest is making the technology used in Nest products more broadly available to accelerate the development of products for the connected home.
The Thread specification defines an IPv6-based reliable, secure and low-power wireless device-to-device communication protocol for home applications. More information about Thread can be found on threadgroup.org.
Not only will device manufacturers be able to implement this code in their smart home products, but they’ll also be able to contribute to the codebase as it evolves and gets better over time. Of course, if OpenThread sees widespread adoption, Nest will benefit as well by having its tech behind a growing network of smart home devices that can easily talk to one another.
How to manually update your Nexus

Get the latest version of Android on your Nexus on your own terms
Nexus, the line of Android devices developed in partnership between Google and various hardware manufacturers (to date, HTC, LG, Samsung and Huawei), is a program that allows developers to get their hands on a 100 percent stock Android experience, as Google intends. It can help to develop applications for the platform quicker and easier than if using a device with a manufacturer skin onboard, and that’s a good thing.
But if there’s a single reason to buy a Nexus device, it’s this — the newest software first. Period.
When Google works on major updates to Android, it’s also building them to work specifically on Nexus devices. This means when Google releases an update to the Android code itself, it will come quickly to the supported Nexus devices first, if not immediately.
And Nexus devices actually are among the few that have several ways of receiving updates. Some are easier, some are faster, but all are available to you. Here’s how to manually update your Nexus.
But first, know this …
Before we go into the steps of sideloading Android updates to Nexus devices, it is strongly recommended that you have previous knowledge of working with the Android SDK (software development kit) and Terminal (OS X or Linux) or Command Prompt (Windows), as it is possible to harm your device if something were to go wrong in the following process.
If you need to download the Android SDK you can grab it from the Android Development website and follow their instructions on how to install it correctly. For the following process all you will need is the adb and fastboot files which are located in the Platform Tools folder.
Additionally, all the following commands are written as they would be in Terminal on a Linux or OS X platform. If you are following this guide and using a Windows machine, you will not need to use the “./” seen in the guide.
Enable developer settings and USB debugging
Go to your Nexus’ Settings and scroll down to About Phone/Tablet
Tap on the Build number seven times until the dialog box says you are now a developer
Go back to the Settings menu and you should find a new option called Developer options. Click into the Developer options
Make sure that the developer options are turned on and that USB debugging is checked on
If you’re upgrading a device running Lollipop or higher, make sure Enable OEM unlock is checked
Plug your Nexus device into your computer and click “ok” on the dialog box asking you to Allow USB debugging while connected to the computer. You can also select to always allow access on that computer
If done correctly, this will be everything you will need to do on your phone or tablet for the moment.
Unlocking your bootloader

Now that you can connect to your Nexus device from your computer it’s time to unlock your bootloader. To do this you must first boot into your bootloader. You can either manually turn off your phone or tablet and hold down the power button and the volume down button to enter your device’s Bootloader Menu or you can enter the following commands into your terminal or command prompt.
Run the following command to make sure your device is properly connected to your computer. If it returns a string of characters it means that you are all set to start updating your device.
./adb devices
Now to enter into the Bootloader menu just run the following command.
./adb reboot bootloader
At the bottom of the screen there will be several things listed including the lock state of the device. This should say locked unless you have unlocked your bootloader in the past and never went back and locked it again.
To unlock your bootloader, which is required only when flashing a stock firmware image (not sideloading and update, which we’ll get to soon), you must enter the following commands. Remember that when unlocking your Nexus’ bootloader it will factory reset your device, so you will lose everything stored on it. If you have not yet backed up anything important on your device you can hit the power button while Start is highlighted in the Bootloader menu and this will boot you back into your device like normal. Now back to unlocking your bootloader.
On older devices (pre-Marshmallow), you used:
./fastboot oem unlock
On newer Nexus devices you’ll use:
./fastboot flashing unlock

A dialog will appear on the device asking if you are sure about unlocking. Again this will factory reset your device, so if you want to back out of the process you just need to select no with the power button. If you are ready to unlock your bootloader you press the volume up button and then the power button to confirm that you wish to unlock your bootloader.
./fastboot reboot-bootloader
It is recommended to reboot the bootloader just to give itself a check to make sure everything is working correctly before moving onto the next step.
Flashing the Stock Nexus firmware image

Now that your bootloader is unlocked, it’s time to flash the new firmware onto your Nexus device. To find the Nexus system images, head on over to the Nexus Factory Images page, find your Nexus device, and download the latest factory image available. It is easiest to then uncompress the file in the Platform Tools folder where the adb and fastboot files are so that you do have to type the path to the different files when flashing the firmware. (Or if you know that you can drag a file into a terminal window to copy the path, just do that.)
To begin, make sure you are still in the bootloader menu on your device and double check that your bootloader is in fact unlocked. If it is not unlocked the following commands will not do anything to your device.
Now it is time to flash the updated bootloader with the following command.
./fastboot flash bootloader [bootloader file].img
You will not see anything on the screen of your device but there should be a dialog in your terminal or command prompt. When it is done flashing the bootloader you should reboot back into the bootloader as to make sure everything is still working correctly.
./fastboot reboot-bootloader
Next you flash the updated radios. This step is only necessary if you are updating the firmware of your Nexus phone or tablet that has cellular radios built into it.
./fastboot flash radio [radio file].img
./fastboot reboot-bootloader
Finally, it’s time to flash the actual system image to your phone or tablet.
Warning: The following line of code will wipe your device. If you do **not* want your device to be wiped, remove the “-w” from the command. The update should still take just fine, and it will not wipe your user data.
./fastboot -w update [image file].zip
When this is done, your Nexus will restart itself and boot up normally. As this process clears all data from your device, it will take slightly longer for your device to boot up for the first time. Once you have been greeted with the device setup walkthrough process, you know you have successfully flashed a new version of the firmware onto your Nexus.
If you do not want to enter the commands manually there are scripts included inside the compressed folder containing the system image that will do most but not all of the heavy lifting for you. The flash-all script files will automate the flashing of the bootloader, radios (if needed), and the system image. The problem with this process is that you must first make sure that your Nexus is in the bootloader menu and its bootloader must be unlocked before starting the script. Of course if these are not already done the script will fail to run and nothing will happen.
Flashing an OTA update image

If you don’t want to unlock your bootloader, you can sideload an OTA update. That is, you’re going to download to a computer the update file your phone normally would grab itself over the air (thus OTA), and then push it over via the command line.
It used to be that we’d have to hunt for the OTA file location when a phone would download it, and use that to pull the file from Google’s servers. And we can still do that if we want. (Though it’s not quite as easy as it used to be.) But Google now provides OTA images for download. (You can find them here.) The only real difference is that these aren’t “delta” updates, containing just the changes from the previous update. So the files are a good bit larger.
Just as is the case with the factory image update, put the OTA file in the Platform Tools directory to simplify the process of sending the file to your phone.
First, make sure that your computer is communicating correctly with your Nexus phone or tablet. As long as your device’s serial number comes back as a connected device you are ready to begin updating your device.
./adb devices
Next, put your device into the bootloader menu by either the following command or by holding down the power button and the volume down button while your Nexus is turned off.
./adb reboot bootloader
Now use the volume down button twice until you have scrolled to Recovery mode, and press the power button to select it. It will look like your Nexus is restarting itself but an image of an Android with a red exclamation mark over it will appear. Next hold down the power button and press the volume up button, and you will be in recovery mode.
Now that you are in the Android system recovery, use the volume down button to highlight apply update from ADB and press the power button to select it. The text on your Nexus’ screen will now say that you can send the OTA to the device using adb.
./adb sideload [OTA file].zip

In your terminal or command prompt you will see dialog that shows you the progress of transferring the update to your phone or tablet and once it has been completely transferred you can read what is happening with the update live on screen. Again, once the process is done your Nexus device will restart itself and attempt to boot normally. You have successfully updated your Nexus!
Getting the newest software updates on your Nexus device is easy to do but understandably difficult the first time. Once you’ve gone through this process multiple times it will become second nature to you, so don’t be discouraged. Luckily Nexus devices are extremely easy to get back into working order if something gets installed wrong or flashed incorrectly — so don’t be alarmed if you’ve pressed the wrong button.
If you have any trouble along the way, be sure to hop into the forums and ask for help!
